

Wi-Fi Module and Bluetooth BP Series Module Programming Tutorial
Last Updated on:2024-11-13 10:27:15
1. Preparations
1. Register for the "Tuya Smart Production Management System", link:https://pms.tuya.com/login
Note: This is not the same account as the Tuya Developer Platform, you need to register and use it separately
2. Purchase the burning fixture, link:Tuya Smart Developer Center
Note: Purchase the burning fixture corresponding to the module. The purchase link provides information on the module models that the fixture is compatible with. See the link for details.
Note: Either the 2M high-speed serial port board or the 3M high-speed serial port board will work
4. Purchase "DuPont wires", which need to be purchased on e-commerce platforms

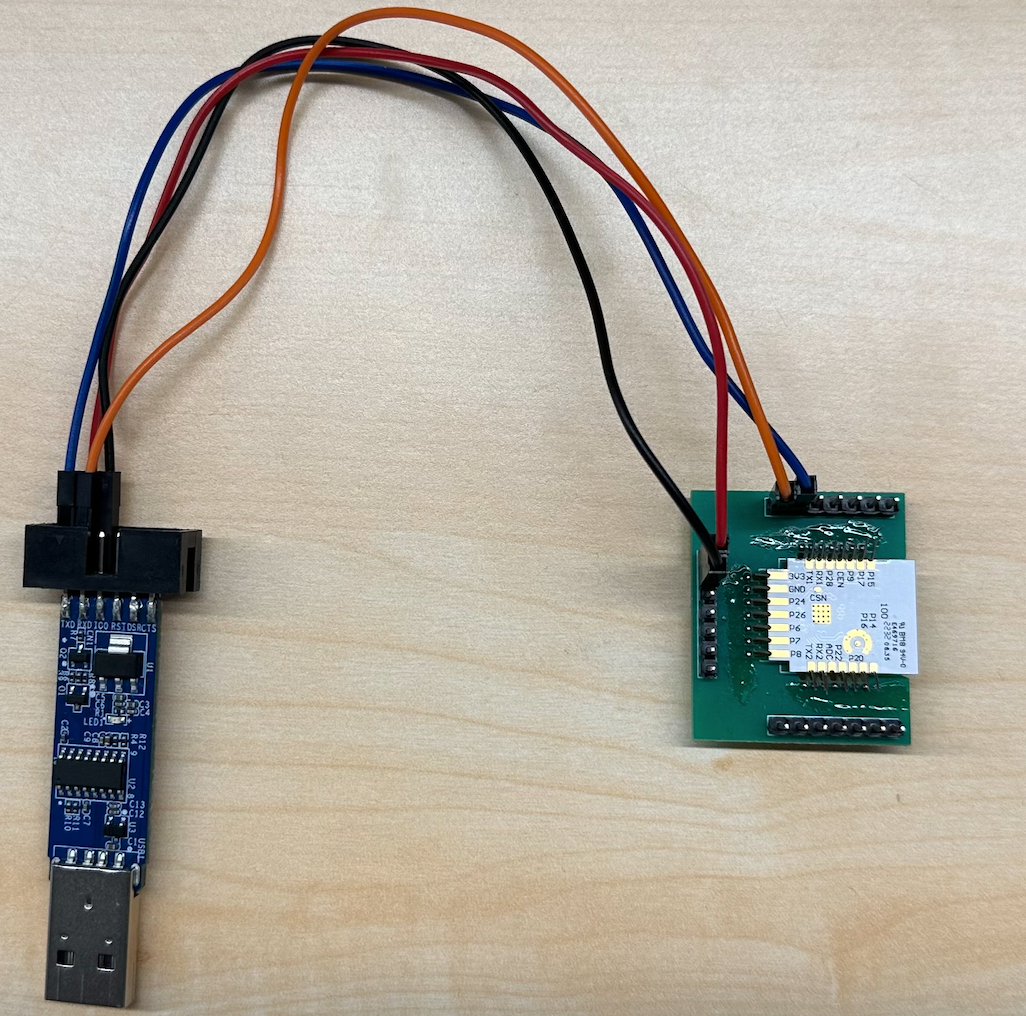
5. Connect the burning wires, connect the module to the serial port tool, and connect the serial port tool to the USB port of the computer
Module Pin | Serial Port Tool |
|---|---|
VCC | VCC |
GND | GND |
TX | RX |
RX | TX |
RST | RST |
WX Series Module Wiring
Module Pin | Serial Port Tool |
|---|---|
VBAT | VCC |
GND | GND |
TX0 | RX |
RX0 | TX |
PB02 | RST |
Note: If the module has no RST pin, only connect VCC, GND, TX, RX
2. Install Software
1. Log in to the "Tuya Smart Production Management System", link:https://pms.tuya.com/login
2. Turn off the "antivirus software" and "computer manager" on your computer
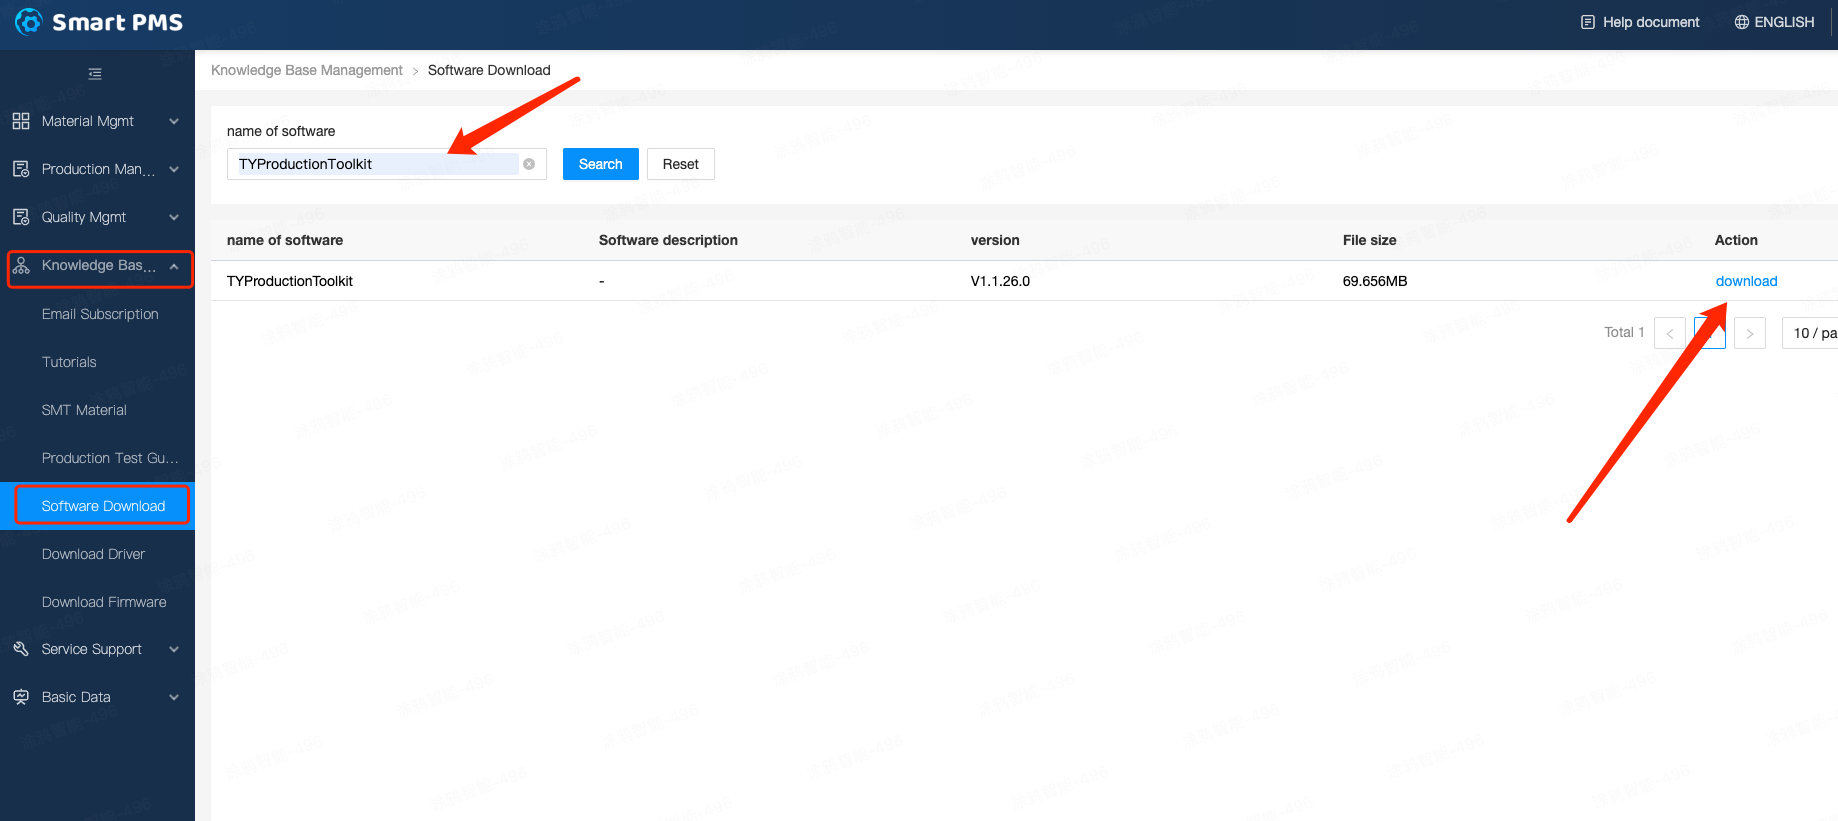
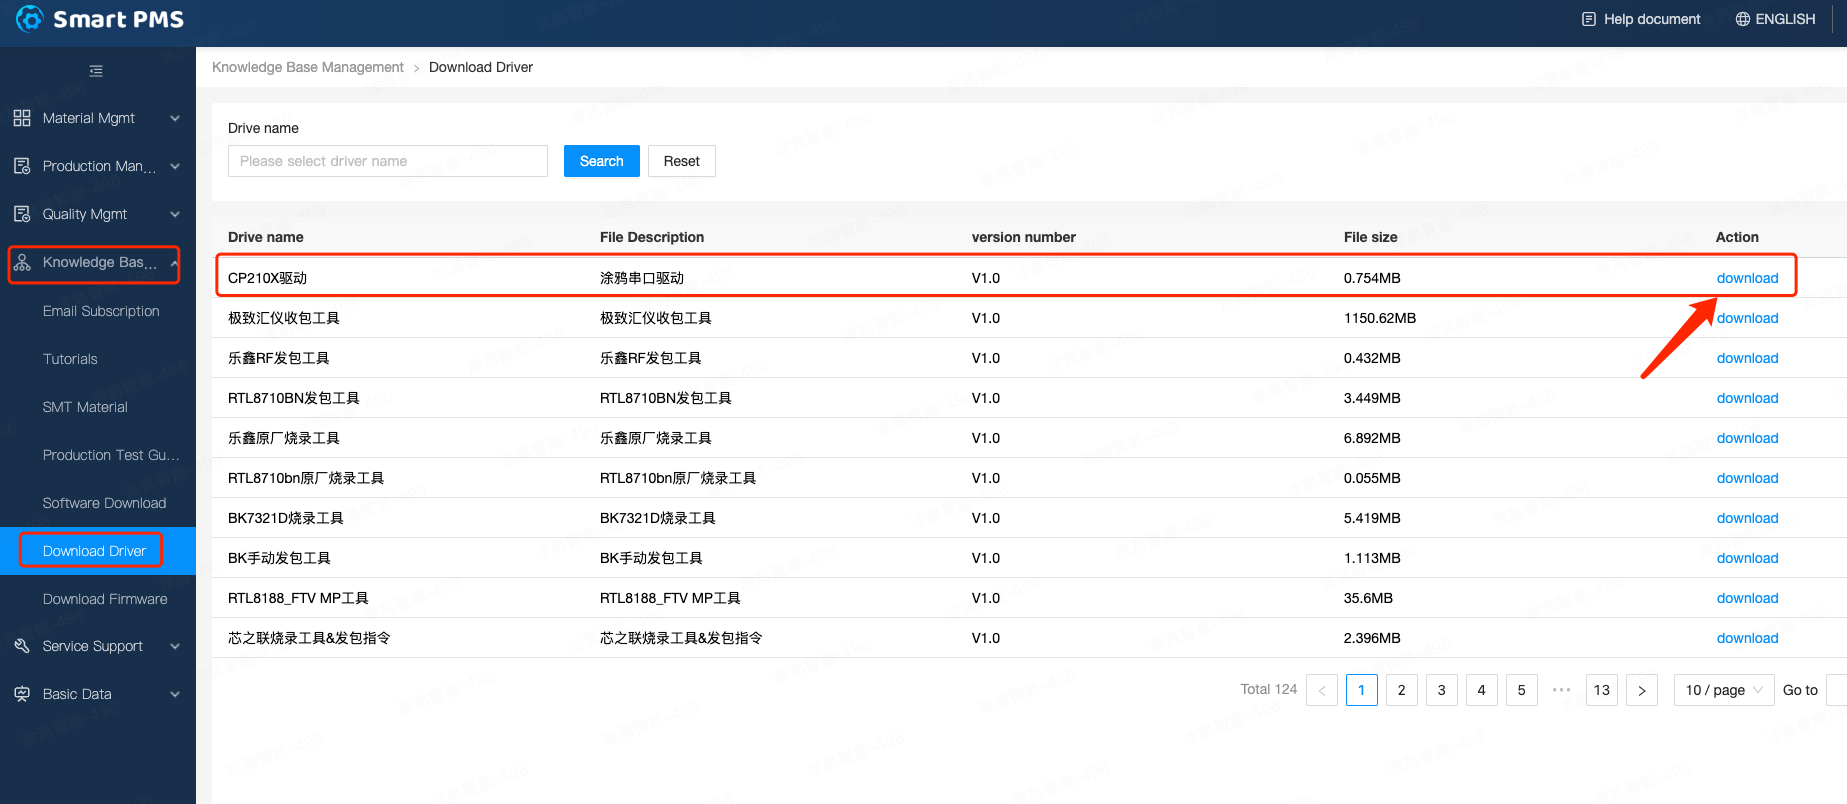
3. Download and install the "Production Solution" software
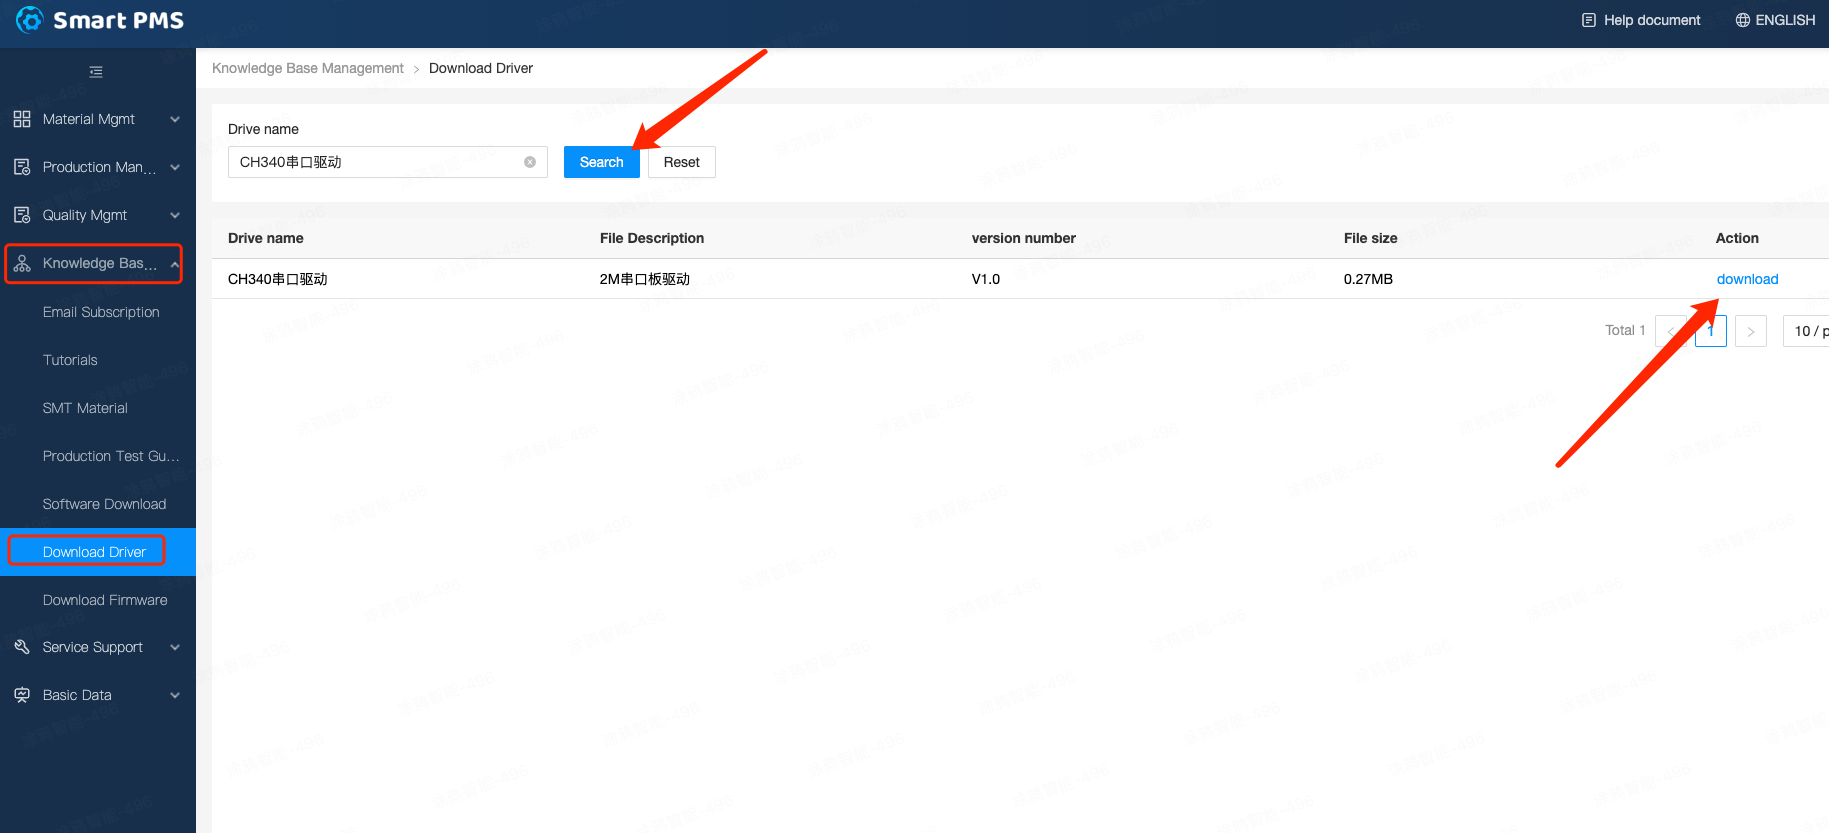
4. Download and install the driver. Download the "CH340 serial port driver" for the 2M serial port board; download the "CP210X driver" for the 3M serial port board
3. Start Burning
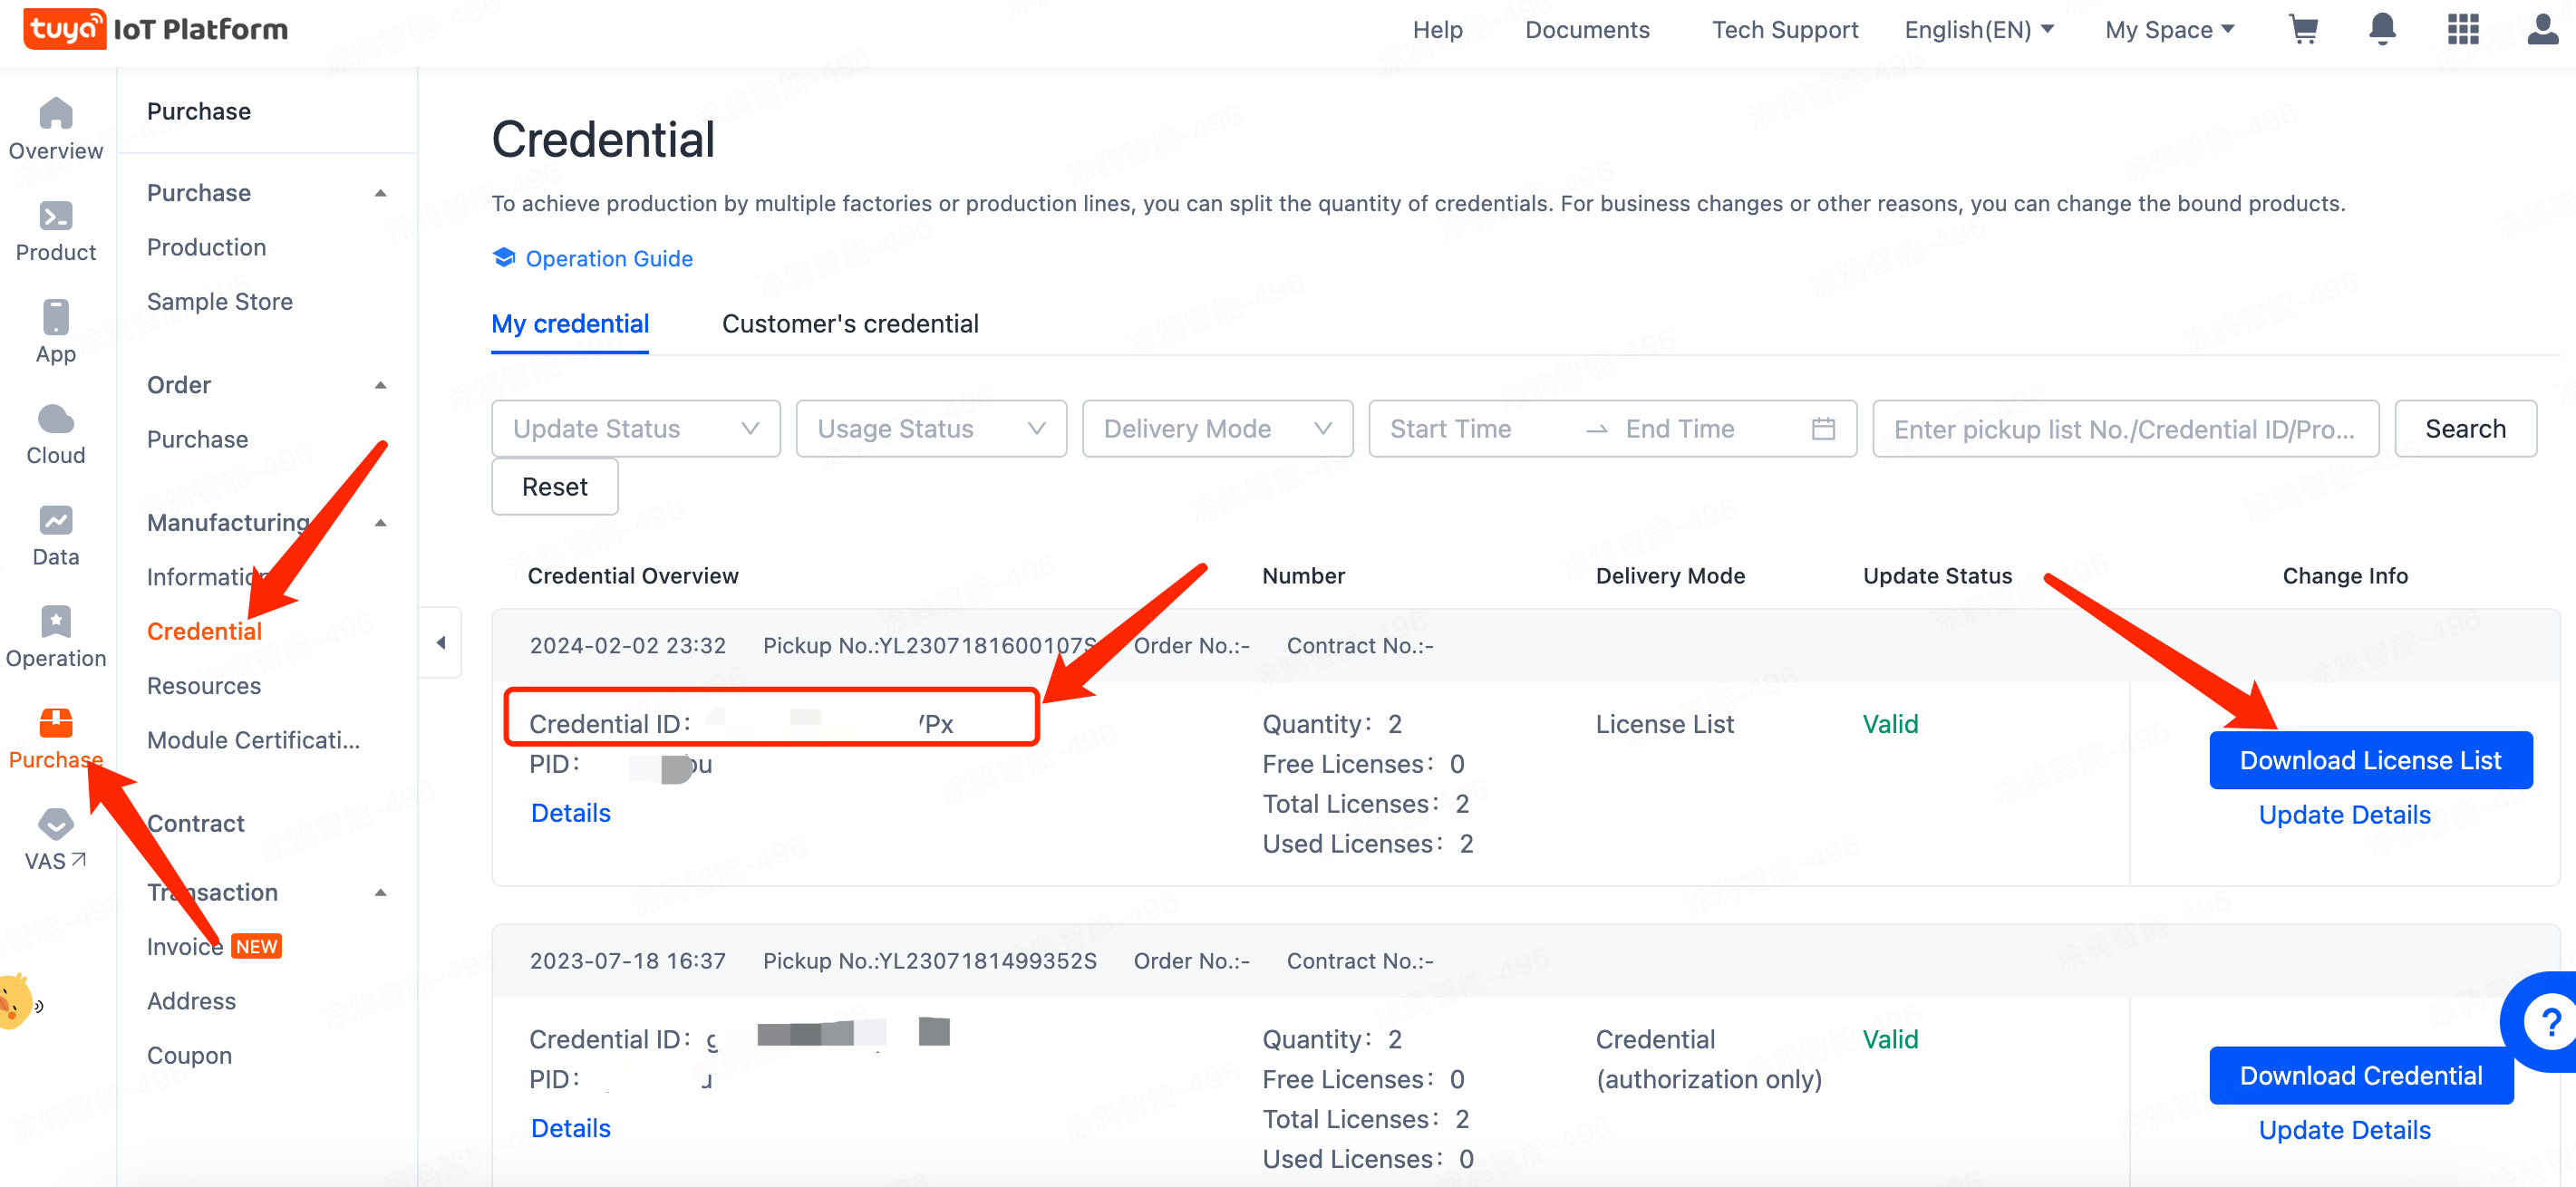
1. Go to the Tuya Developer Platform, find the "production certificate" corresponding to the purchased module, copy the "production certificate" and paste it into the "Tuya Smart Production Management System" to confirm
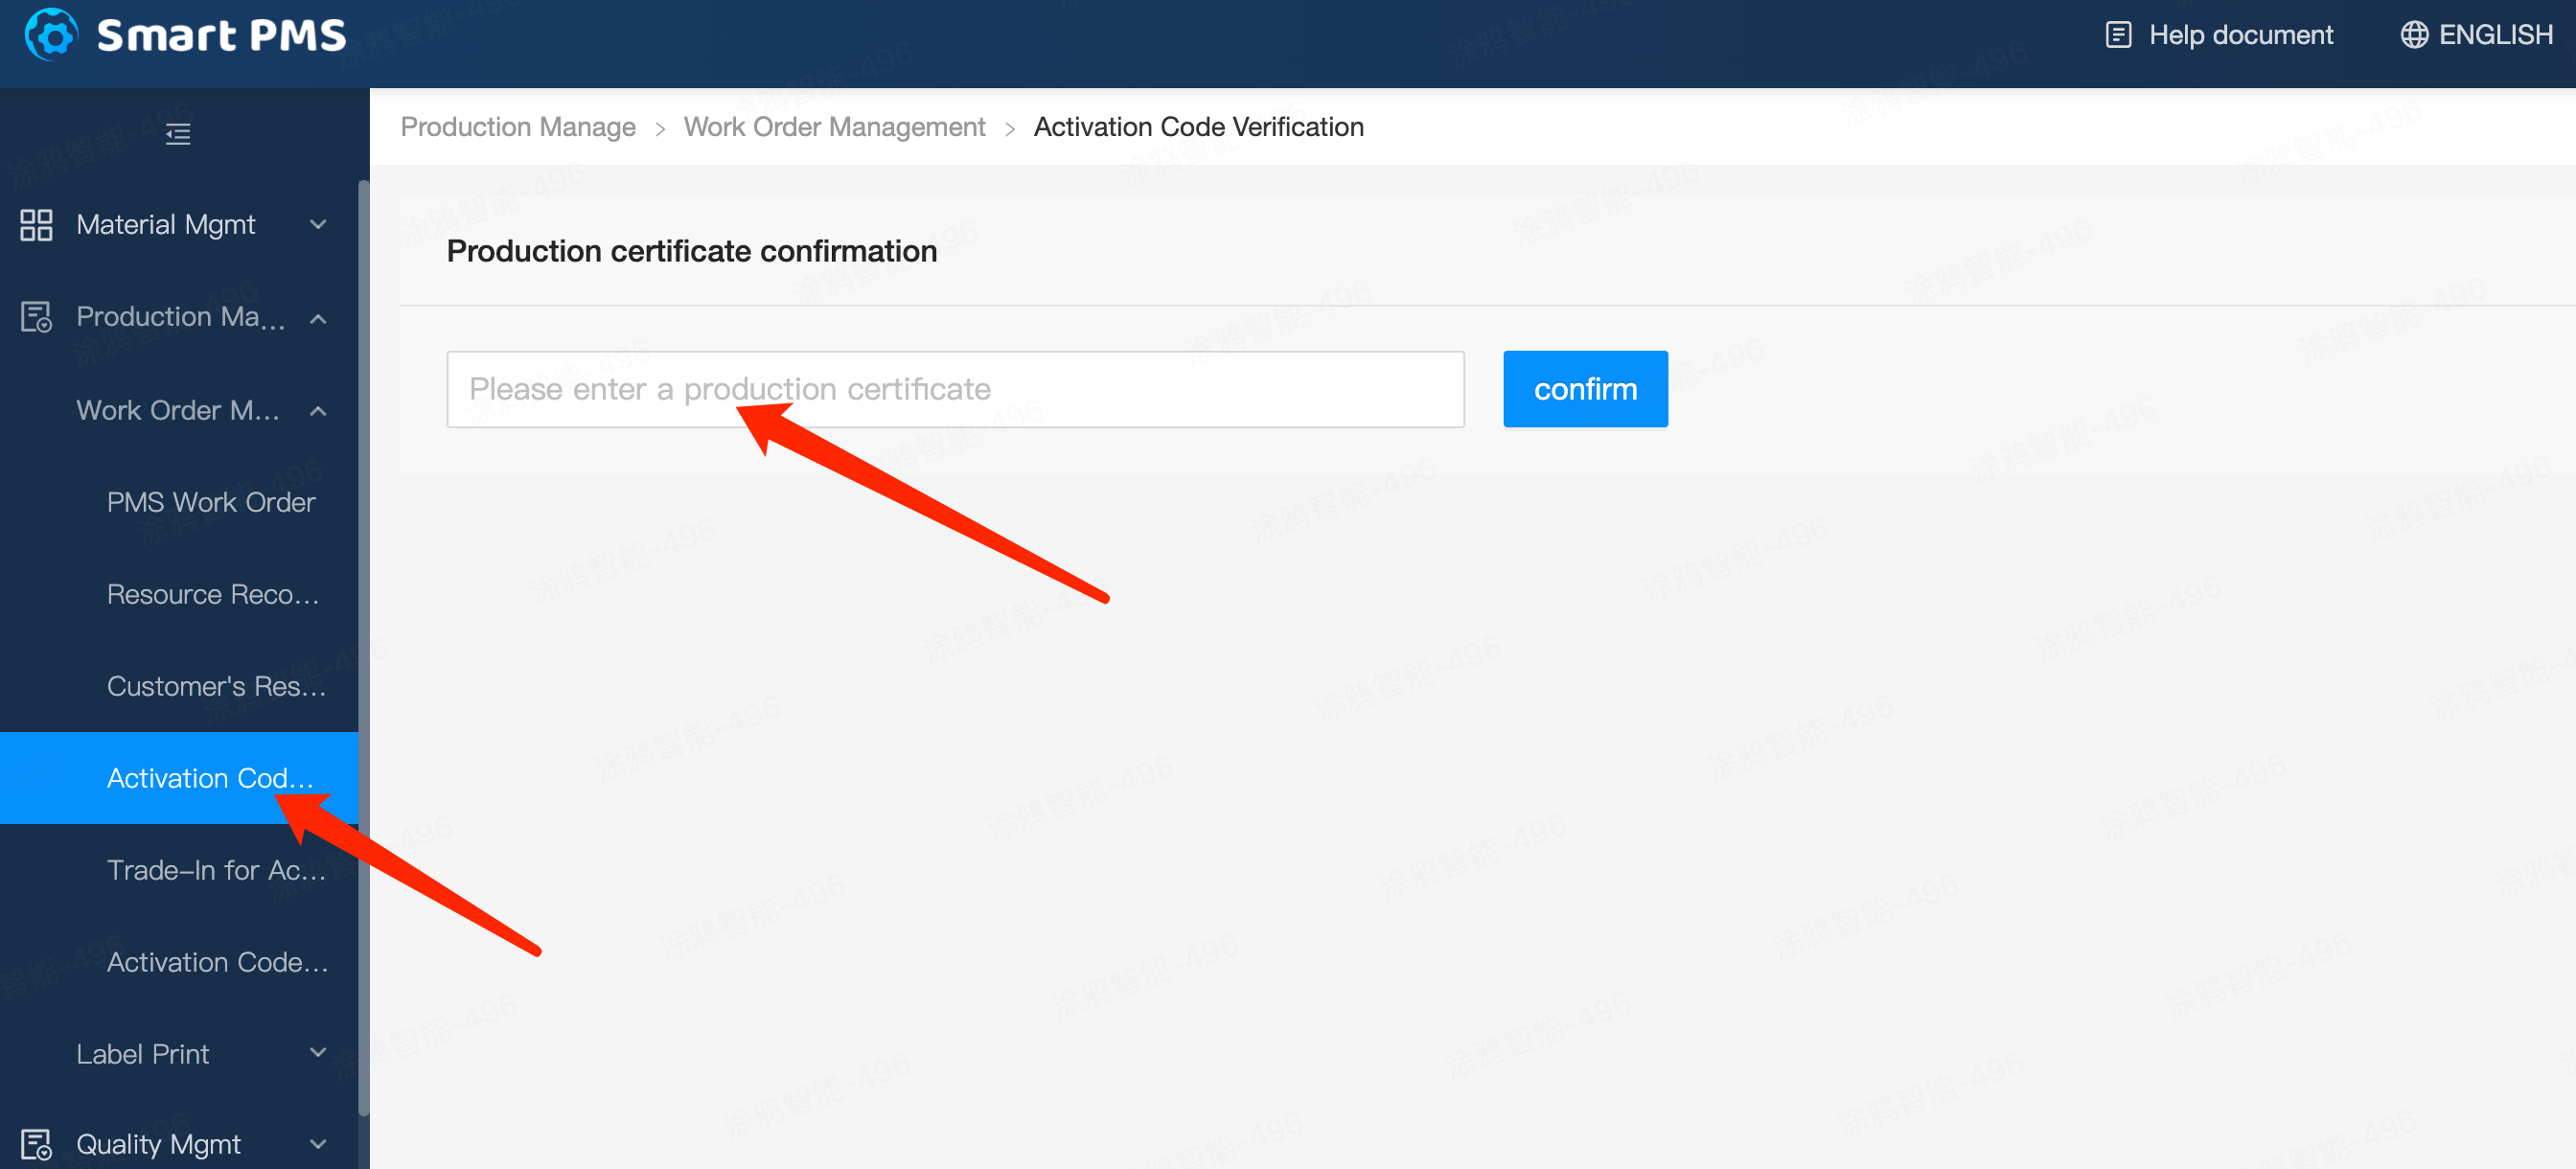
2. Enter the "Tuya Smart Production Management System" to confirm the "production certificate", copy the "production certificate" into the input box, and then click "Confirm"
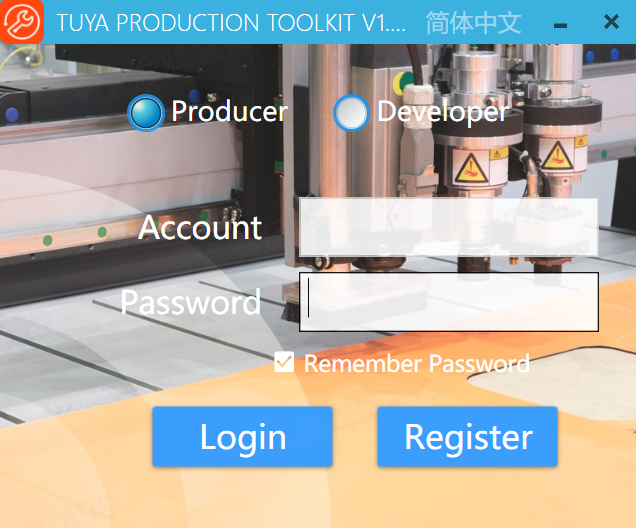
3. Open the "Production Solution" software, and log in to the "Production Solution" software using the "Tuya Smart Production Management System" account
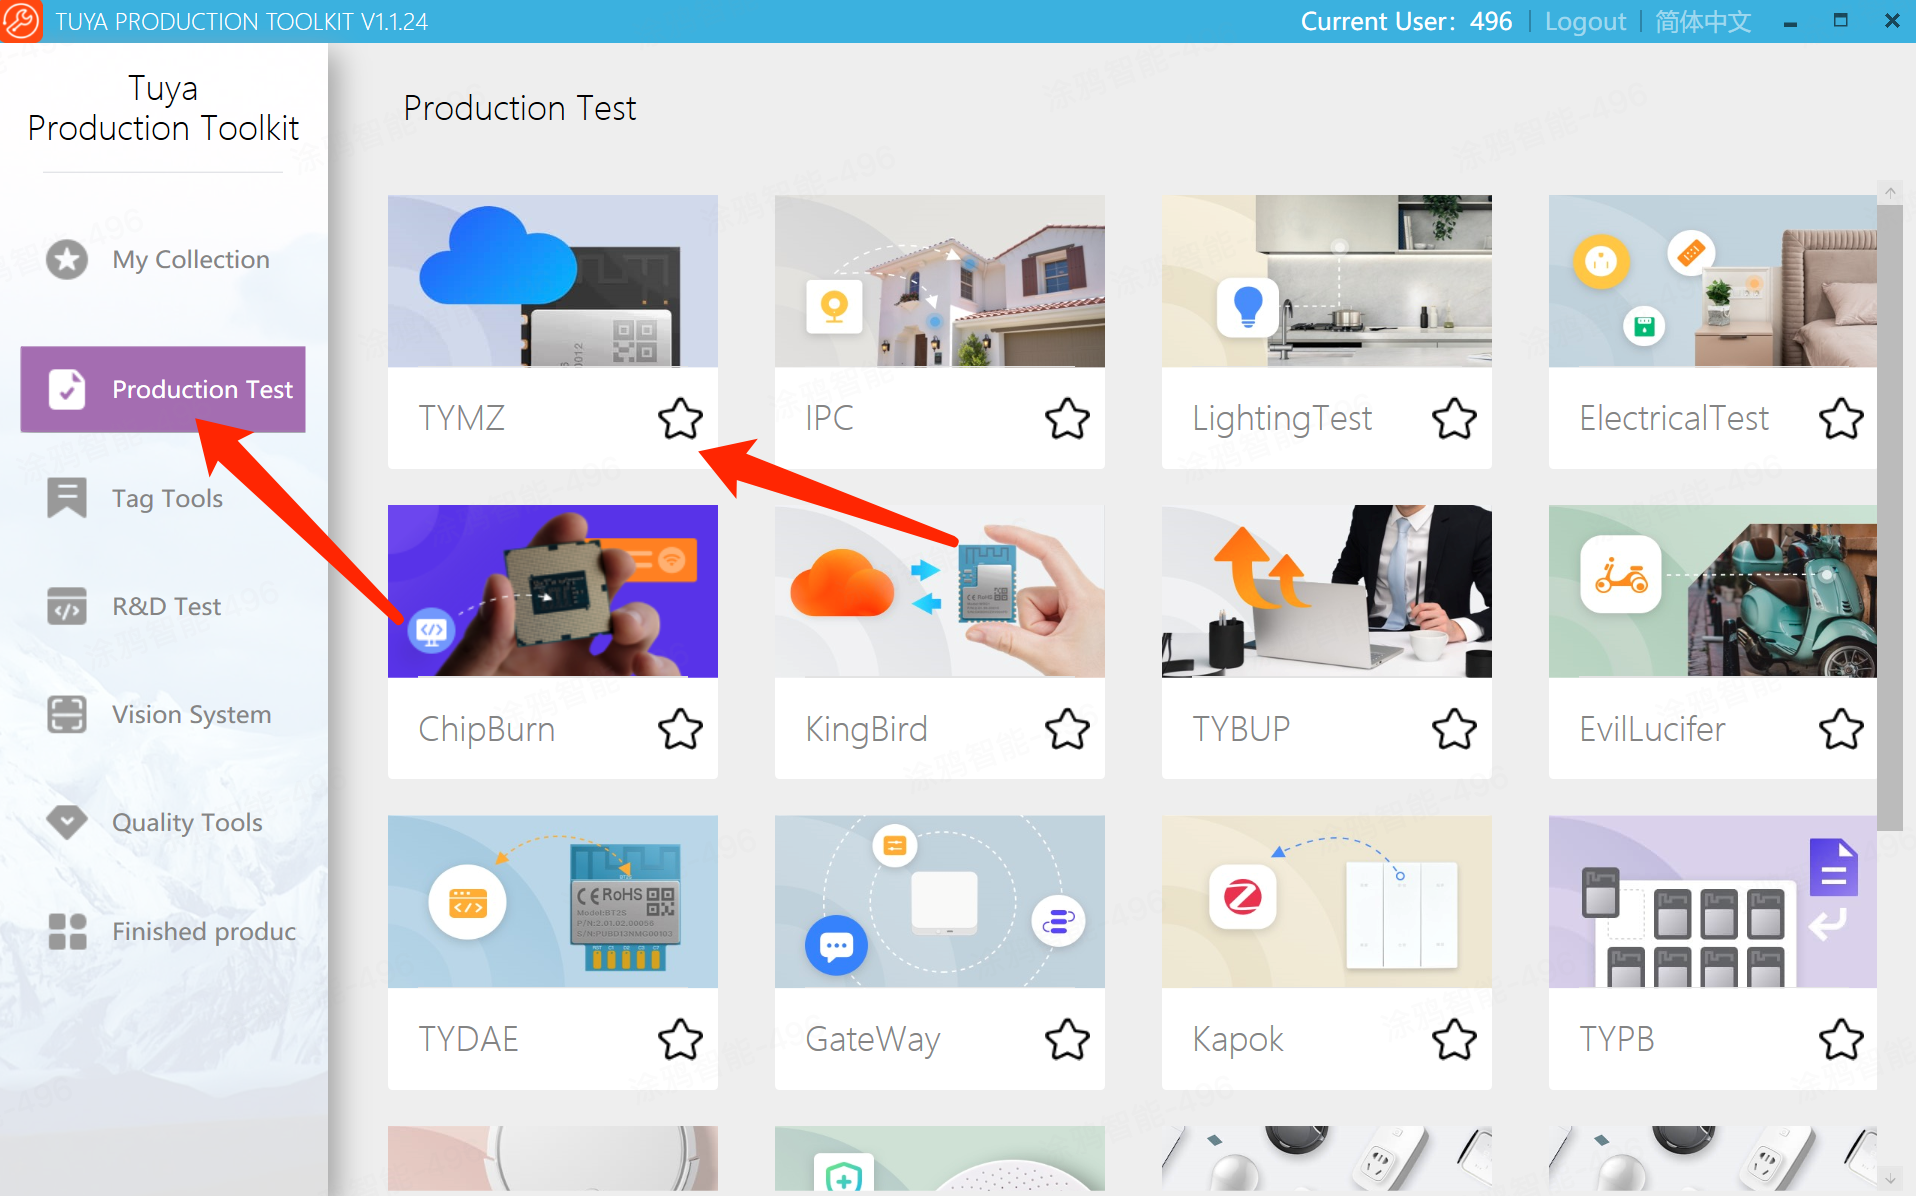
Note: Turn off the "computer manager" before using the "Production Solution" software to burn. 4. After opening the "Production Solution" software, click to enter the "Cloud Module" entry
4. After opening the "Production Solution" software, click to enter the "Cloud Module" entry
5. Enter the "production certificate" and press the "Enter" key on the computer
Note: The "production certificate" is the "authorization code"

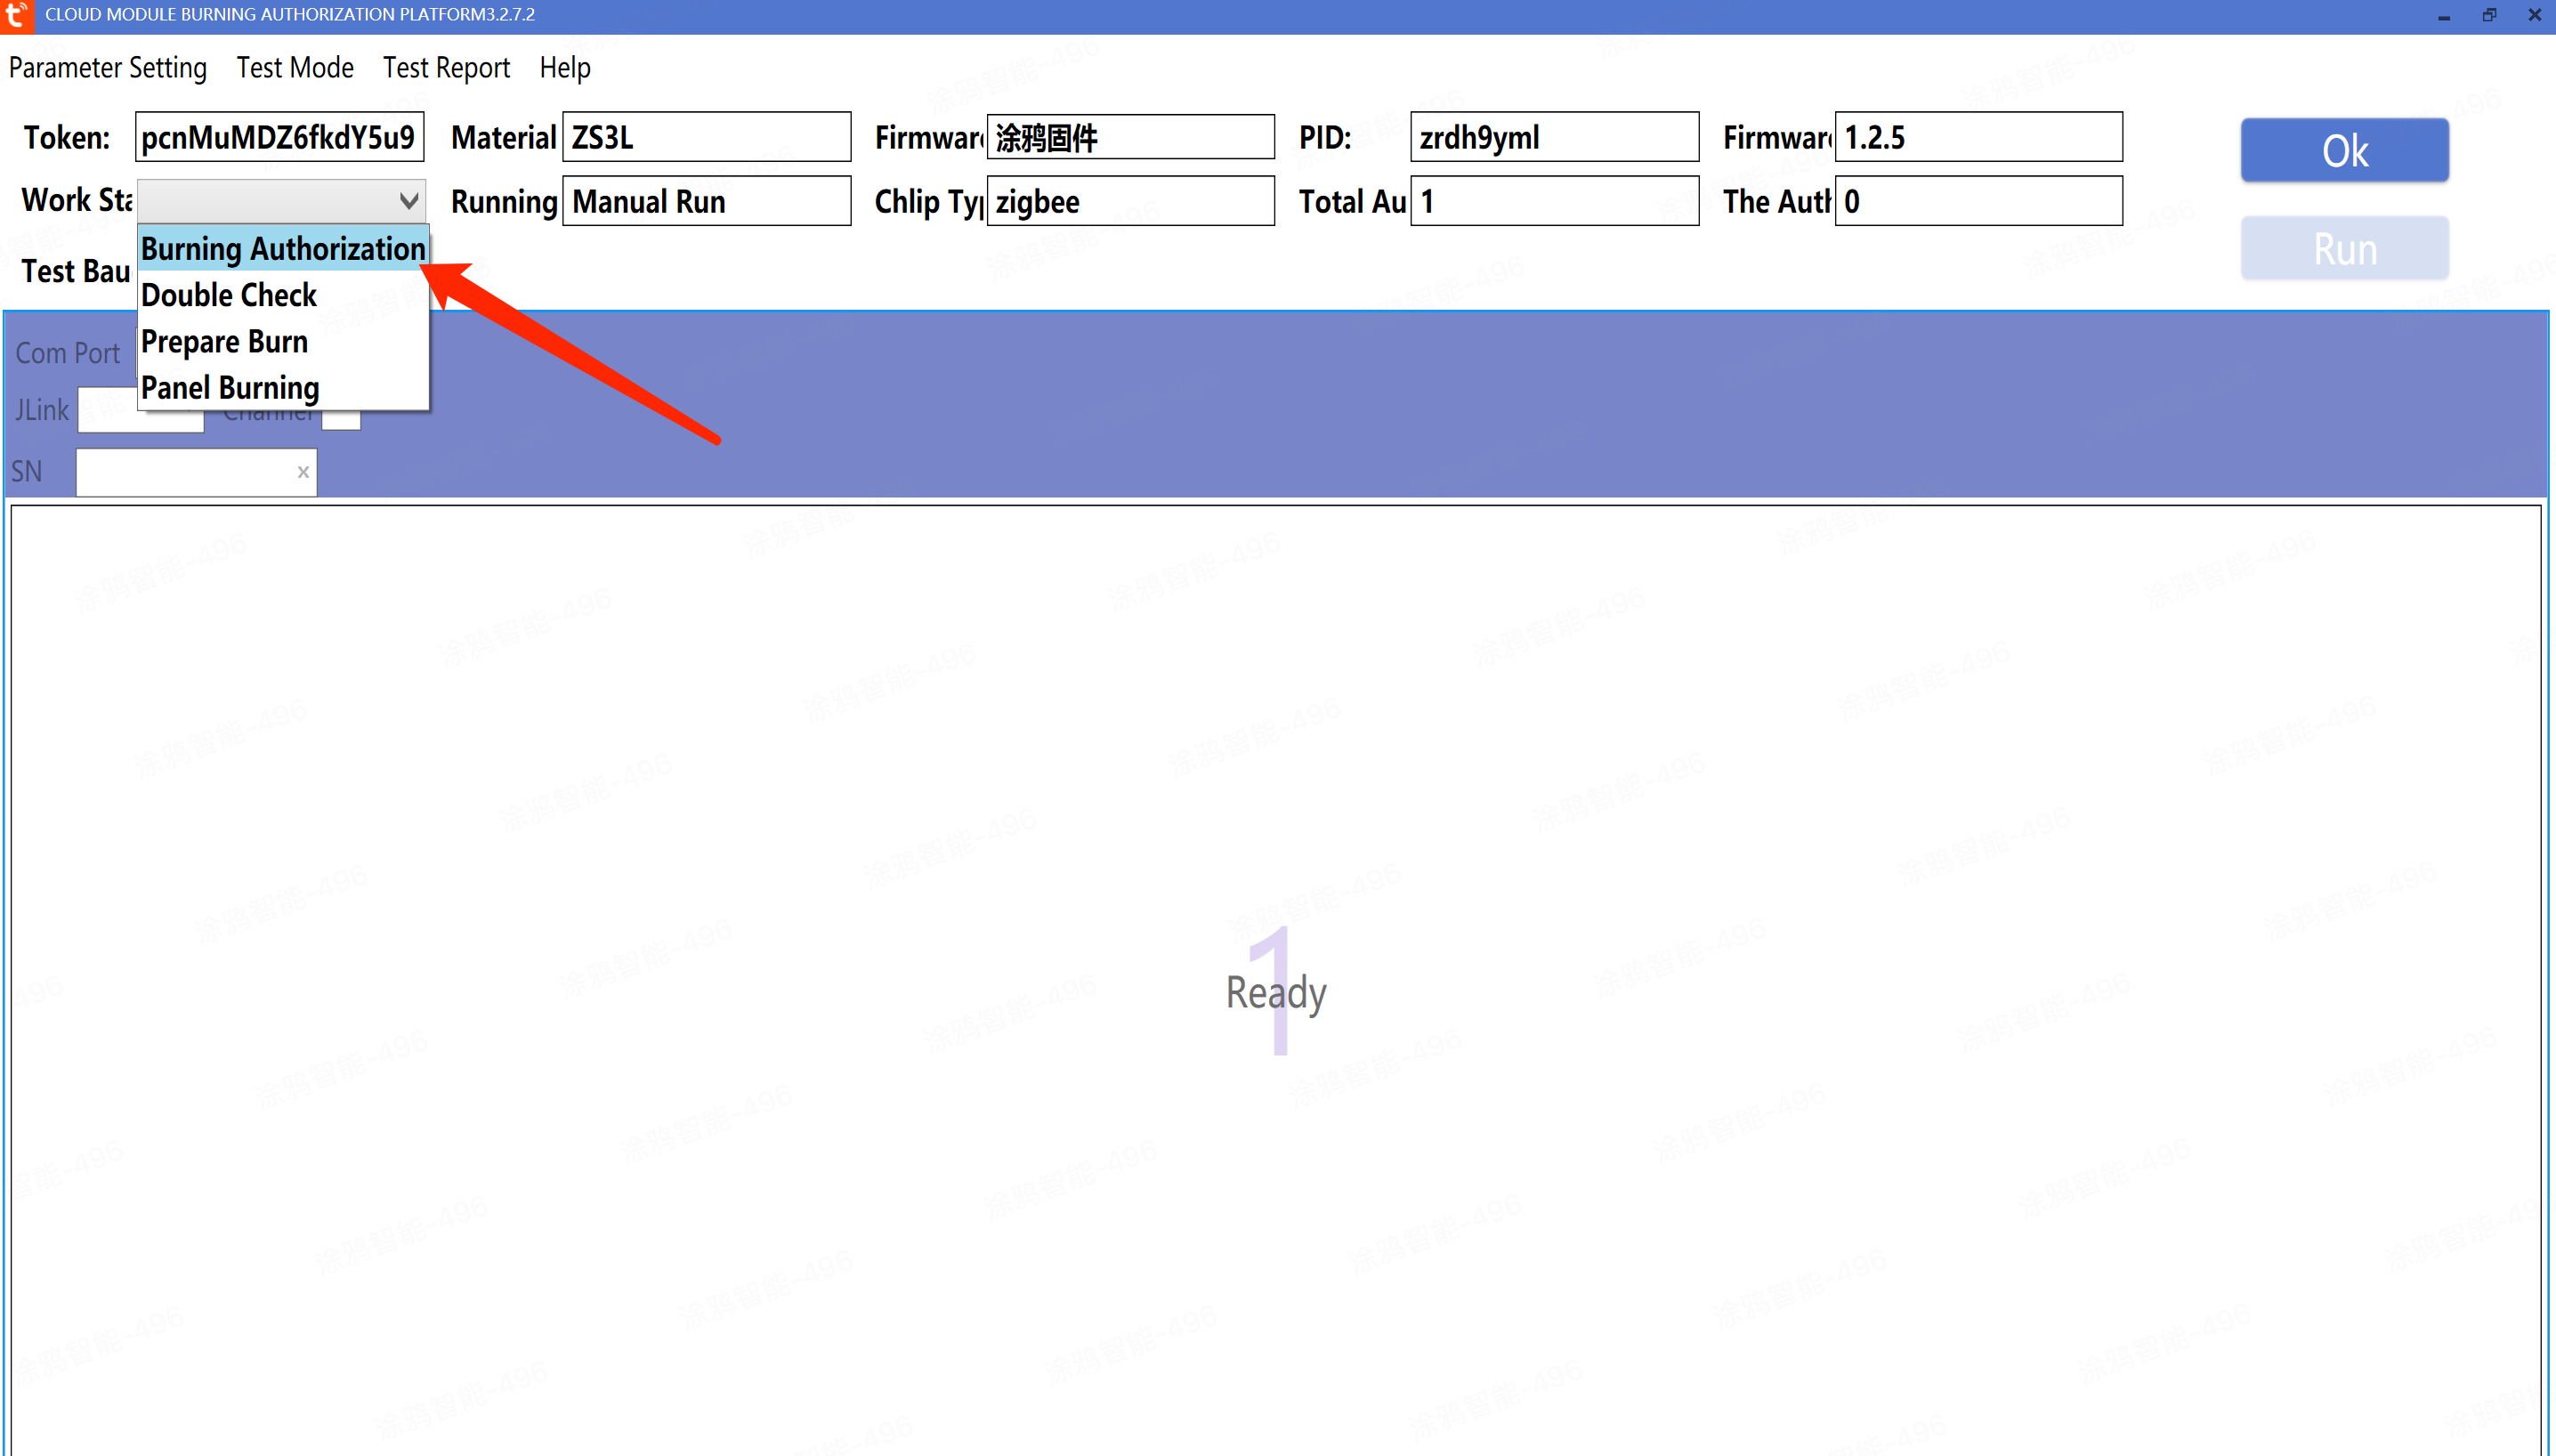
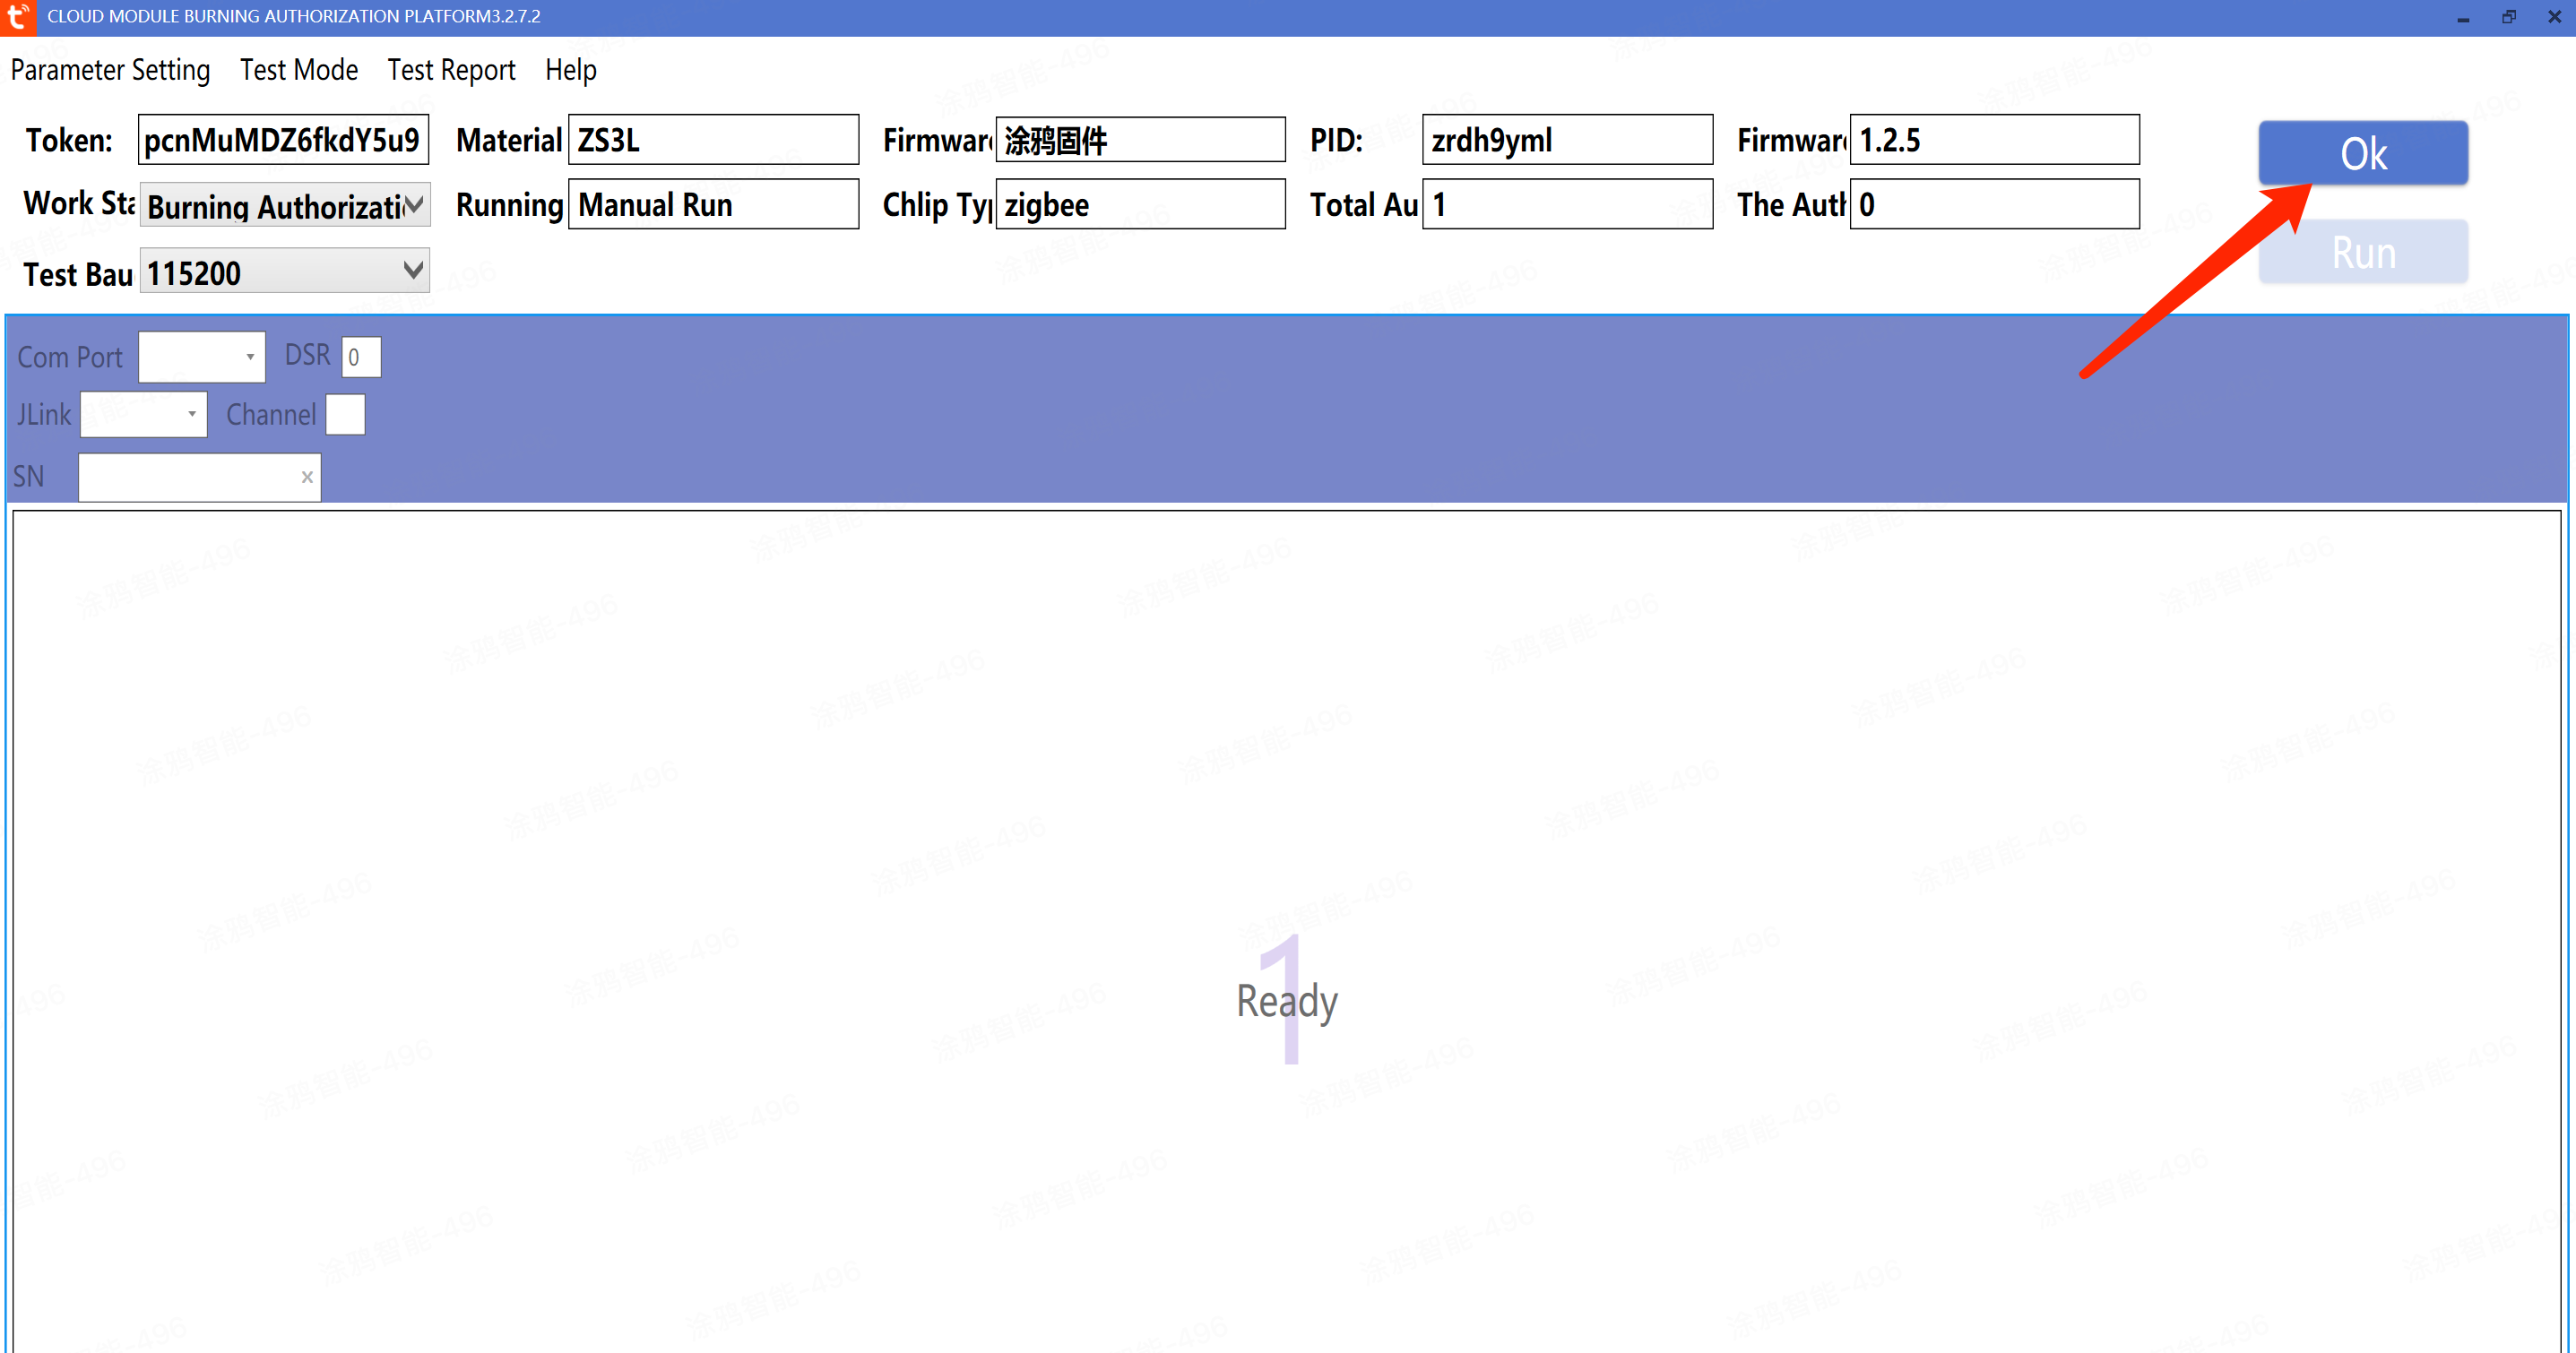
6. Select the "test process", choose the "burn authorization" process, and click "Confirm" after selection
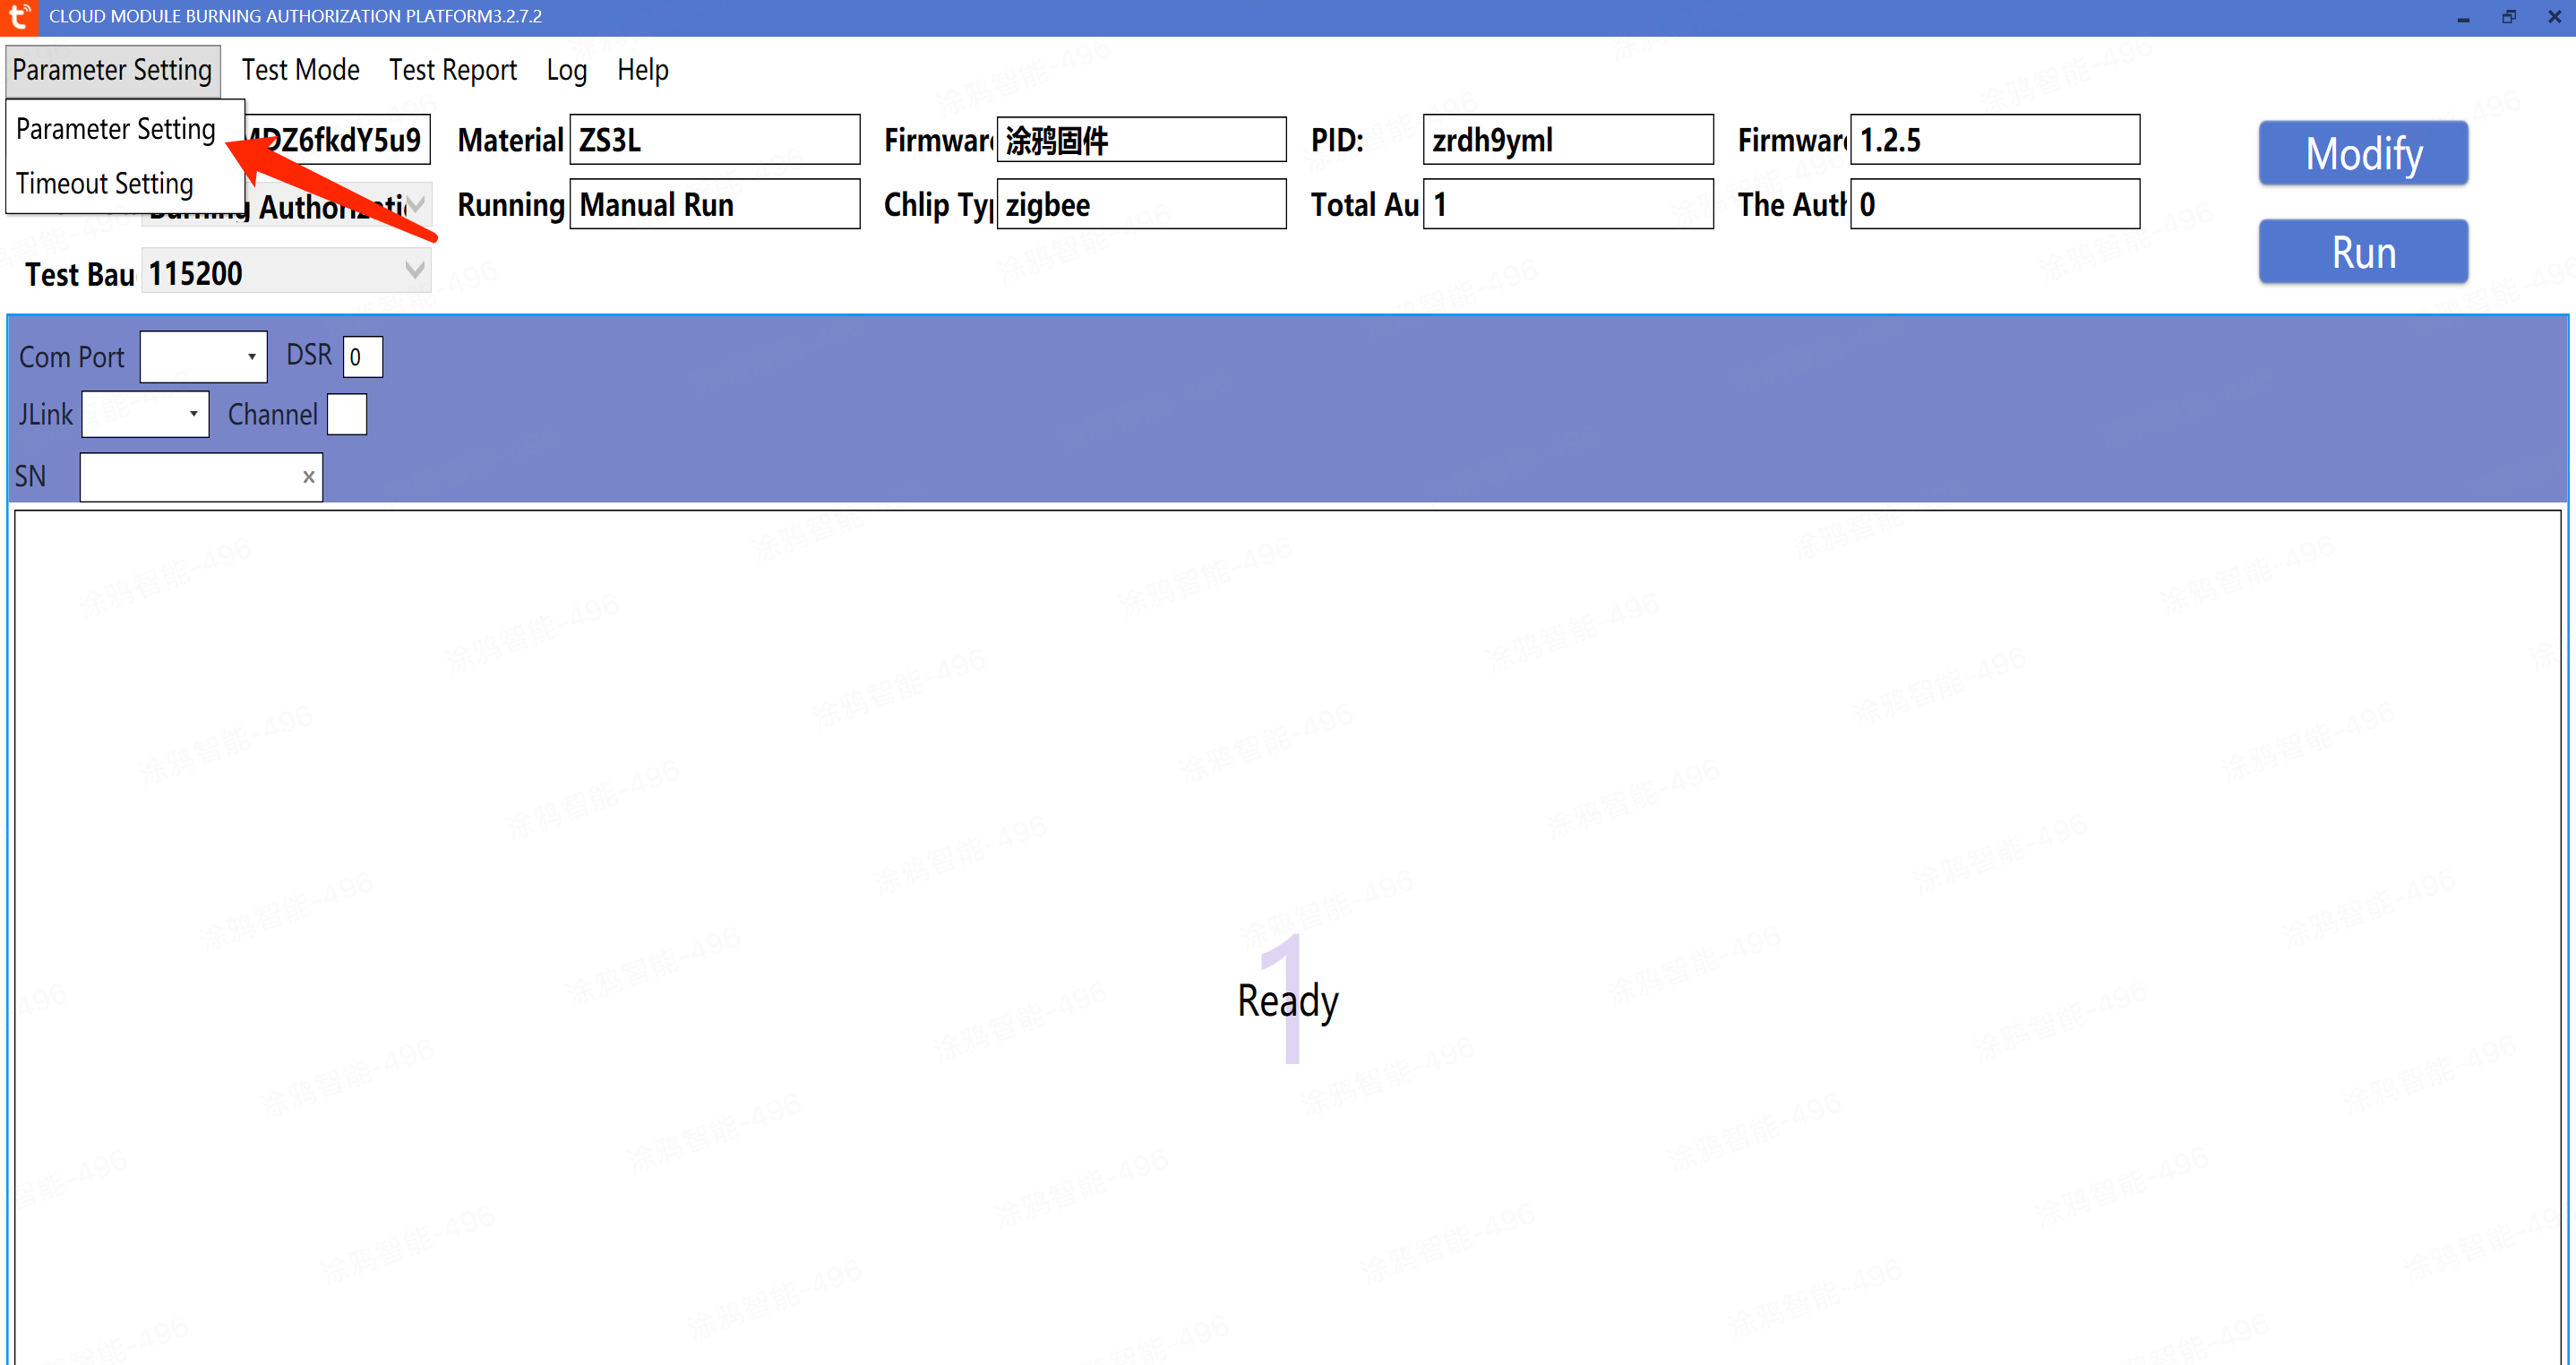
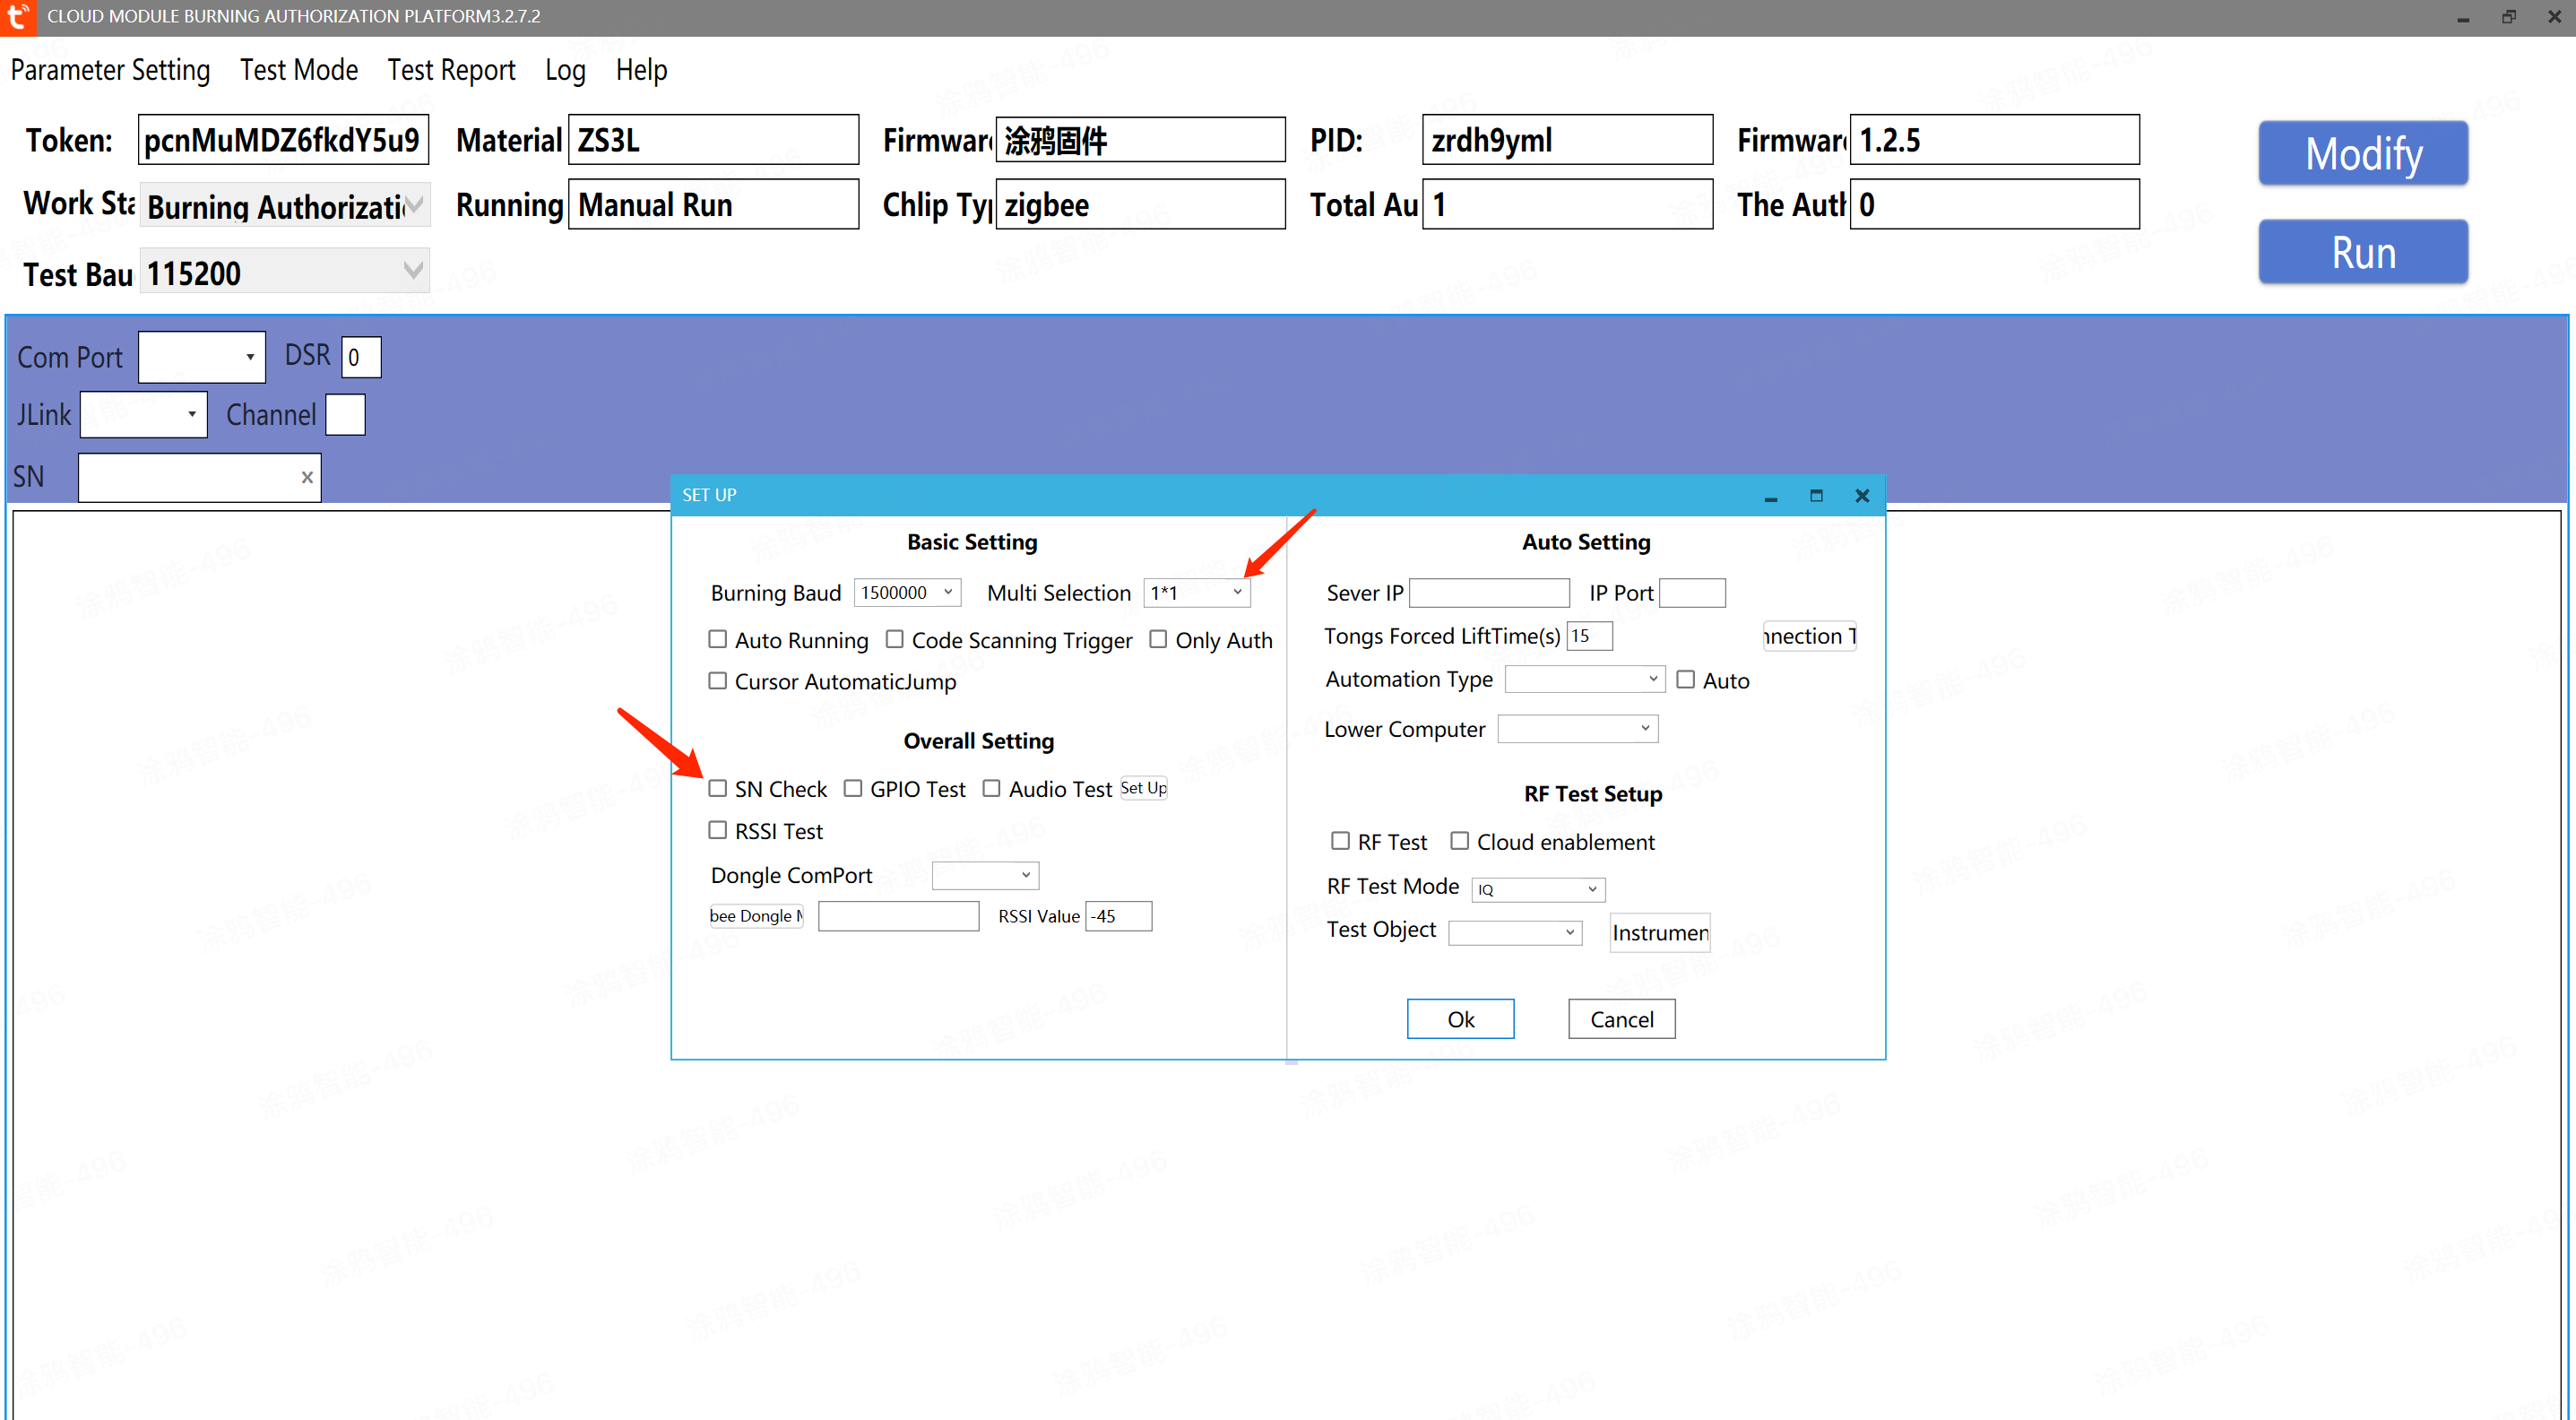
7. Click "Parameter Settings" in the upper left corner. Uncheck "Check SN", the number of channels can be changed to 1*1, refer to the figure below for settings, and click "Confirm" after setting
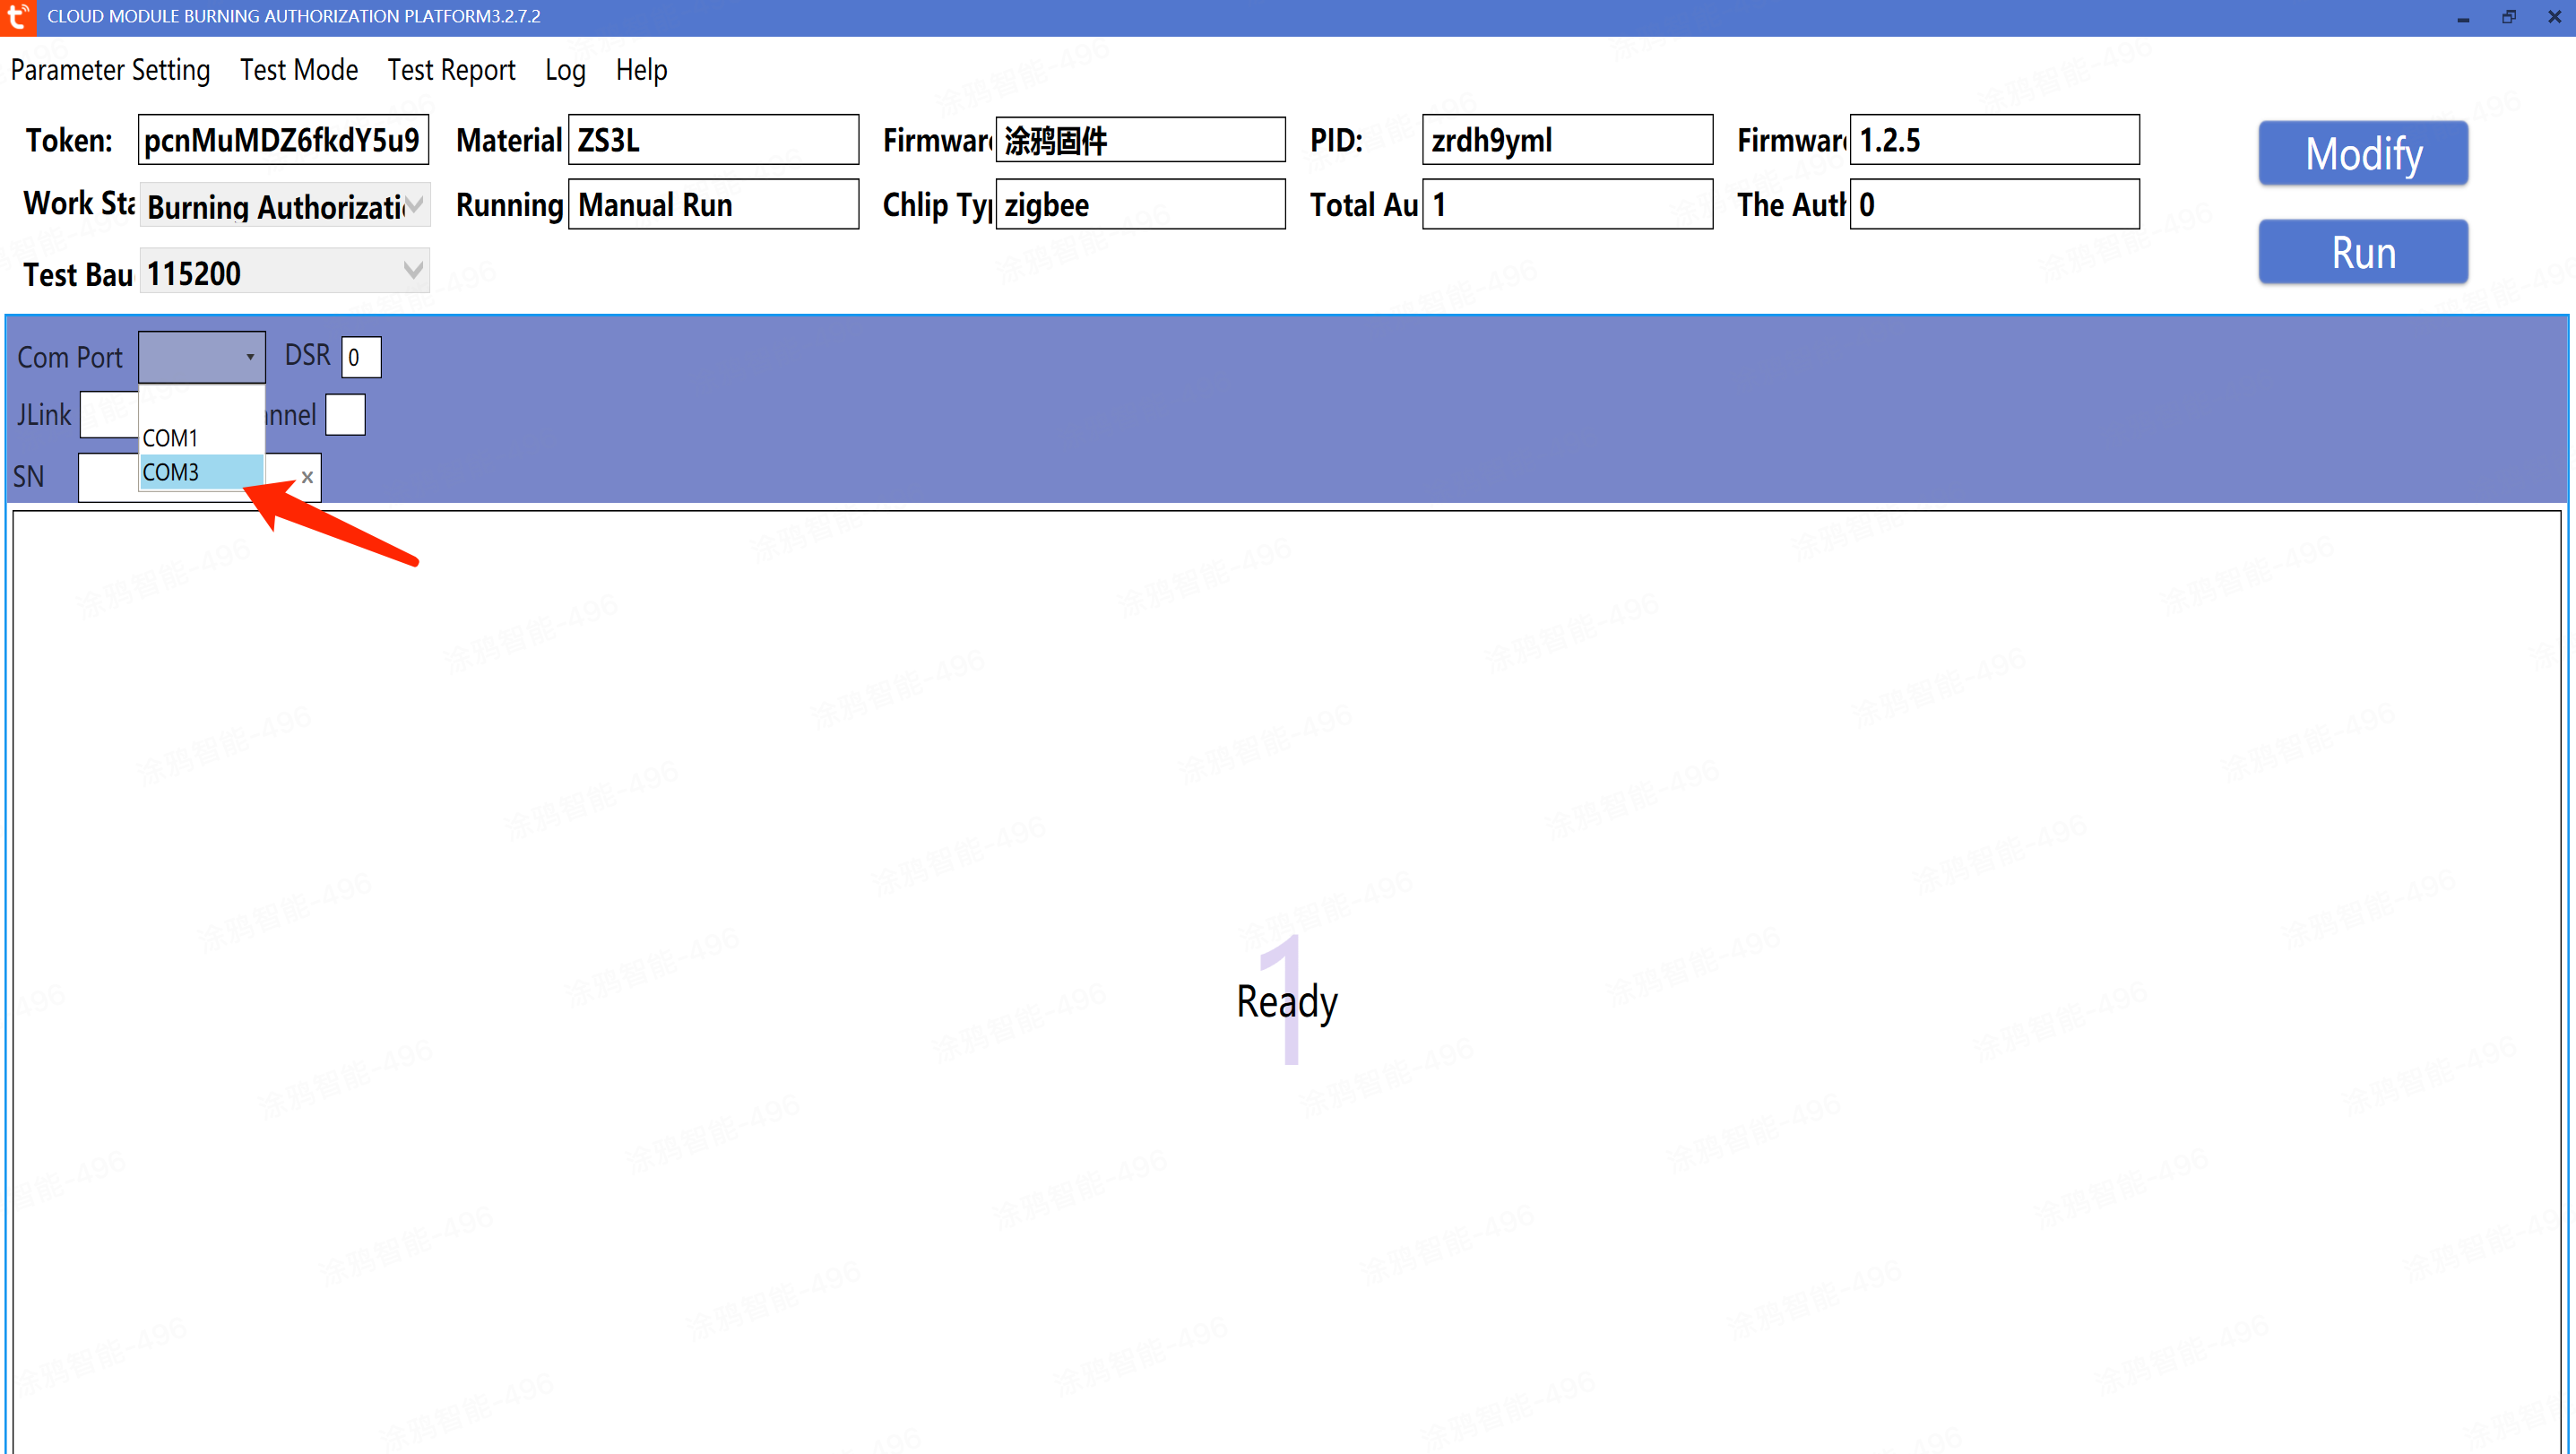
8. Port selection, insert the "serial port tool" into the USB port of the computer. You can see that a new COM port pops up after inserting the "serial port tool", select the corresponding COM port
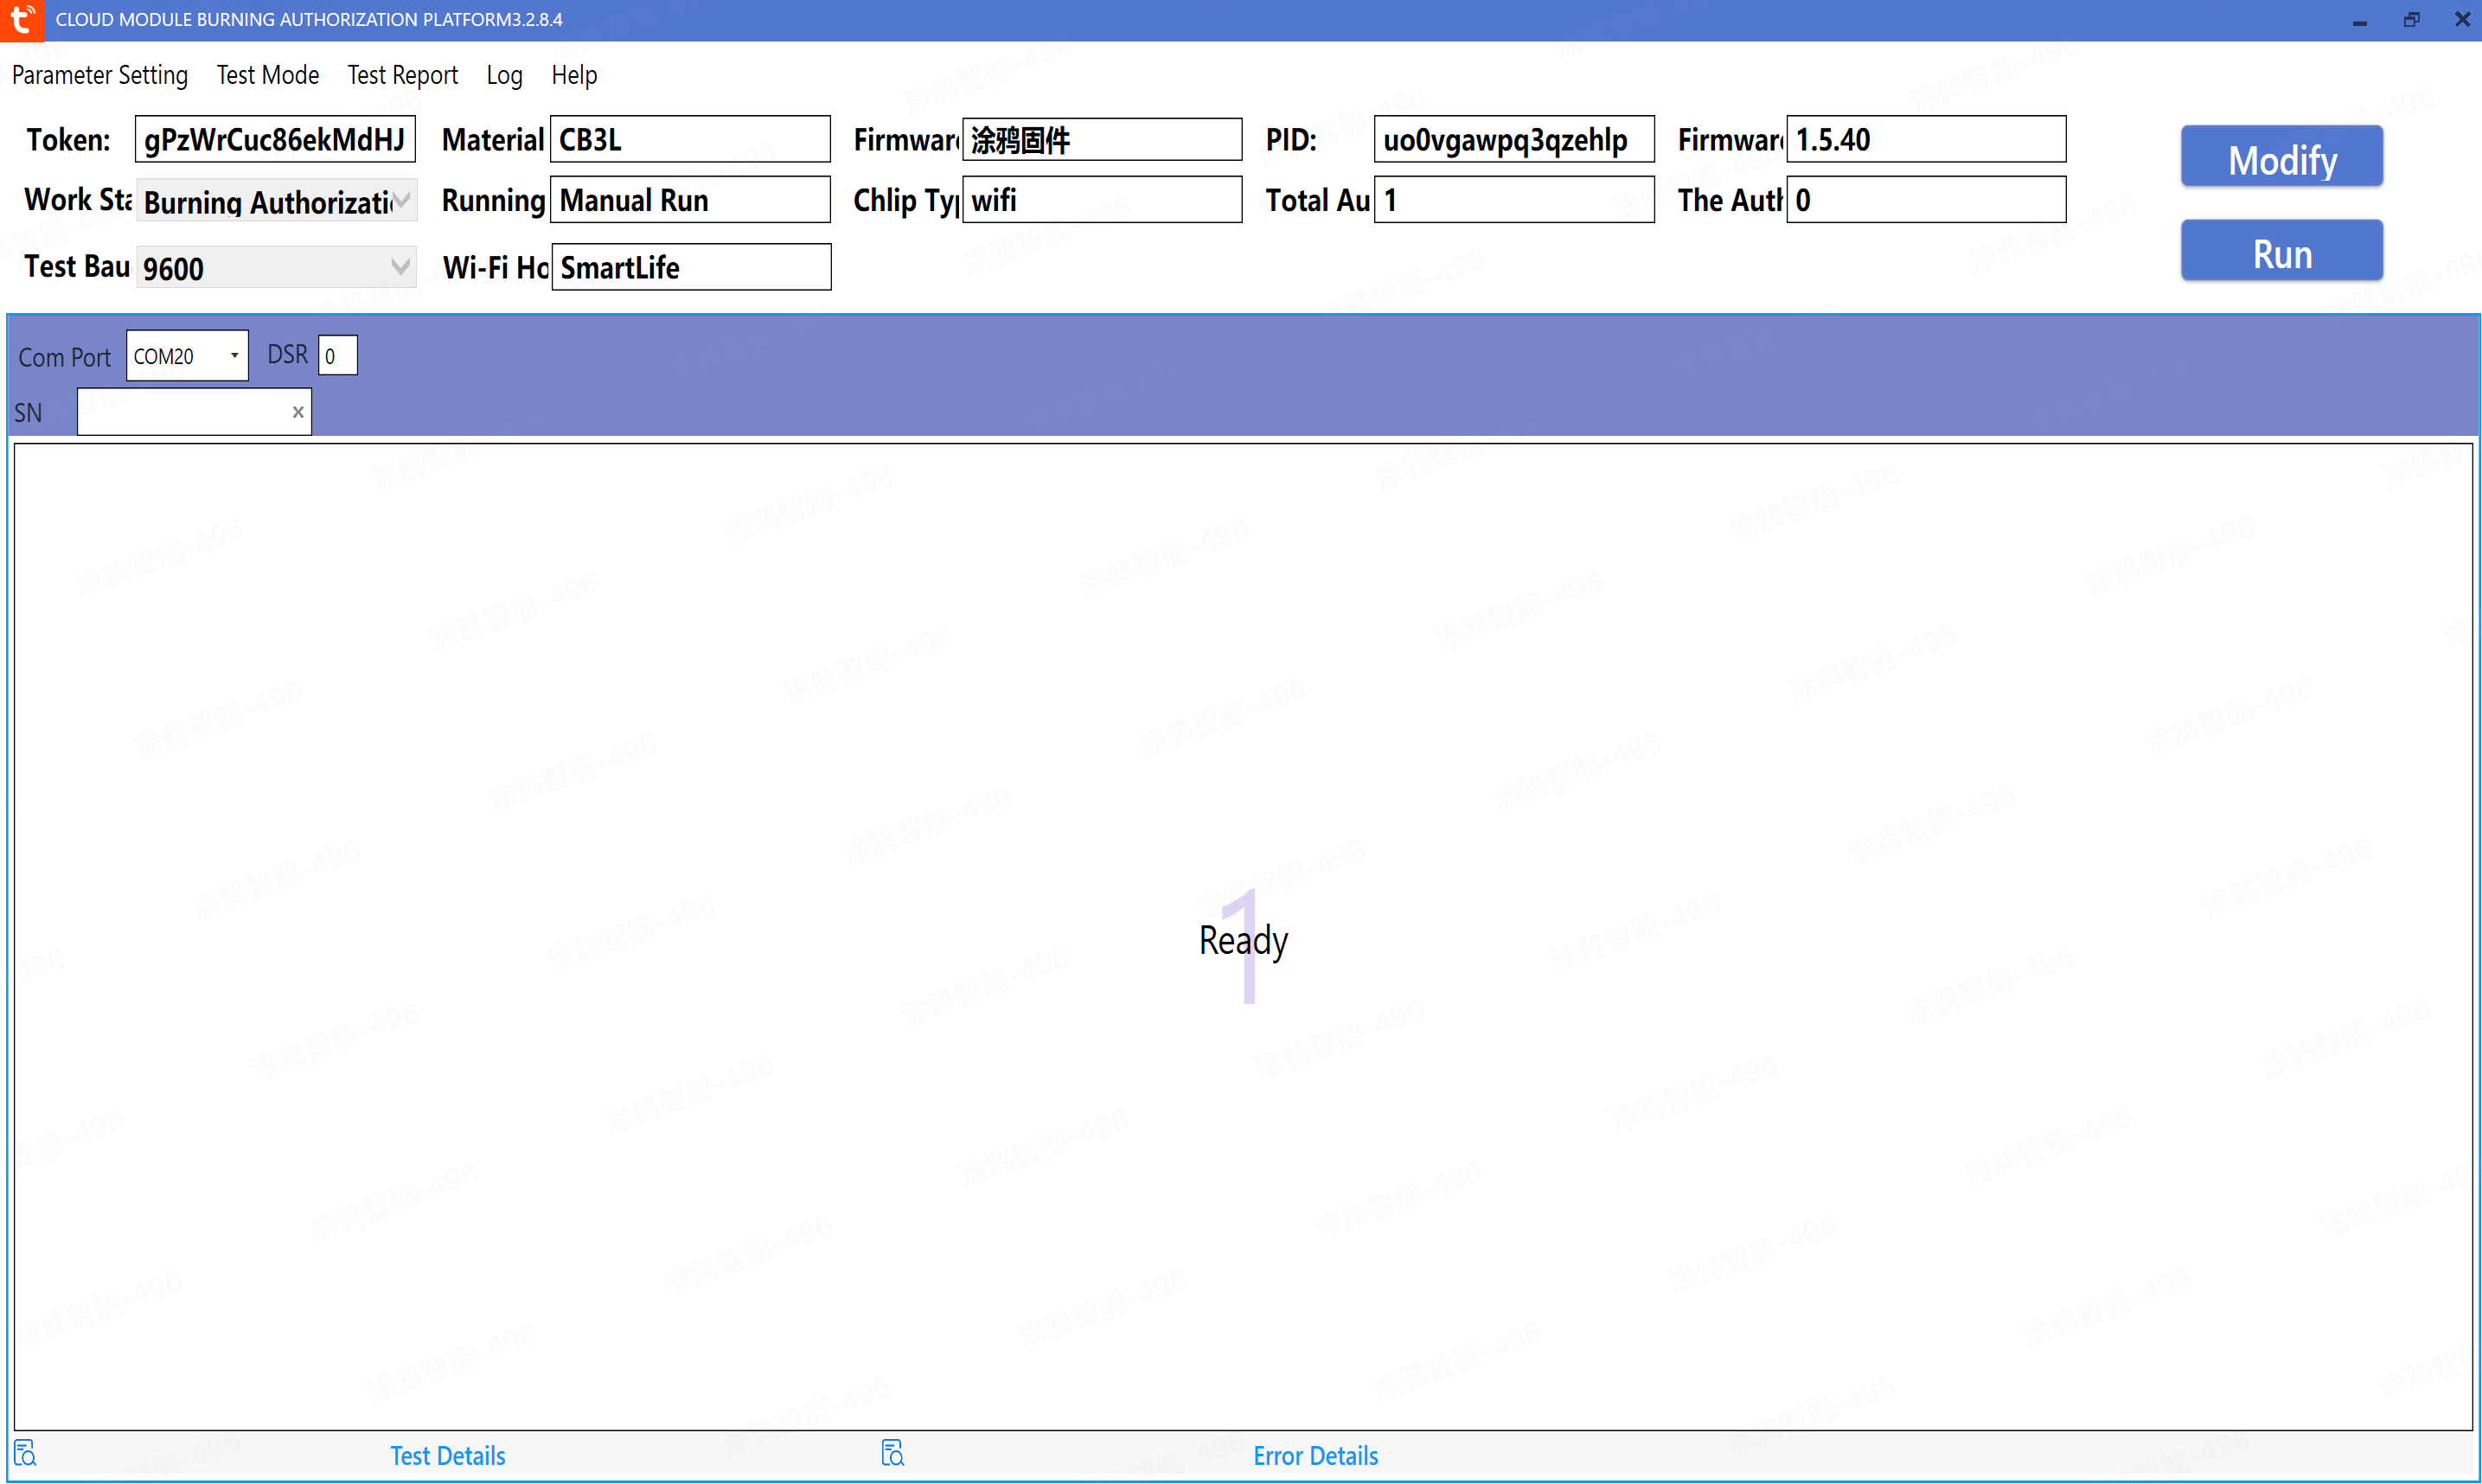
9. Click "Run" to start burning authorization

Note: If burning fails and shows red, first disconnect the VCC wire from the VCC of the serial port tool, then click "Run" first, and then reconnect the VCC wire to burn successfully.
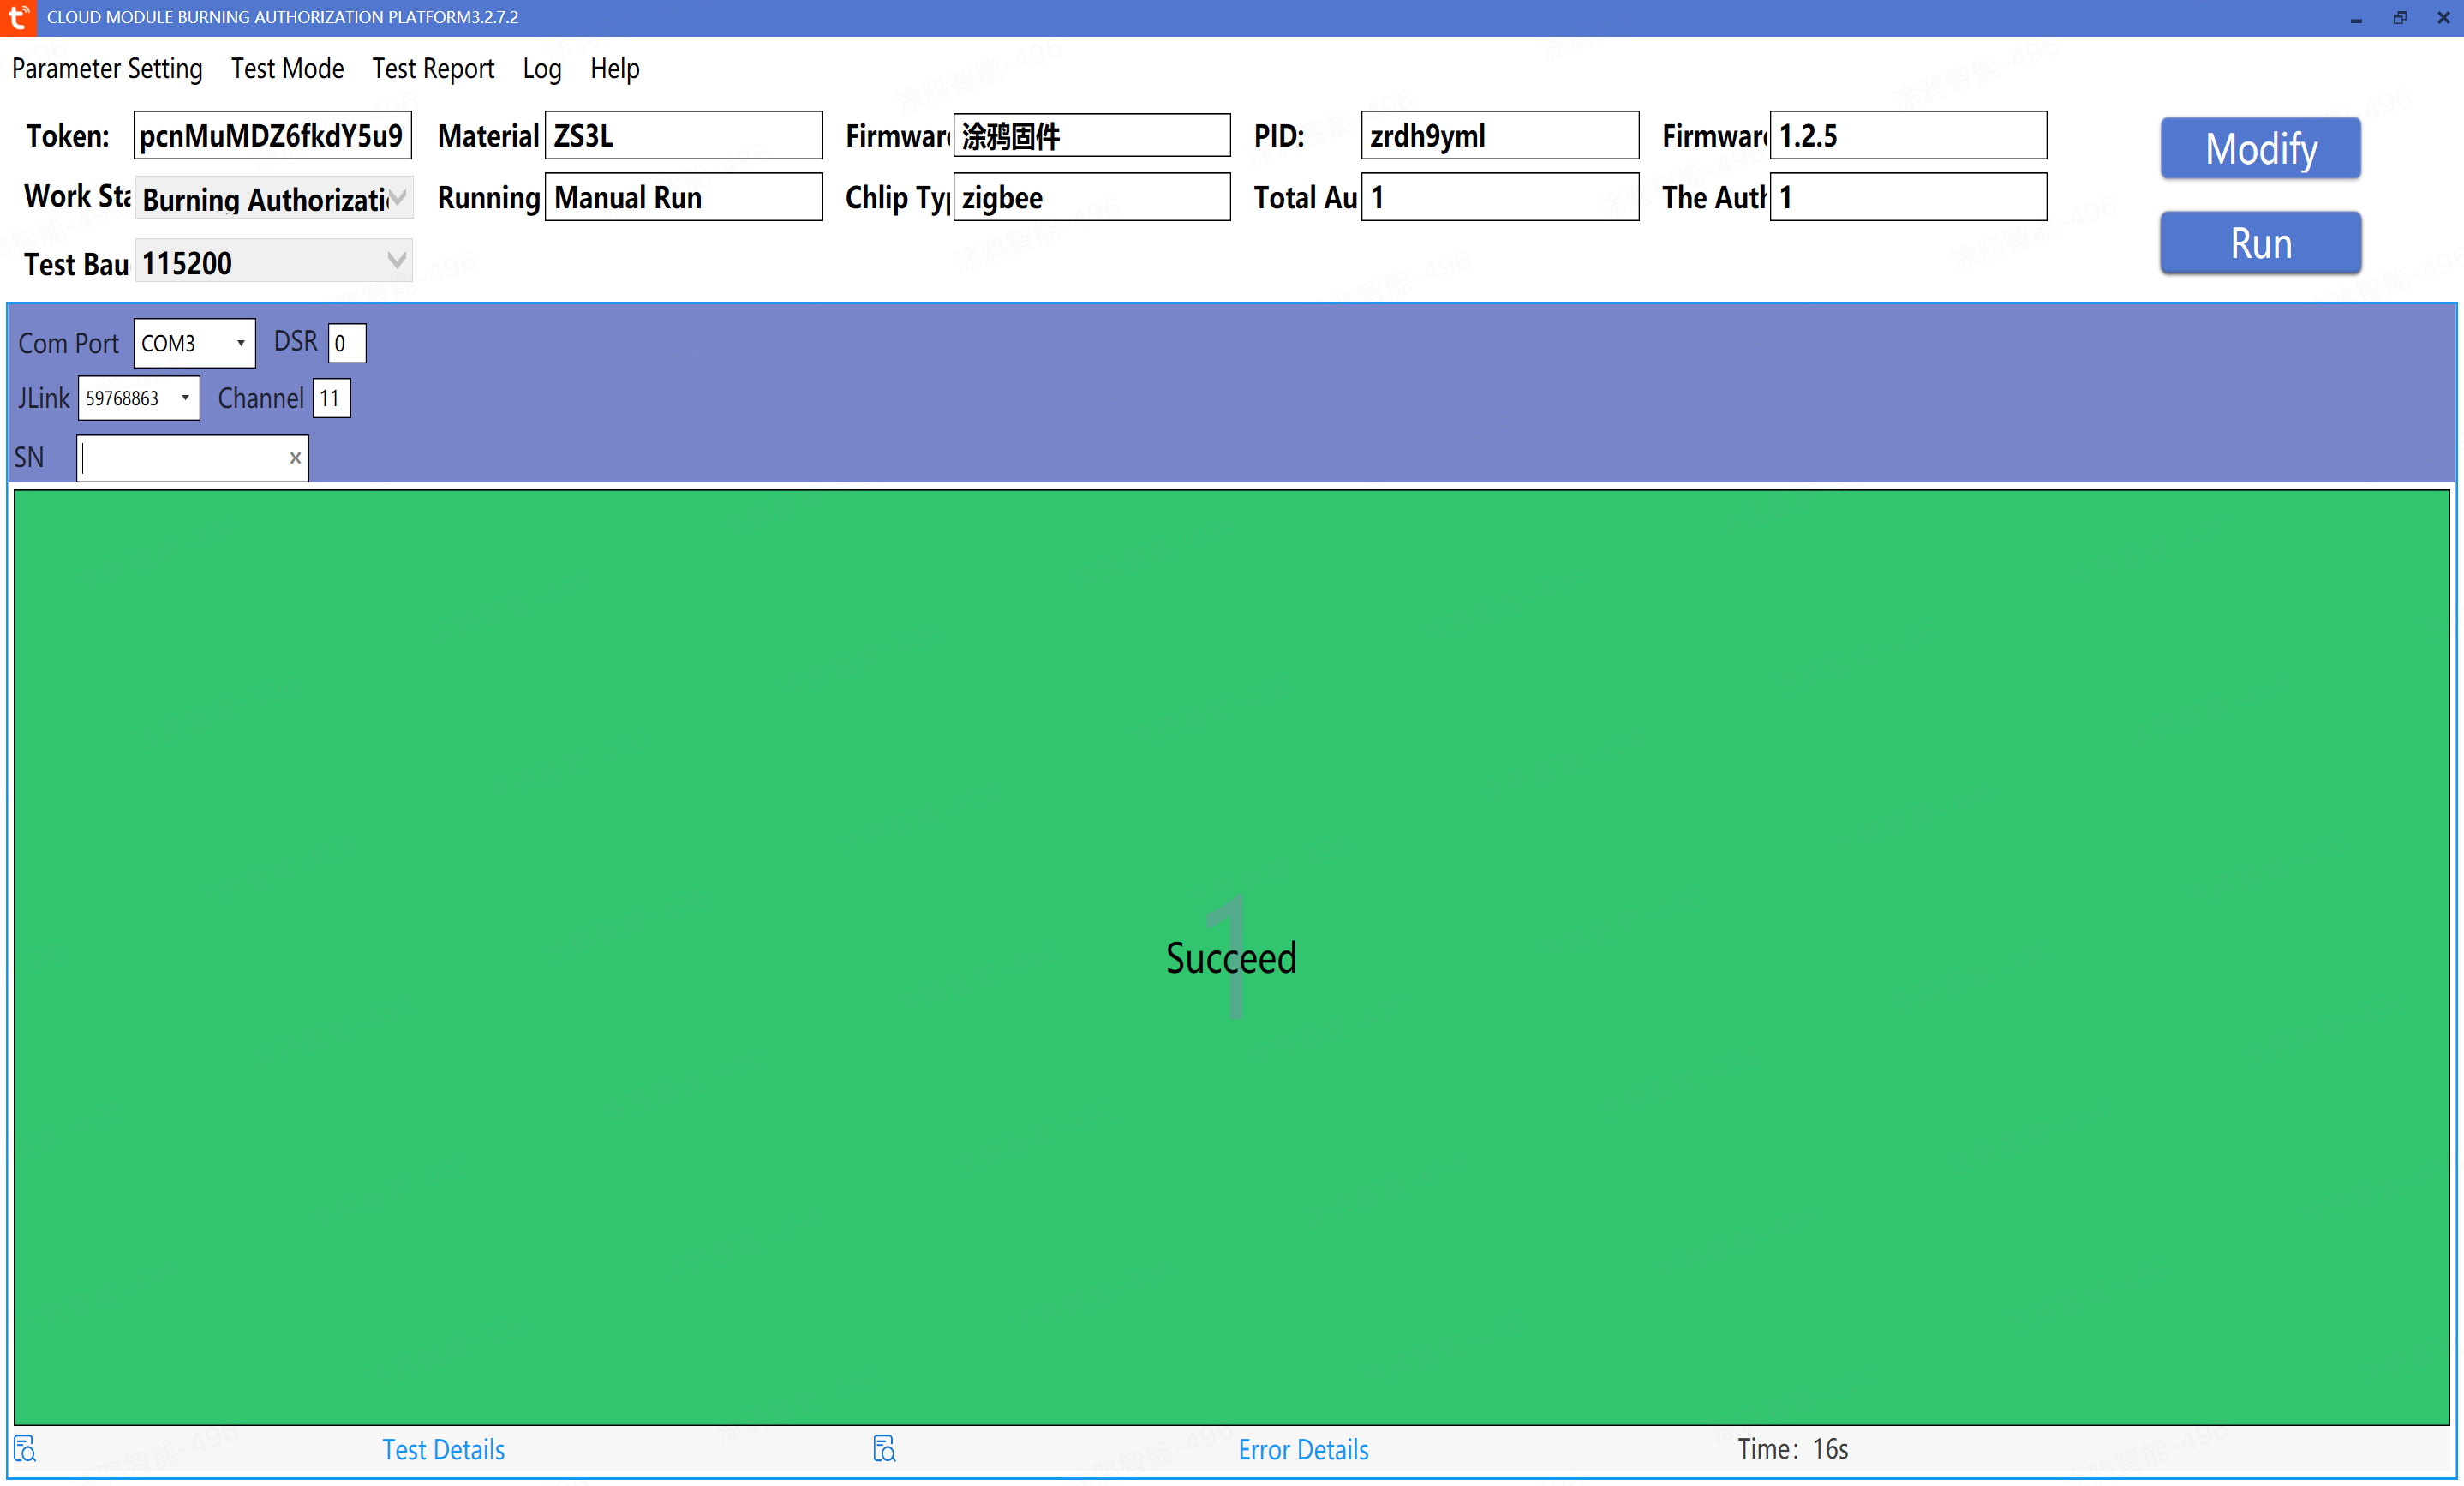
10. If it shows success and the interface is green, it means the burning authorization is complete. Congratulations, you can now use the module for debugging!
Is this page helpful?
YesFeedbackRelated Topics
Marketing Cooperation
Business Cooperation
Customer Service
Media Inquiry


Click for services and help
Help Center
Consult
(001)844-672-5646
Submit Question