

Burning Tutorial | ZS Series Module
Last Updated on:2025-09-29 02:35:26
Confession Letter
Hello there, dear friend we've yet to meet!
We've created comprehensive documentation and a wealth of Q&A content,
but when problems arise, it seems we can't help you quickly find the nanny-level tutorials you need.
We've considered creating different documents for different businesses and roles,
but with limited resources and an unknown return on investment, this is not realistic.
Therefore, we can only meet you in the current way,
and we will try to point out the applicable audience and scenarios at the beginning of the text to help you locate more quickly.
If you think this format is okay, we hope you can give us positive feedback such as likes,
because only with enough positive feedback can we apply for more resources to continue.

Main Content Directory
I. Applicable Audience and Scenarios
II. Preliminary Preparations
III. Software Installation
IV. Flashing Process

I. Applicable Audience and Scenarios
Development methods: No-code development, MCU SDK universal solution, TuyaOS development method
Development stage: After creating a product on the development platform and ordering networking modules during hardware development, you are in the sample debugging stage
Note: If you are in the form of "Authorization Code List Delivery", "Bulk order over 100pcs modules", "Secondary development of finished products", "Reverse development", "no-code development multi-mode gateway/Cat.1 protocol modules and other special categories or chip platforms", you do not need to flash by yourself, and you do not need to read this tutorial.

II. Preliminary Preparations
1. Purchase a flashing jig, link: Tuya Smart Developer Center
Note: Purchase the flashing jig corresponding to the module, the purchase link contains instructions on the module models that the jig is compatible with, see the link for details
2. Purchase a serial port tool and serial cable, link: Tuya Smart Developer Center
Note: Either a 2M high-speed serial board or a 3M high-speed serial board will do, if you don't have a serial cable, you need to buy one
3. Purchase a Zigbee production test beacon, link: Tuya Smart Developer Center
Note: Power the beacon during flashing, set the beacon mode to BC mode, and place it within 1 meter of the module
4. Purchase a J-link flasher with SWD interface, which can be bought on e-commerce platforms
5. Register for the "Tuya Smart Manufacturing Management System", link:https://pms.tuya.com/login
Note: It is not the same account as the Tuya development platform, you need to register before using
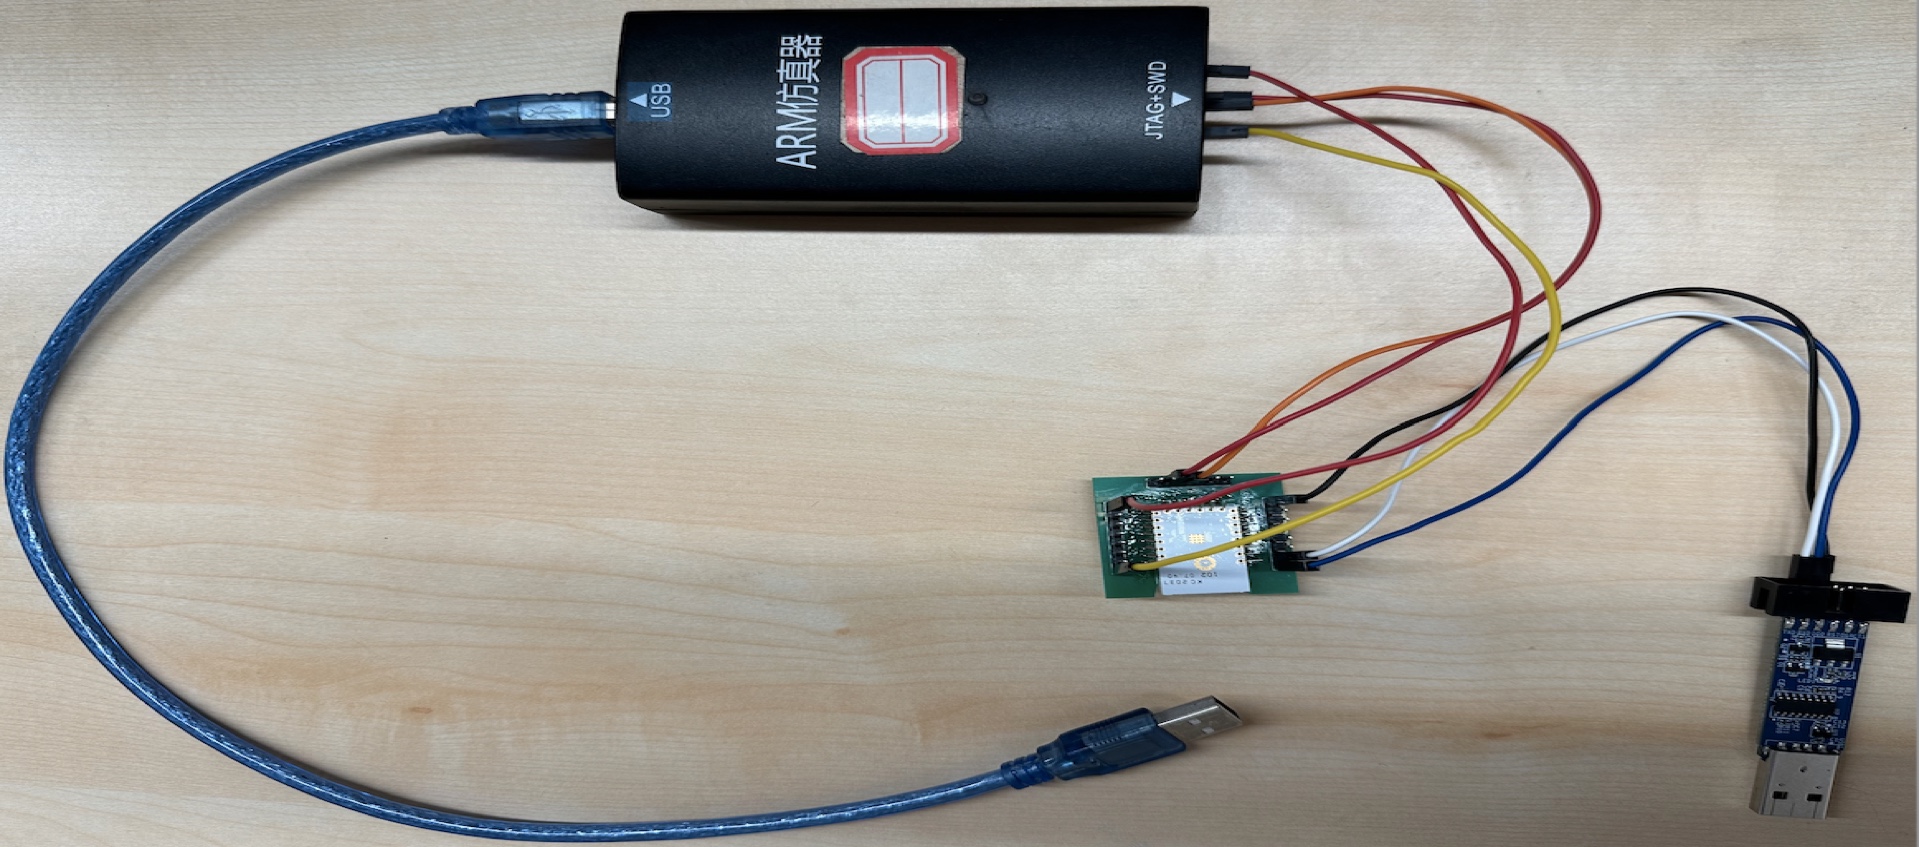
6. Flashing wiring, connect the module with the serial port tool and J-link flasher, and plug the serial port tool and J-link flasher into the USB port of the computer
Module Pin | J-link Flasher |
|---|---|
| VCC | VCC |
| SWDIO | SWDIO |
| SWCLK | SWCLK |
| RST | RESET |
Module Pin | Serial Port Tool |
|---|---|
TX | RX |
RX | TX |
GND | GND |

III. Software Installation
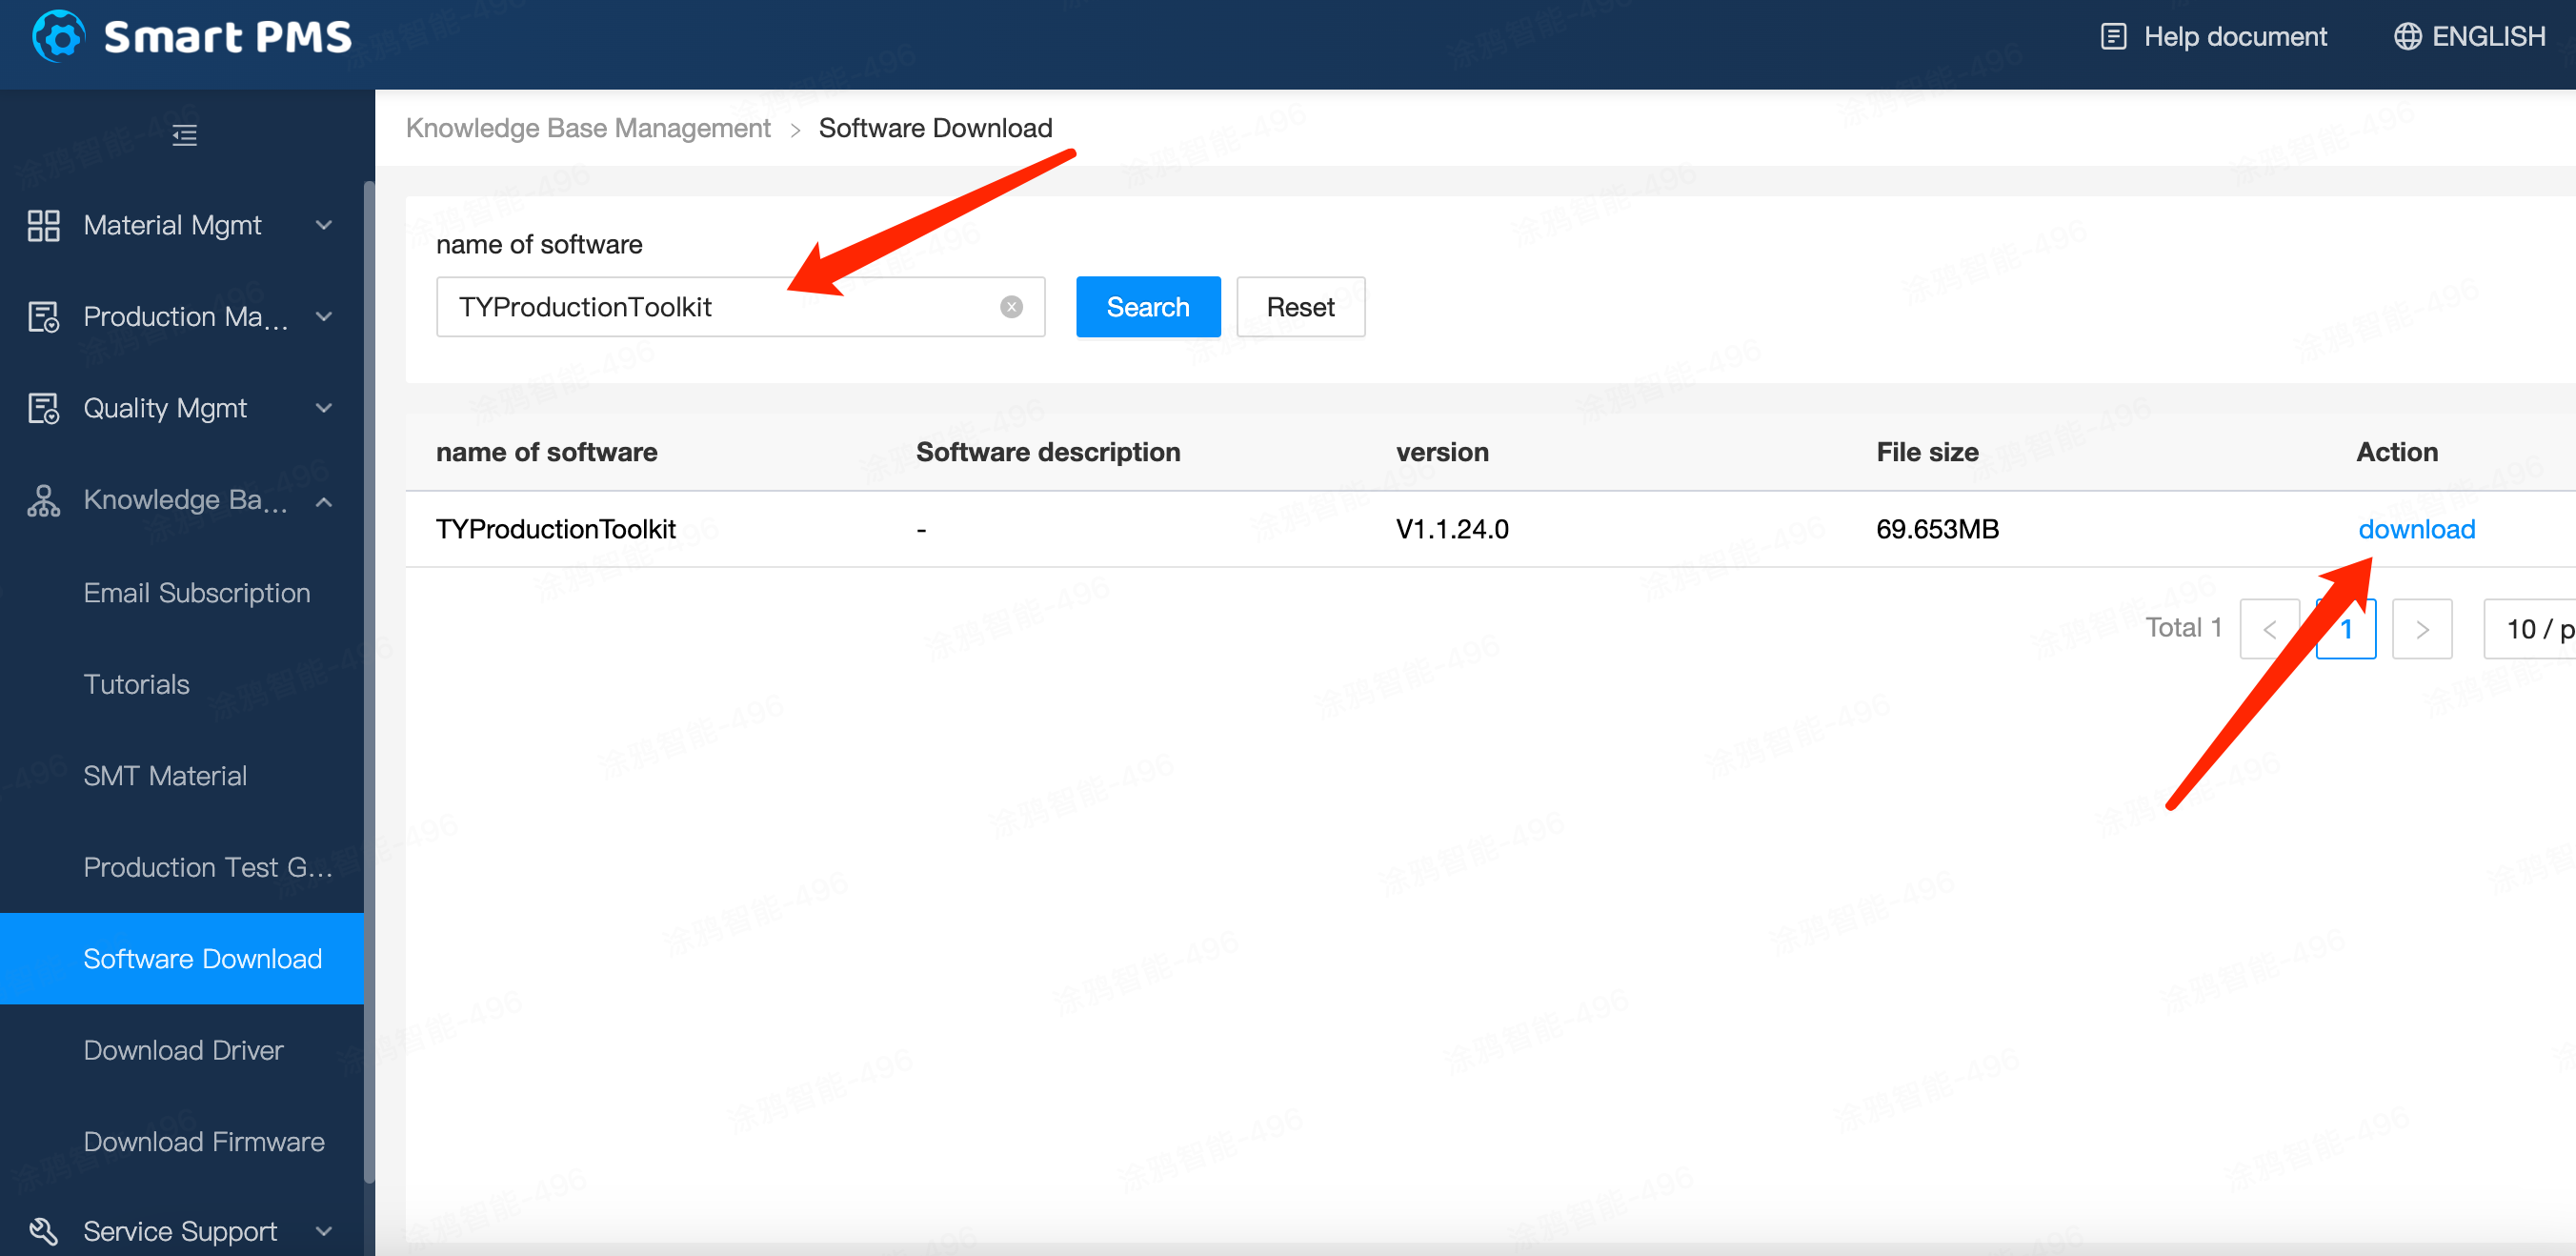
1. Log in to the "Tuya Smart Manufacturing Management System", link https://pms.tuya.com/login
2. Download and install the "Production Solution" software
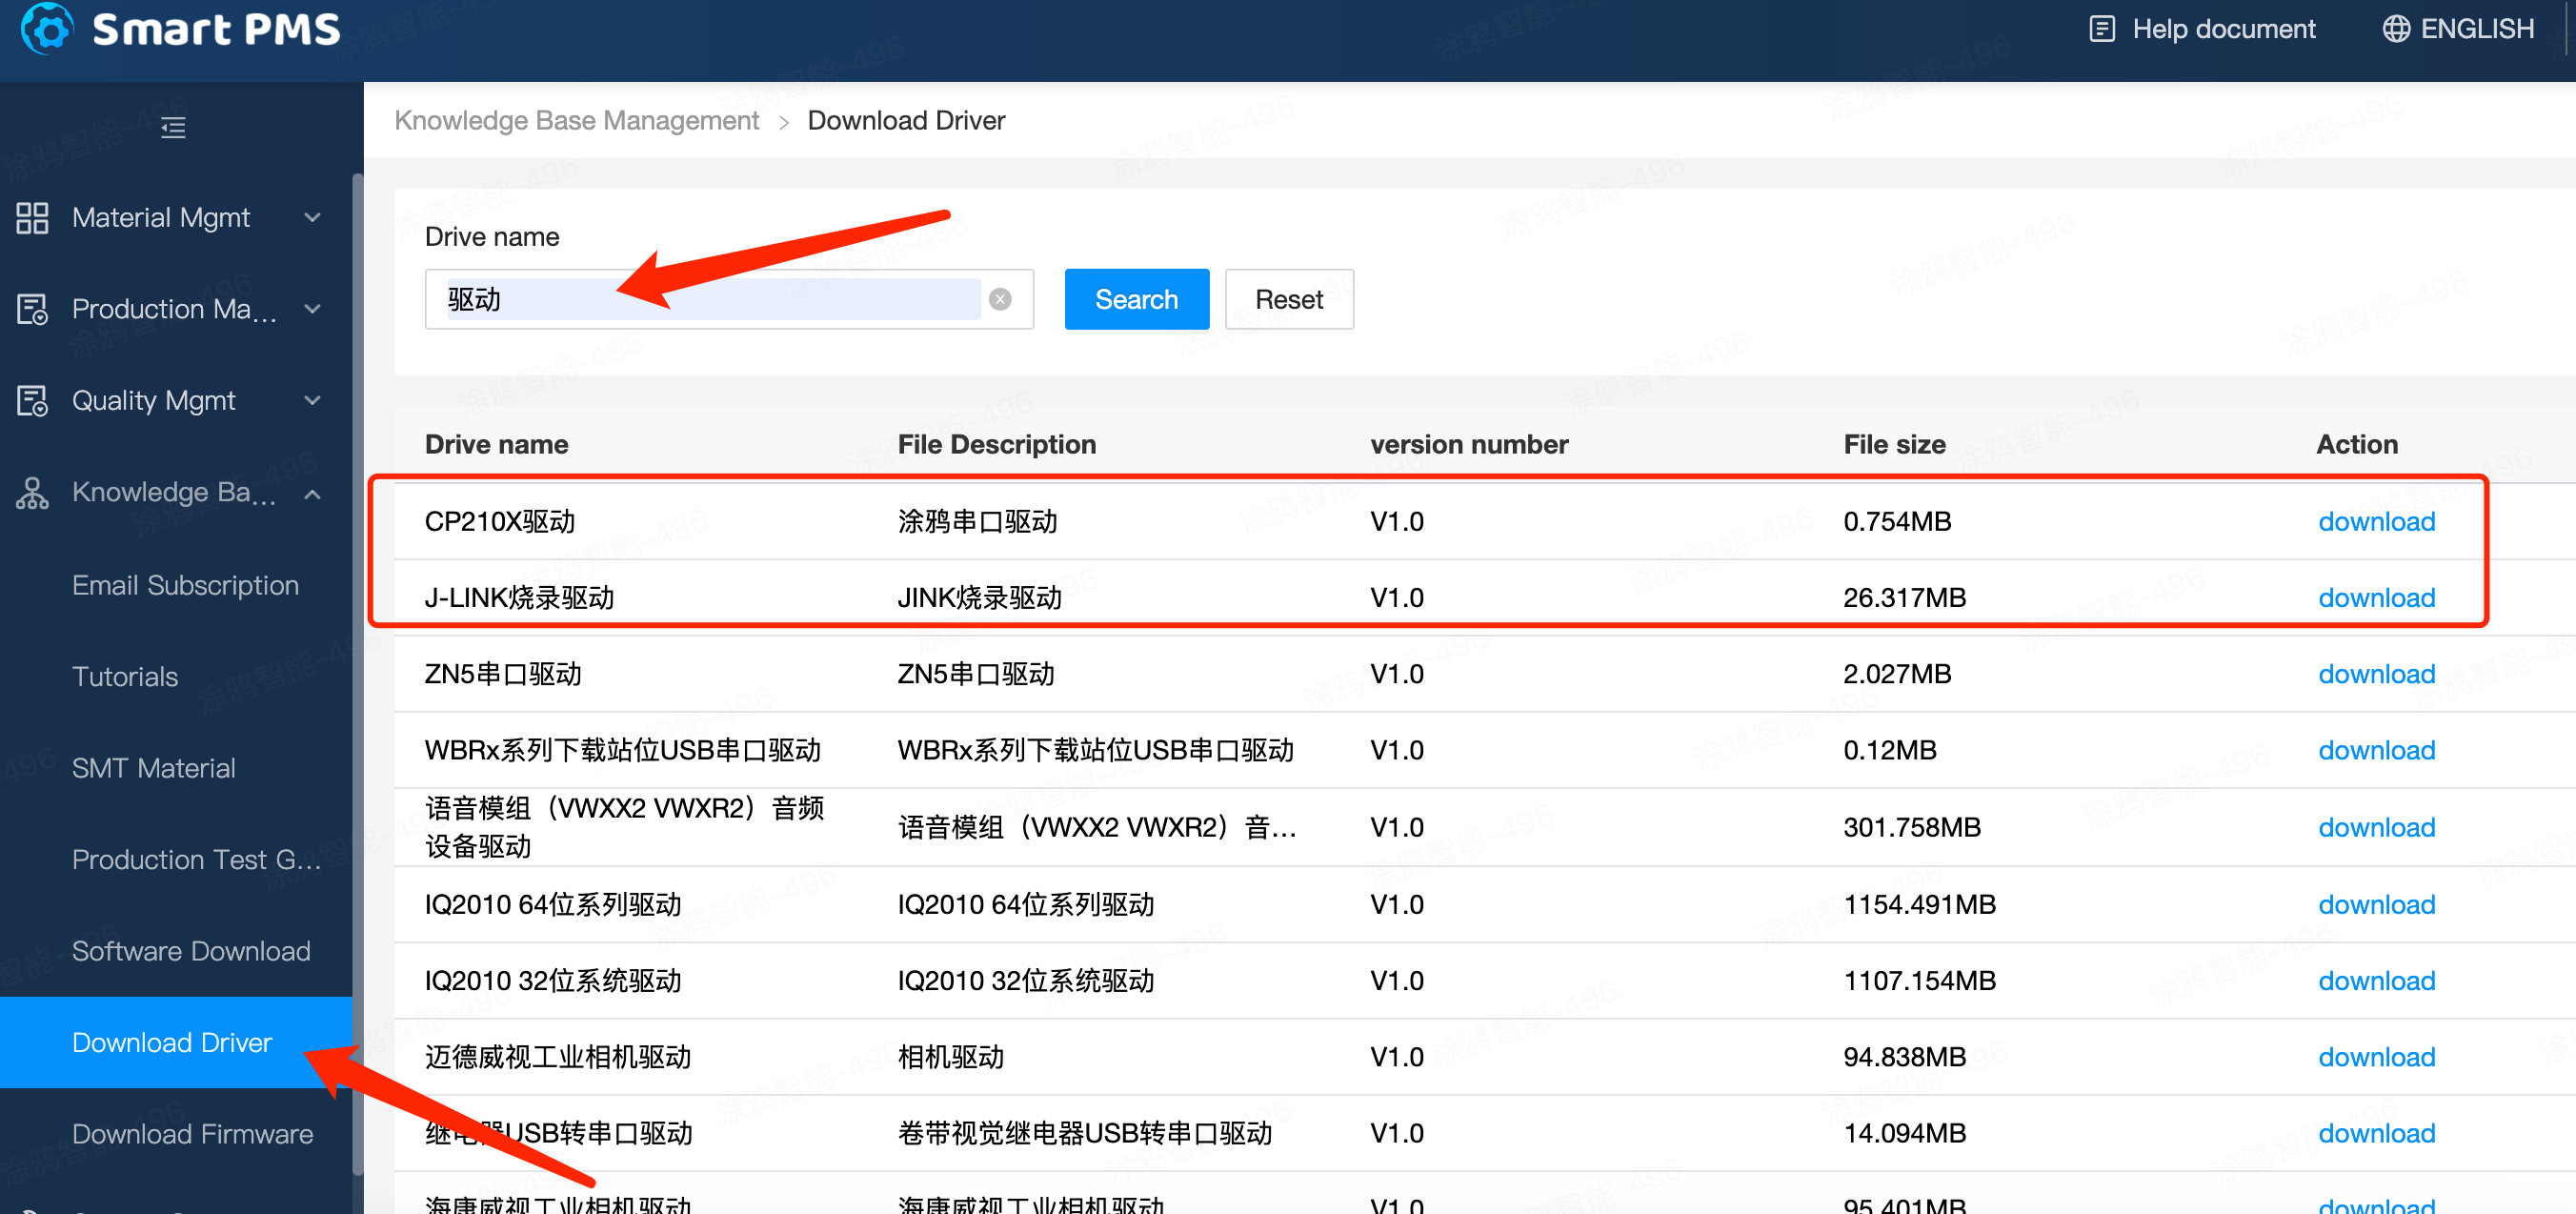
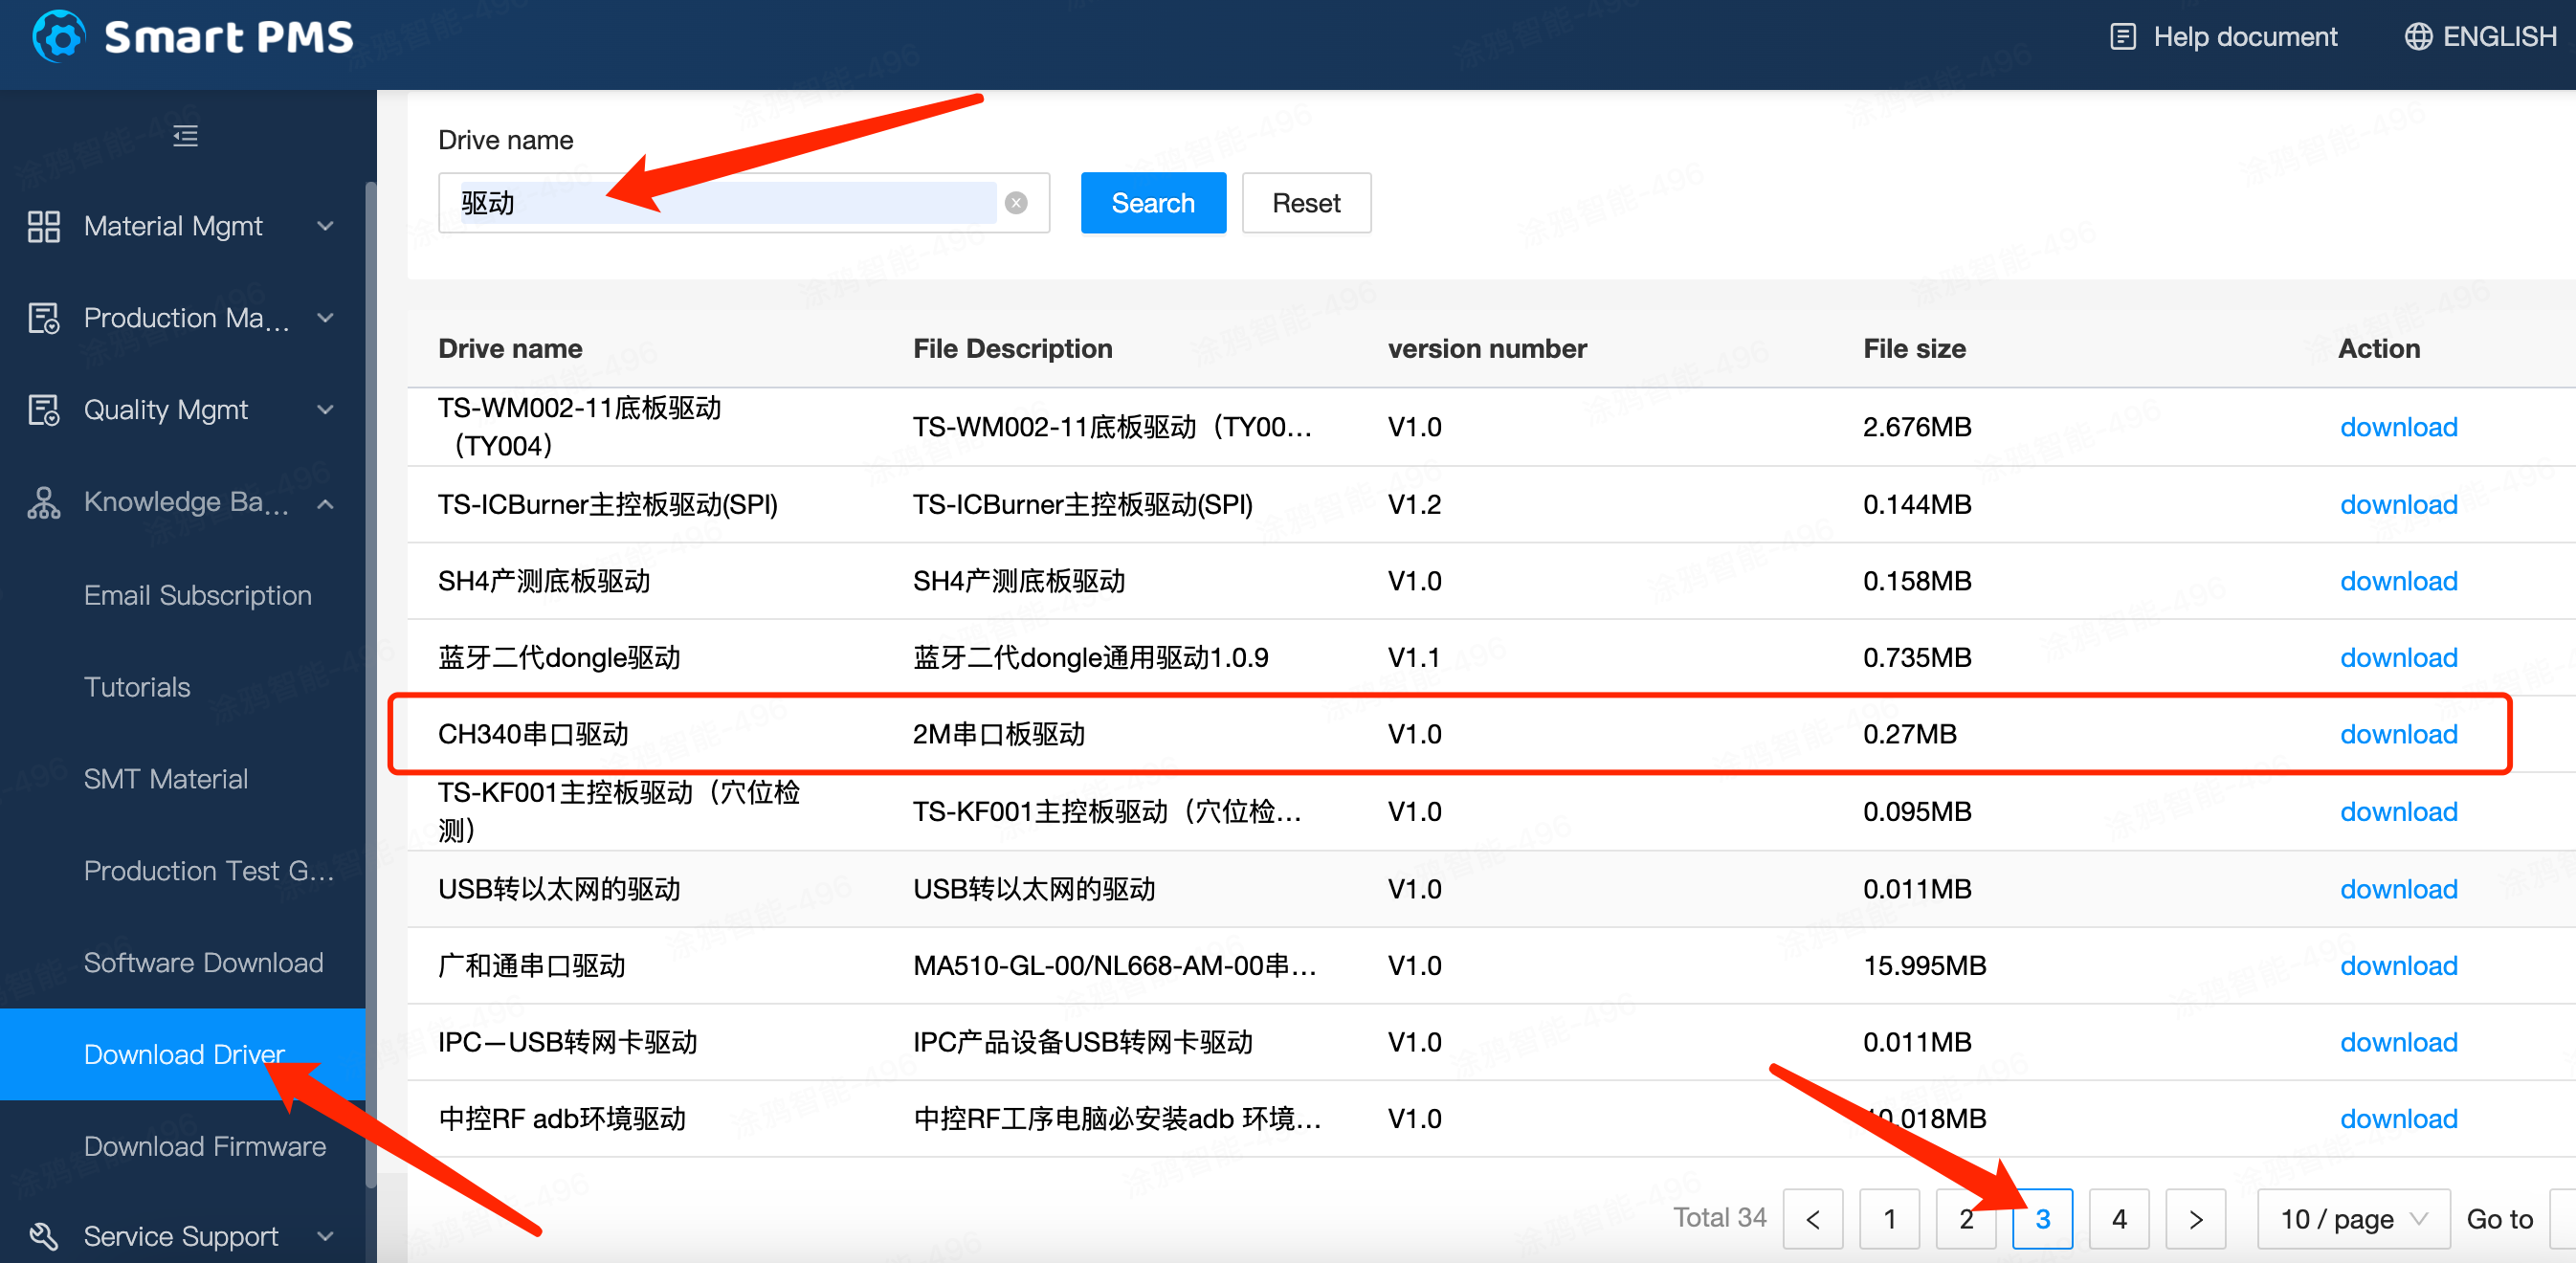
3. Download and install drivers, J-link download "J-LINK Flashing Driver"; 2M serial board download "CH340 Serial Driver"; 3M serial board download "CP210X Driver"
Is this page helpful?
YesFeedbackMarketing Cooperation
Business Cooperation
Customer Service
Media Inquiry


Click for services and help
Help Center
Consult
(001)844-672-5646
Submit Question