[Property Manager] Access Management
Last Updated on:2023-05-29 05:48:35
Access Type
Currently, SaaS web portal supports 5 types of access types, namely online password, offline password, dynamic password, online card, and online fingerprint, which also require hardware to support corresponding functions.
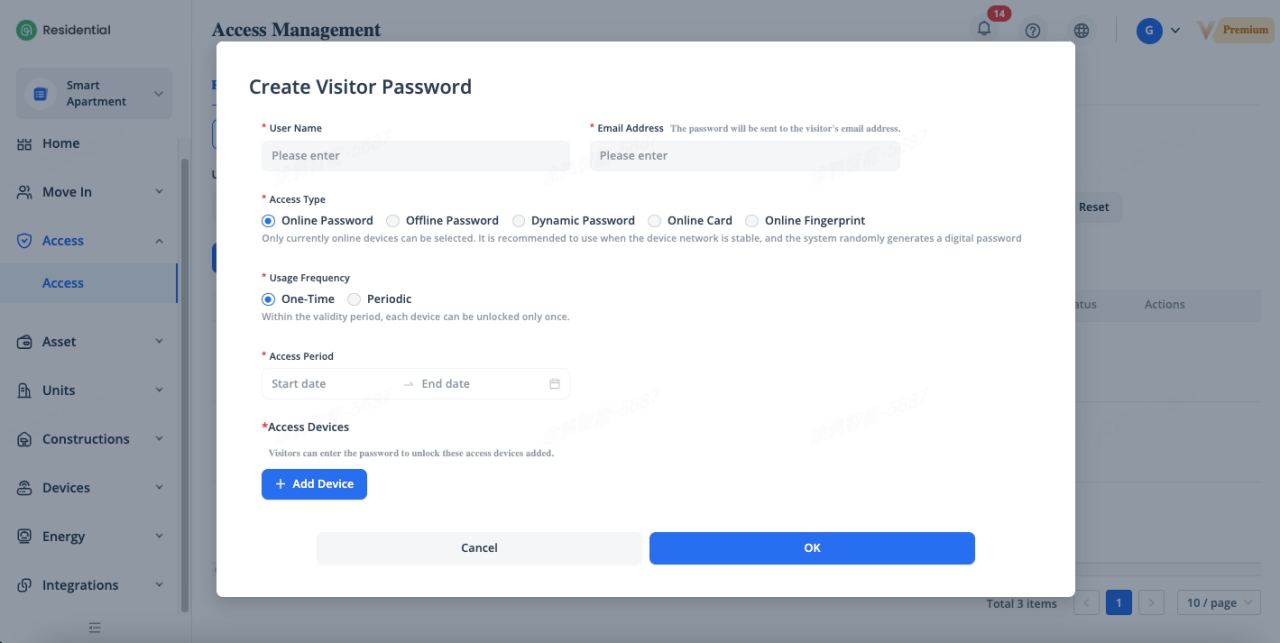
Create Online Password
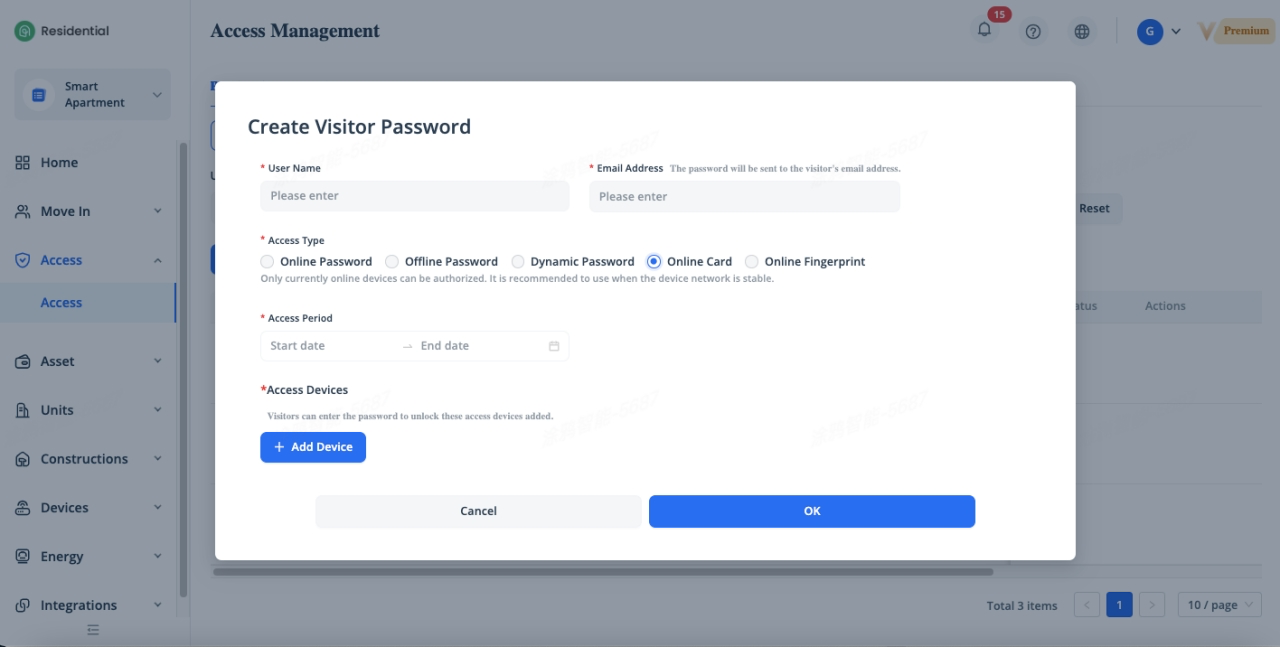
To create a online password, click [Access] - [Access] - [Create Visitor Password], select [Online Password] of “Access Type” in the pop-up window, enter a username and the email address, this email address is onlyused to receive passwords. Two types of passwords are supported: One-Time password and Periodic password. One-time password can be used only once on a single device, except in the case of multiple devices authorized at the same time. Periodic password can be used for a specified period, such as during a specified period on certain days of every week.
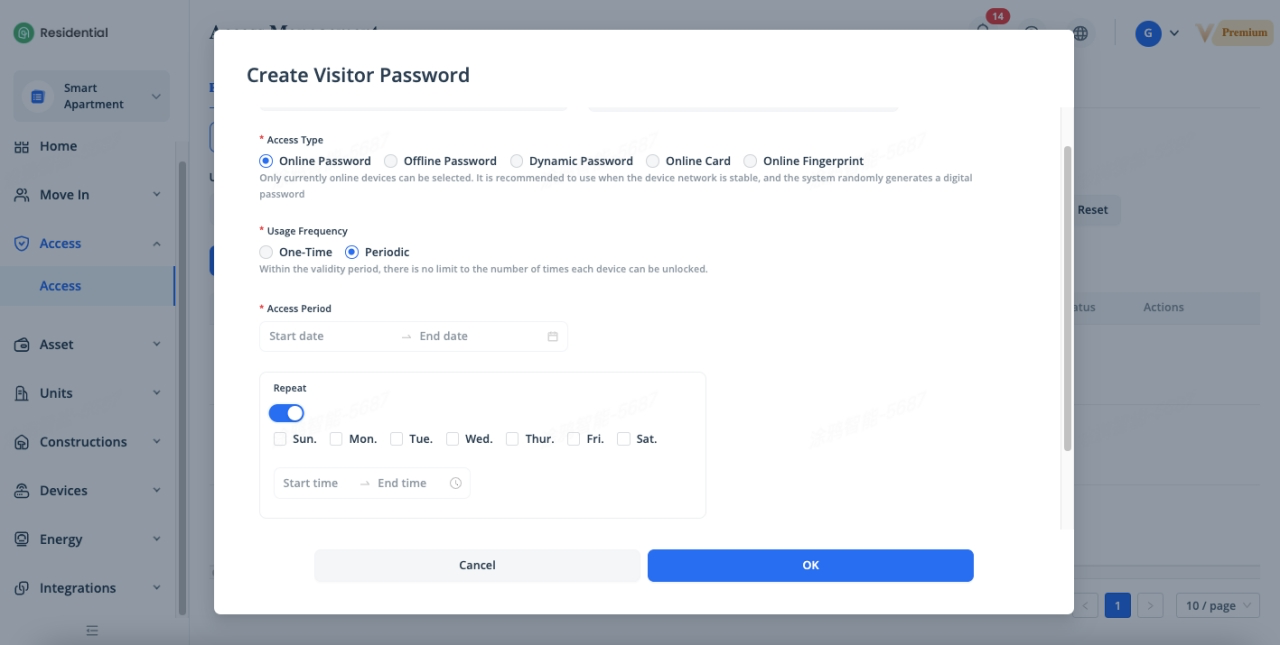
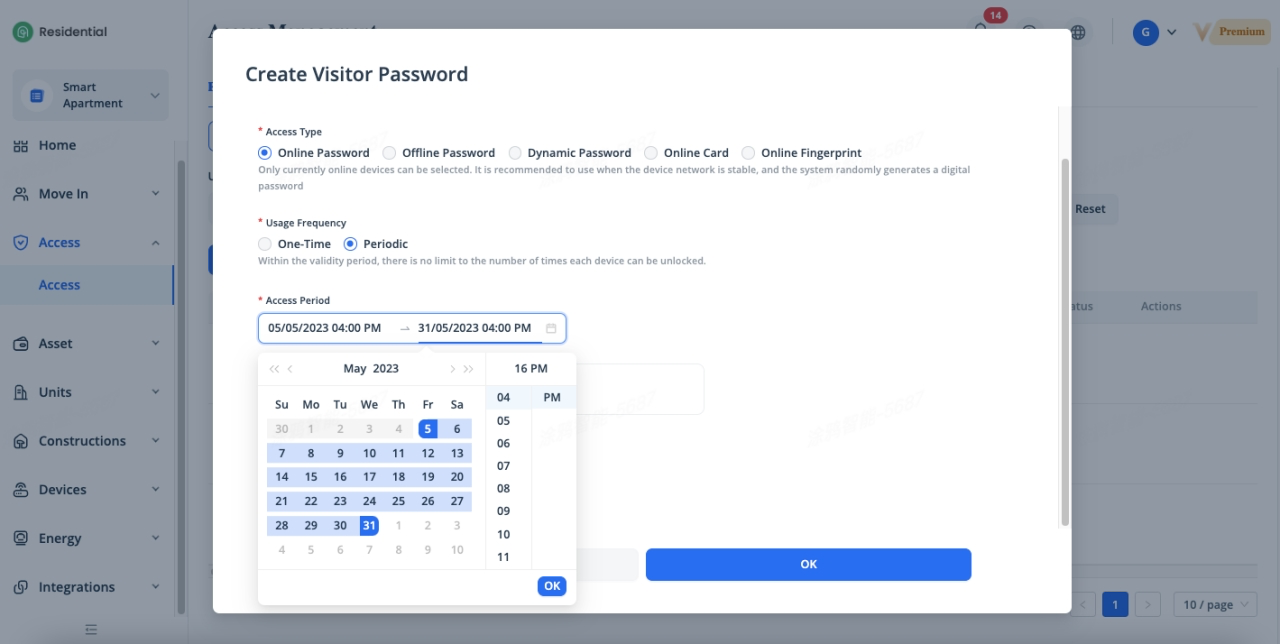
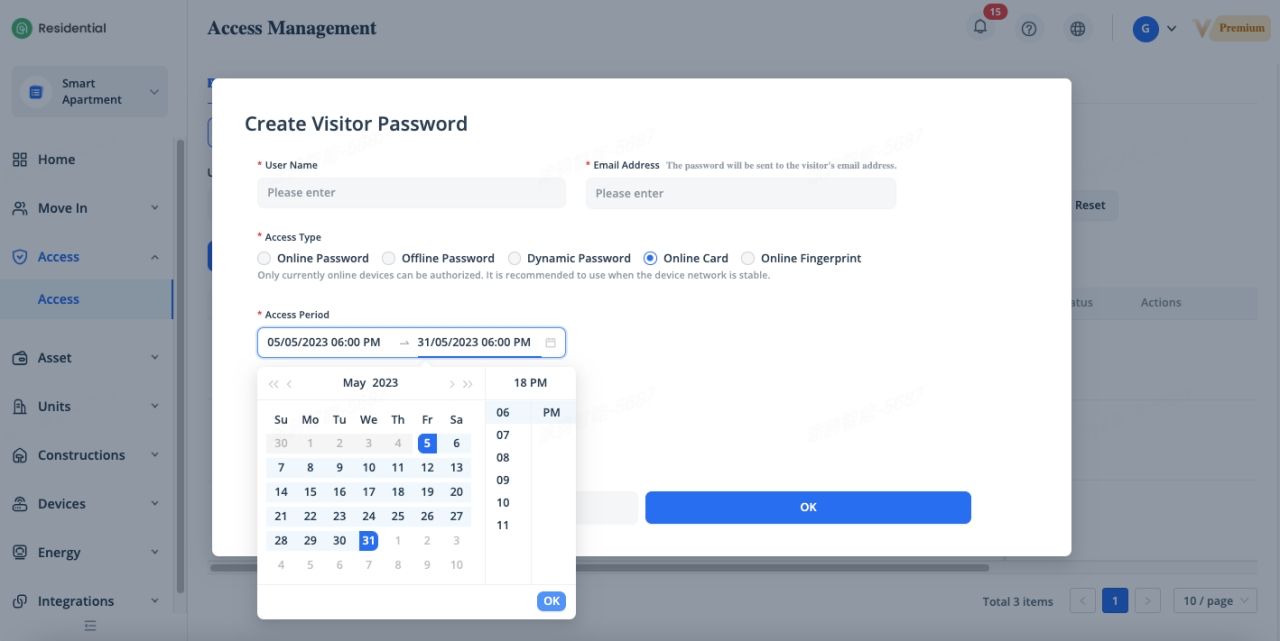
Specify the access period by selecting the start time and end time. You can specify an access period for one-time passwords and periodic passwords, you can also select a future time for the password to take effect, and the password will be in the “To Be Effective” state after it is created. When the effective time arrives, the authorized visitor will receive an email, which notifies that the password has taken effect.
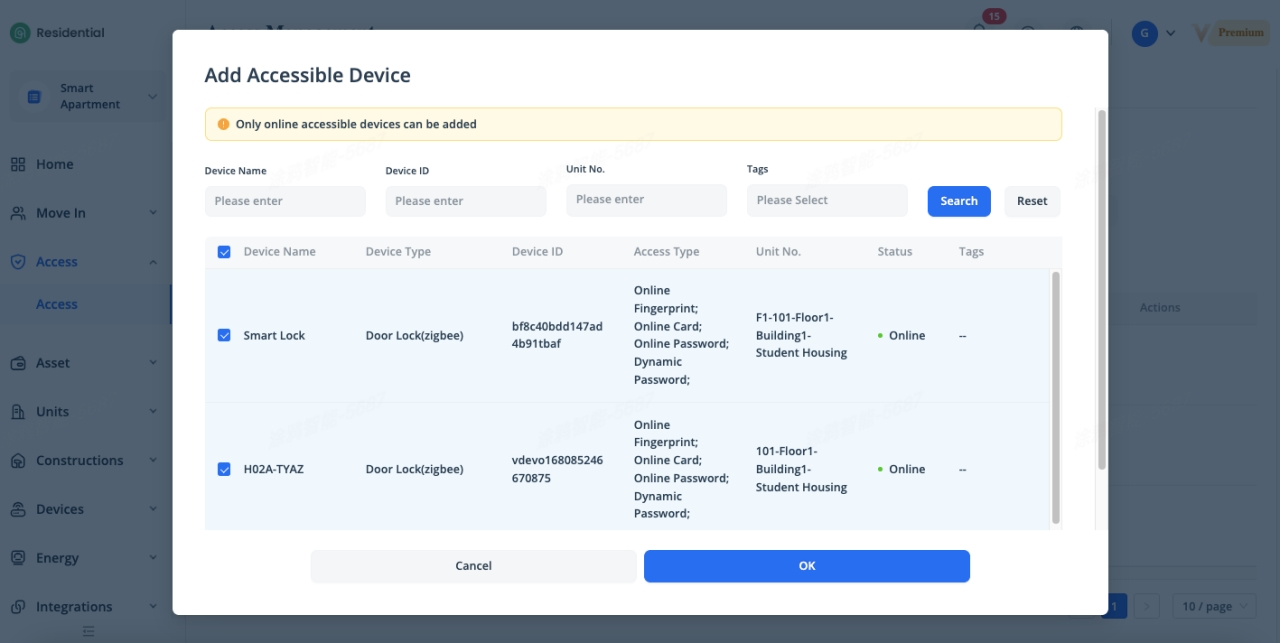
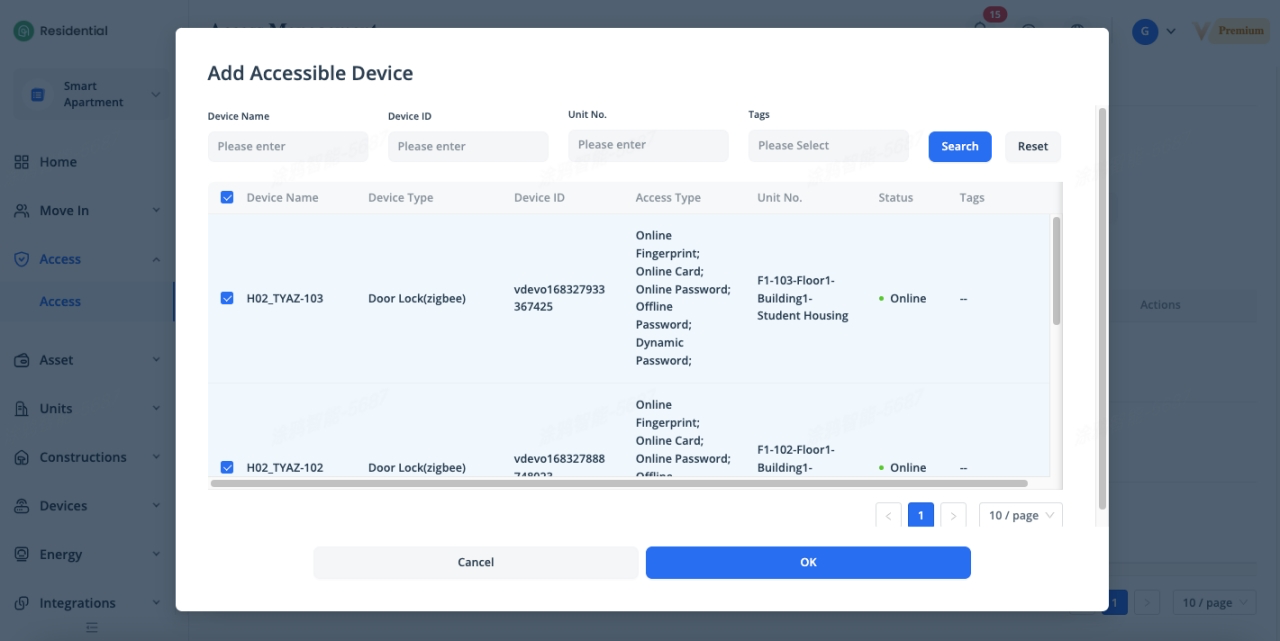
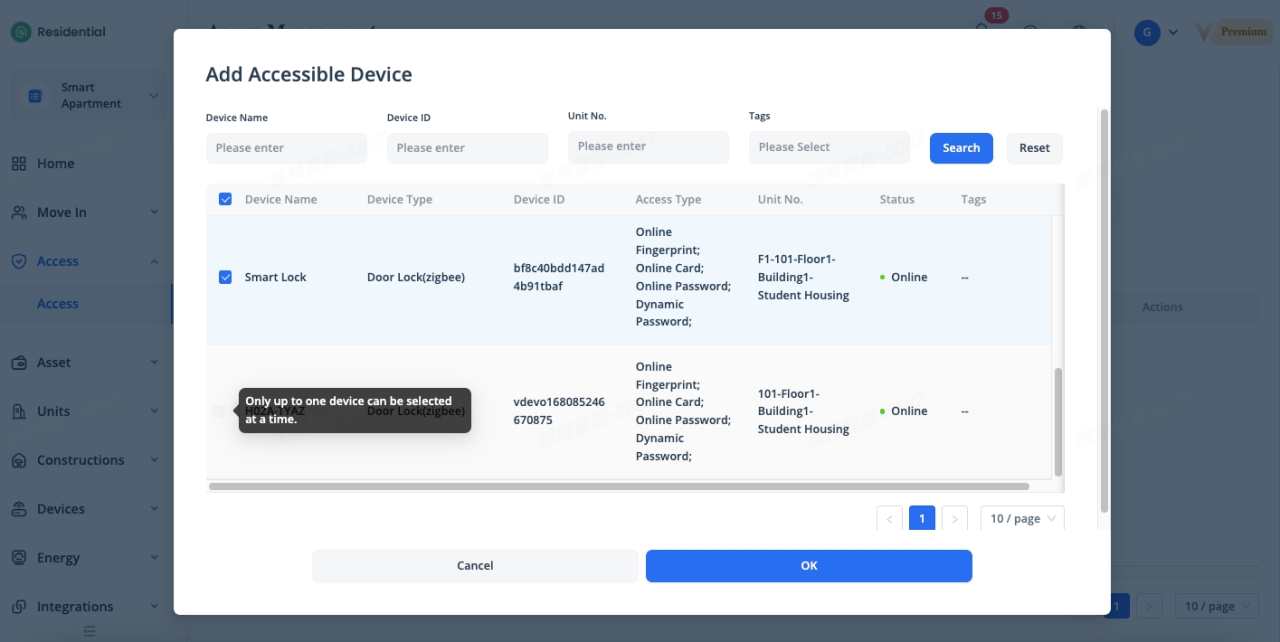
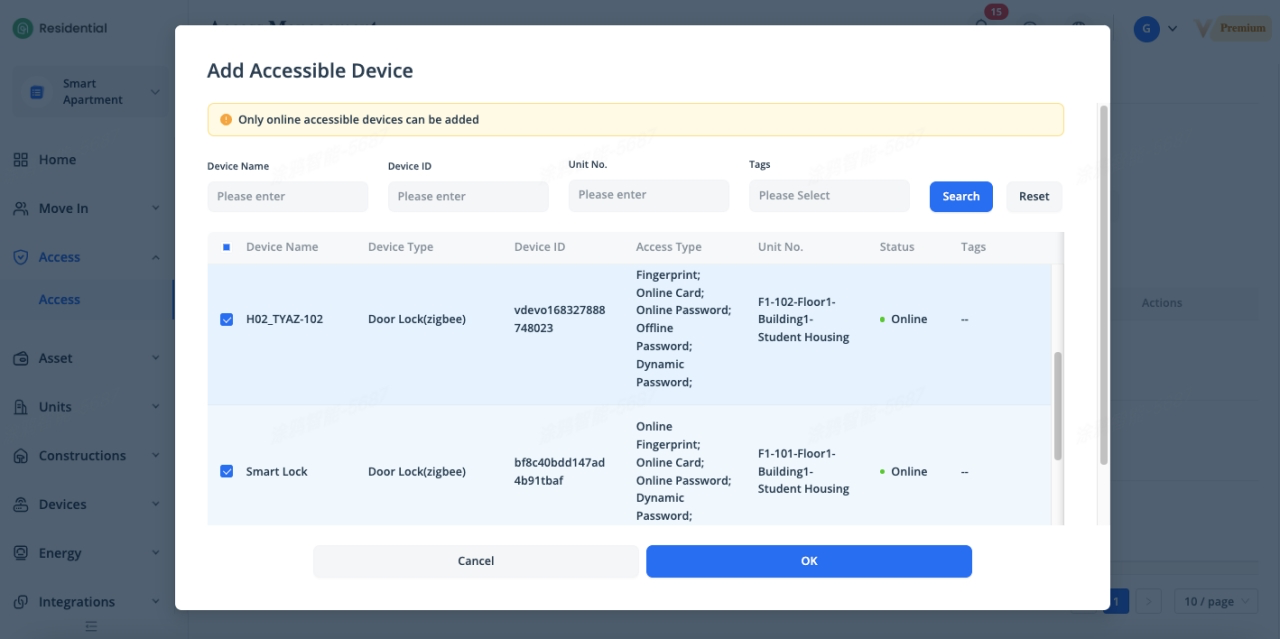
Authorize access devices for visitor. Online password issuing requires proper network connections, therefore, you can only authorize to online devices. To authorize these online devices for a resident, click [Add Device] button, tick the locks which you want to authorize the access to the resident, and the resident can use a same password to access all of these authorized devices. The access types supported by the lock will be displayed under “Access Type”, so make sure the lock supports the corresponding access type before generating it.
Create Offline Password
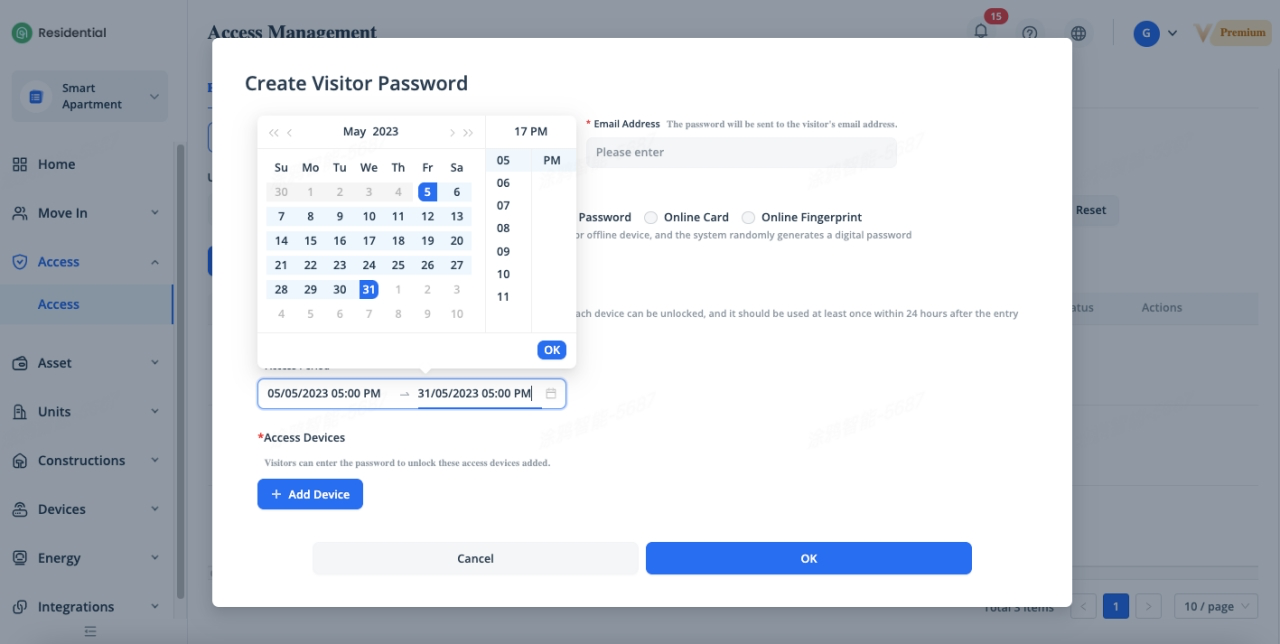
To create a offline password, click [Access] - [Access] - [Create Visitor Password], select [Offline Password] of “Access Type” in the pop-up window, enter a username and the email address, this email address is onlyused to receive passwords. Two types of passwords are supported: One-Time password and Periodic password. One-time password can be used only once during the validity period. Periodic password can be used unlimited times during the validity period.
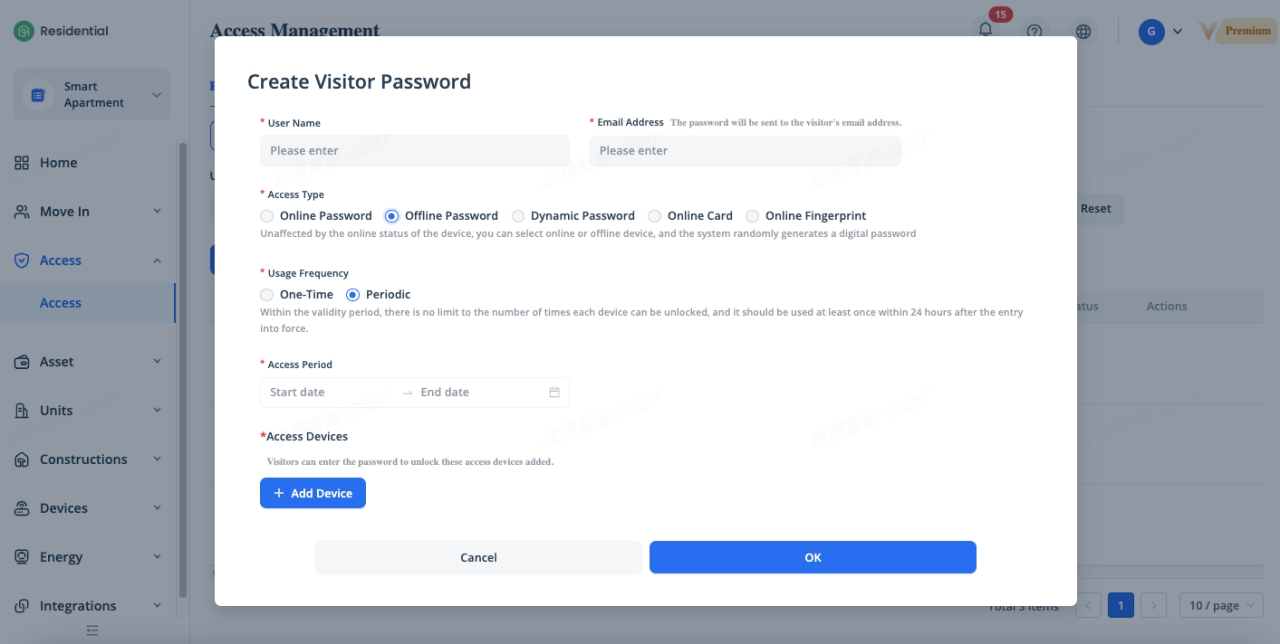
Specify the access period by selecting the start time and end time. You can specify an access period for one-time passwords and periodic passwords, you can also select a future time for the password to take effect, and the password will be in the “To Be Effective” state after it is created. When the effective time arrives, the authorized visitor will receive an email, which notifies that the password has taken effect.
Authorize access devices for visitor. Offline password issuing does not require network connections, therefore, you can authorize to offline devices. To authorize these devices for a resident, click [Add Device] button, tick the locks which you want to authorize the access to the resident, and the resident can use a same password to access all of these authorized devices. The access types supported by the lock will be displayed under “Access Type”, so make sure the lock supports the corresponding access type before generating it.
Create Dynamic Password
To create a dynamic password, click [Access] - [Access] - [Create Visitor Password], select [Dynamic Password] of “Access Type” in the pop-up window, enter a username and the email address, this email address is onlyused to receive passwords. The dynamic password is only valid for 5 minutes.
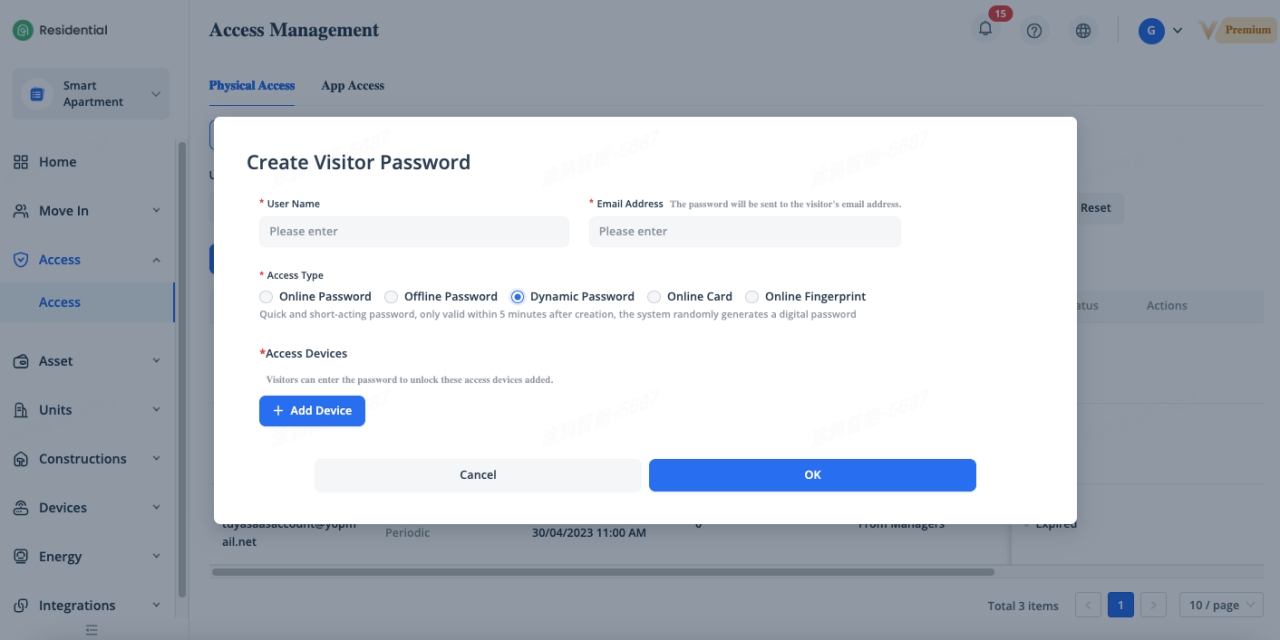
Authorize access devices for visitor. Dynamic password issuing does not require network connections, therefore, you can authorize to an offline device. To authorize an device for a resident, click [Add Device] button, tick the lock which you want to authorize the access to the resident, only up to one device can be selected at a time. The access types supported by the lock will be displayed under “Access Type”, so make sure the lock supports the corresponding access type before generating it.
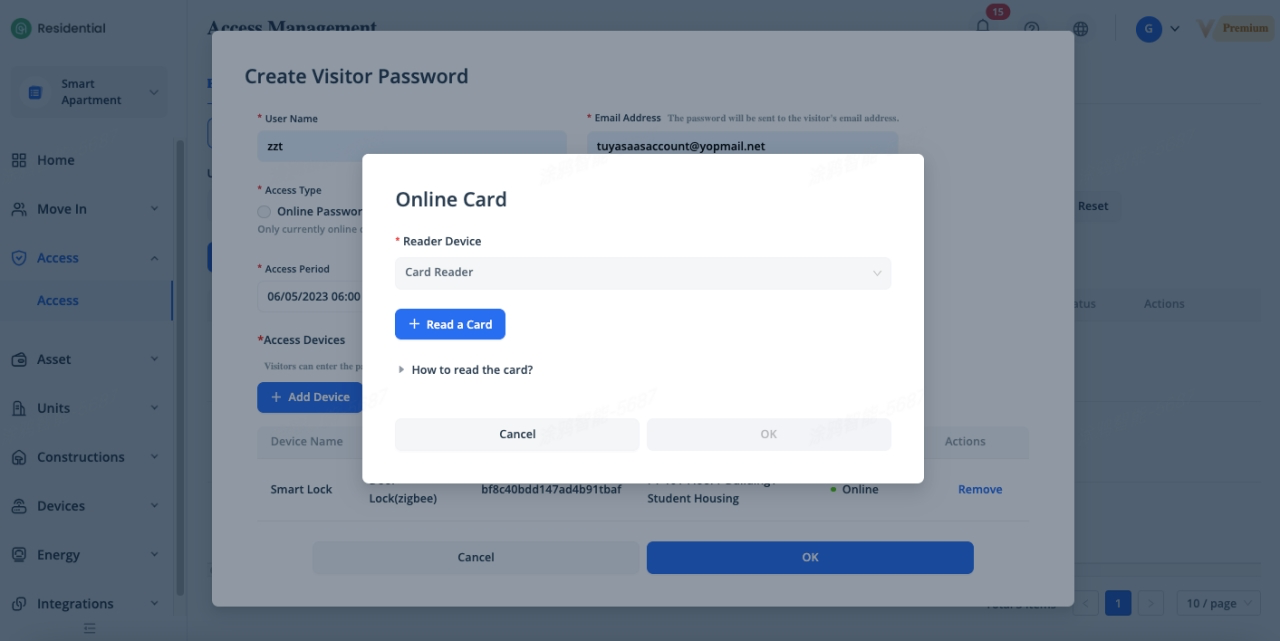
Create Online Card
To create a onlinecard, click [Access] - [Access] - [Create Visitor Password], select [Online Card] of “Access Type” in the pop-up window, enter a username and the email address, this email address is onlyused to receive card information.
Specify the access period by selecting the start time and end time. You can specify an access period for the card, you can also select a future time for the card to take effect, and the card will be in the “To Be Effective” state after it is created. When the effective time arrives, the authorized visitor will receive an email, which notifies that the card has taken effect.
Authorize access devices for visitor. Online card issuing requires proper network connections, therefore, you can only authorize to online devices. To authorize these online devices for a resident, click [Add Device] button, tick the locks which you want to authorize the access to the resident, and the resident can use a same card to access all of these authorized devices. The access types supported by the lock will be displayed under “Access Type”, so make sure the lock supports the corresponding access type before generating it.
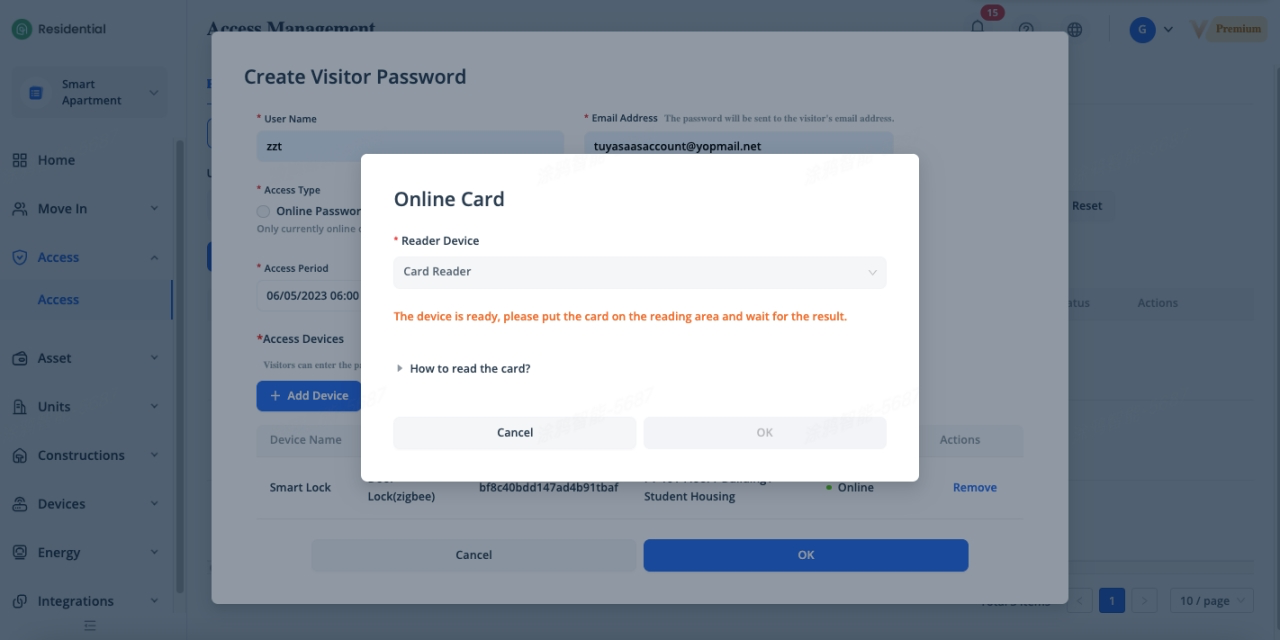
Select the card reader to read the card id and issue to the corresponding locks. Click [Read a Card] button to read a card.
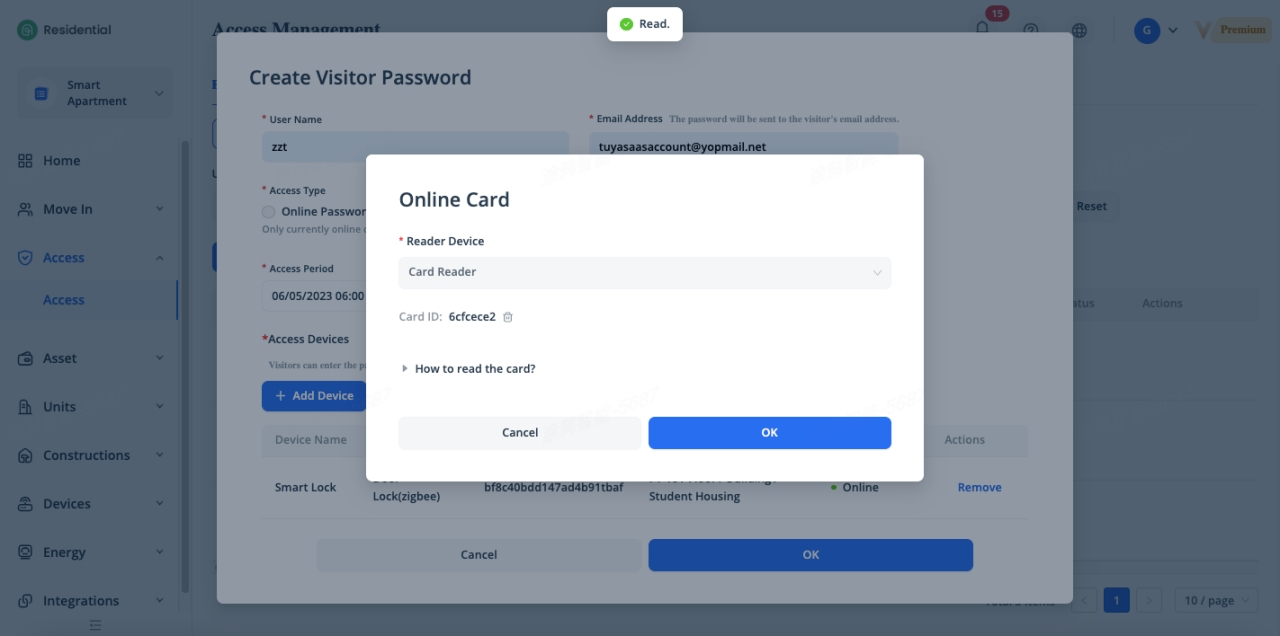
Put the card on the sensing area of card reader, once the card is read, the card id will be displayed, then click [OK] to issue to the locks.
Create Online Fingerprint
To create a onlinefingerprint, click [Access] - [Access] - [Create Visitor Password], select [Online Fingerprint] of “Access Type” in the pop-up window, enter a username and the email address, this email address is onlyused to receive fingerprint access information.
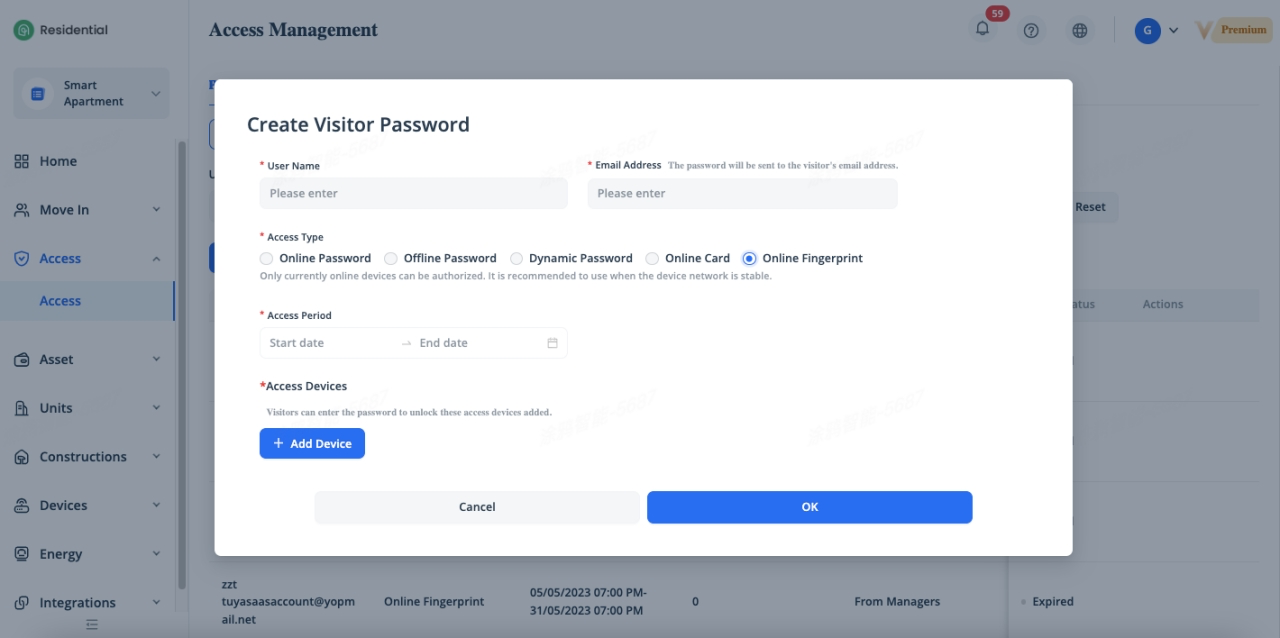
Specify the access period by selecting the start time and end time. You can specify an access period for the fingerprint, you can also select a future time for thefingerprint to take effect, and the fingerprint will be in the “To Be Effective” state after it is created. When the effective time arrives, the authorized visitor will receive an email, which notifies that the fingerprint has taken effect.
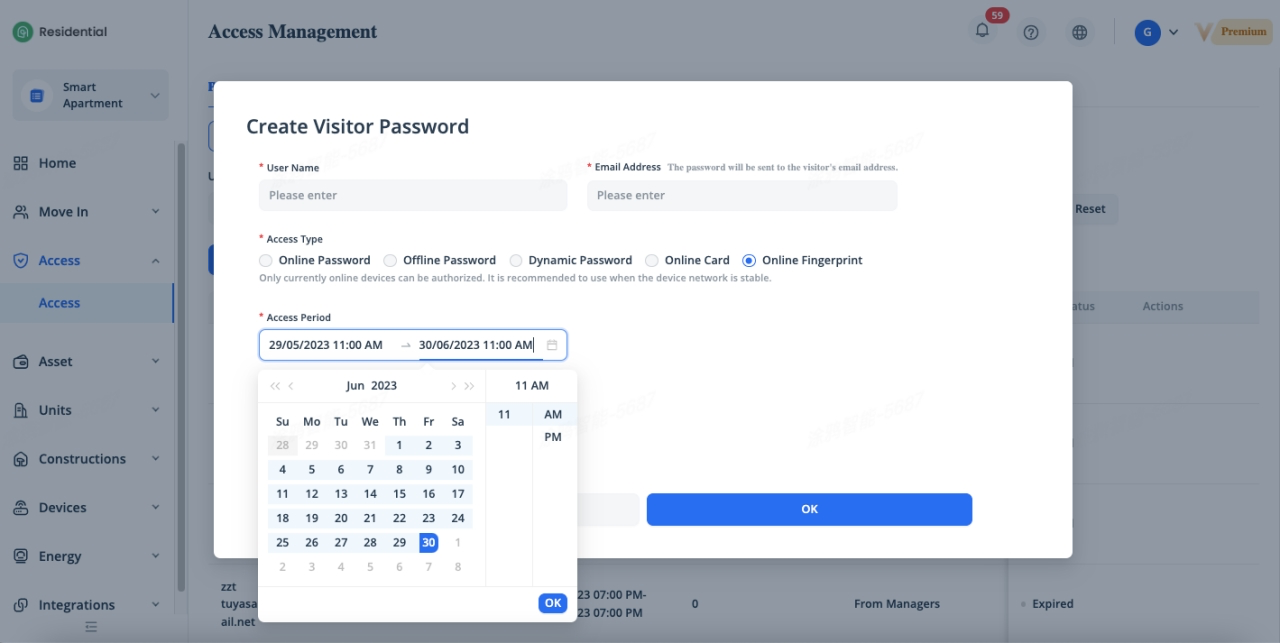
Authorize access devices for visitor. Online fingerprint issuing requires proper network connections, therefore, you can only authorize to online devices. To authorize these online devices for a resident, click [Add Device] button, tick the locks which you want to authorize the access to the resident, and the resident can use a same fingerprint to access all of these authorized devices. The access types supported by the lock will be displayed under “Access Type”, so make sure the lock supports the corresponding access type before generating it.

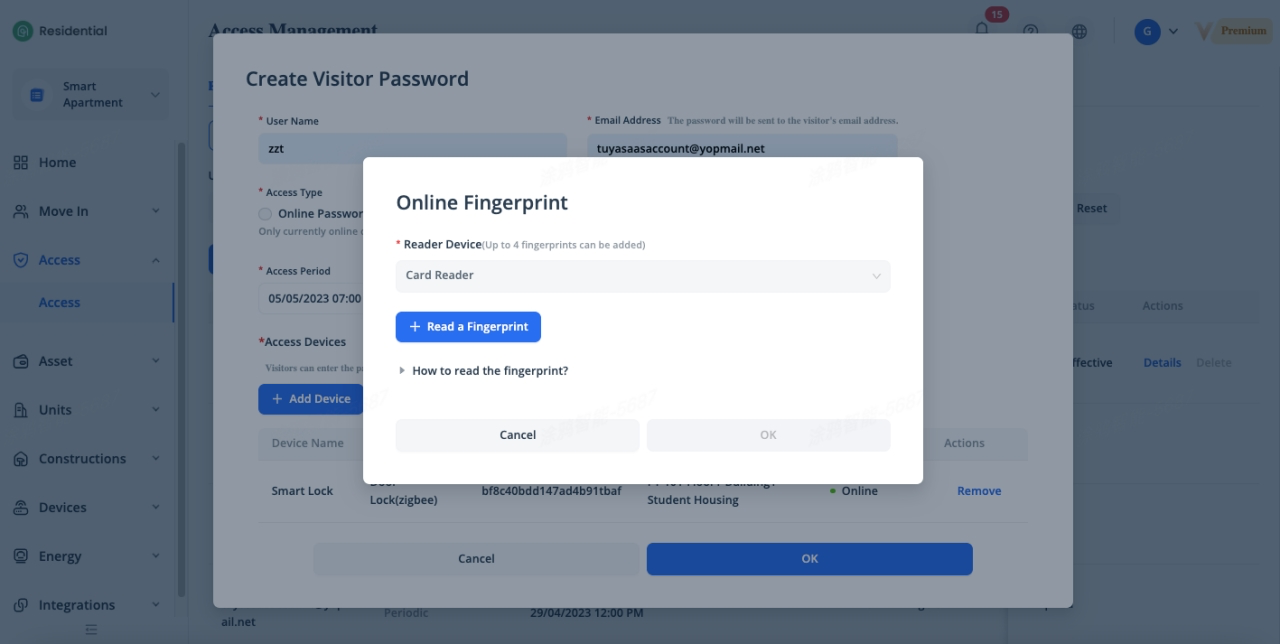
Select the information terminal to collect the fingerprint and issue to the corresponding locks. Click [Read a Fingerprint] button to collect the fingerprint.
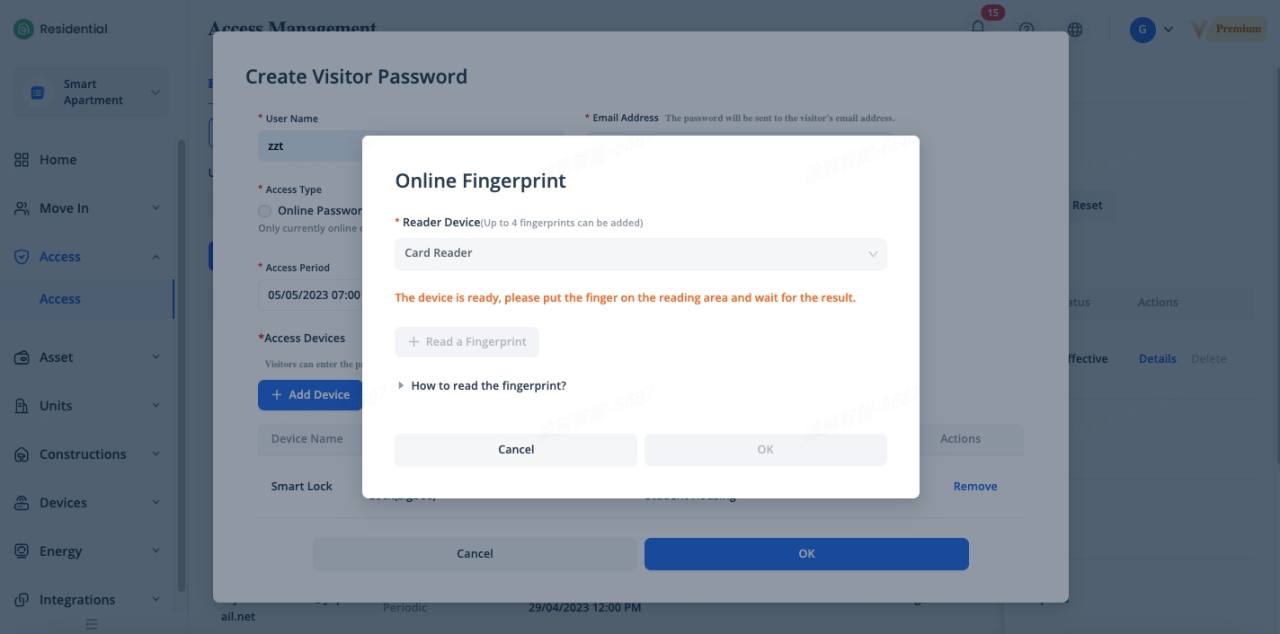
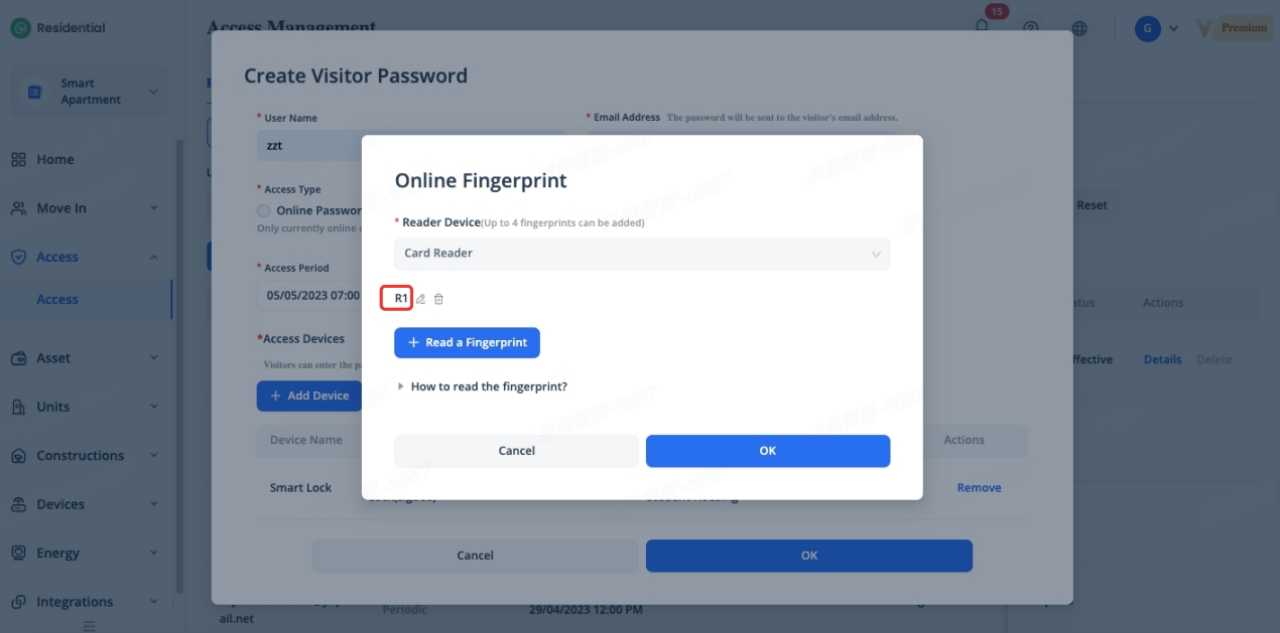
Put your finger on the sensing area of information terminal, once the fingerprint is collected, the fingerprint name will be displayed, then click [OK] to issue to the locks.
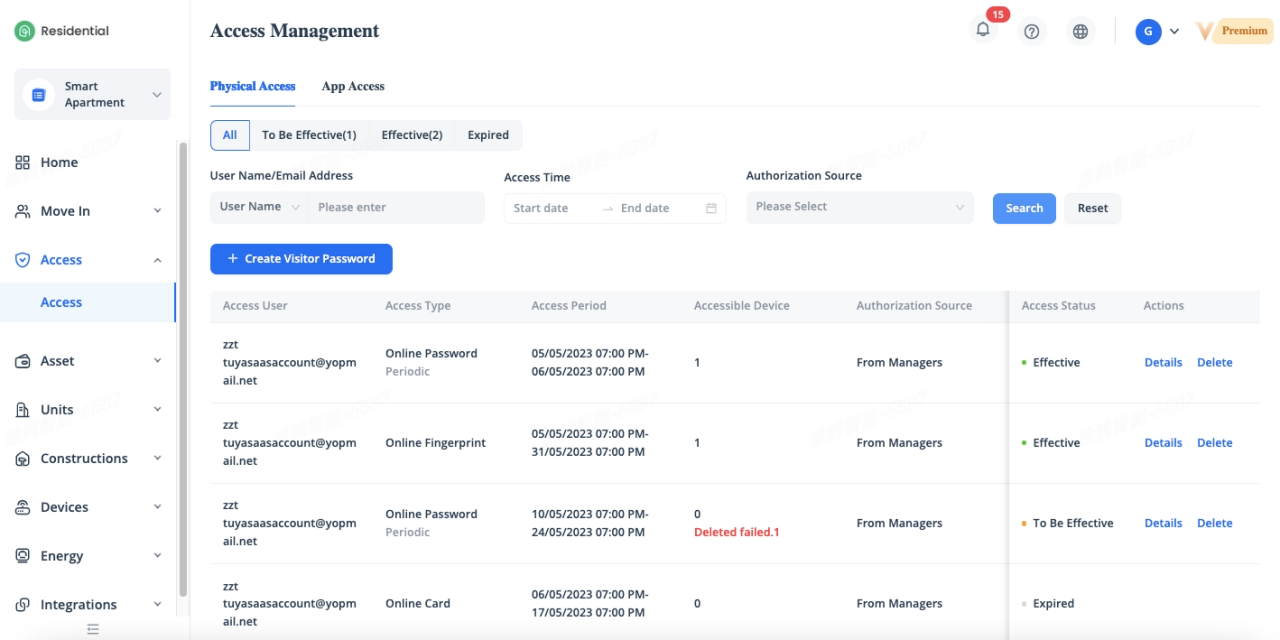
Query Visitor Password Records
The Access page displays all visitor passwords in various states, including To Be Effective, Effective, and Expired. The system counts and displays the numbers of visitors of the first two status. You can click the status to query the corresponding records.
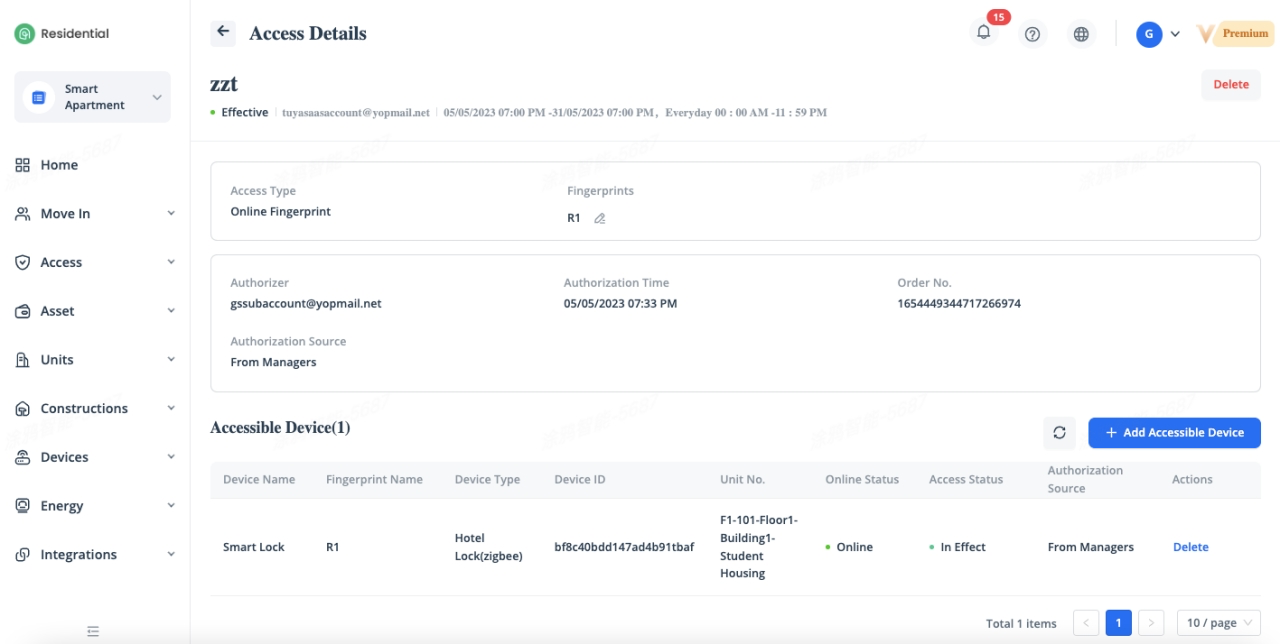
View Visitor Password Details
To view the details of a visitor password, click [Details] ofthe password. You cannot view the details for the expired visitor passwords.
The visitor password details page displays the access period, specific available time, and authorized accessible device list, etc. You can click [Add Access Device] or [Delete] button to add or remove authorized devices.
If visitor password issuing failsdue to device is offline, you can click [Retry] button to re-issue the password again when the device is online.
Related Topics