[Property Manager] Construction Management
Last Updated on:2023-05-29 05:48:51
Create Installer Account
Smart Residential is a commercial scenario, the installation of devices is different from smart home scenario. The manager assign the installation task to the installer and the installer adds the devices through “Smart Construction” App according to the installation template or free to install devices.
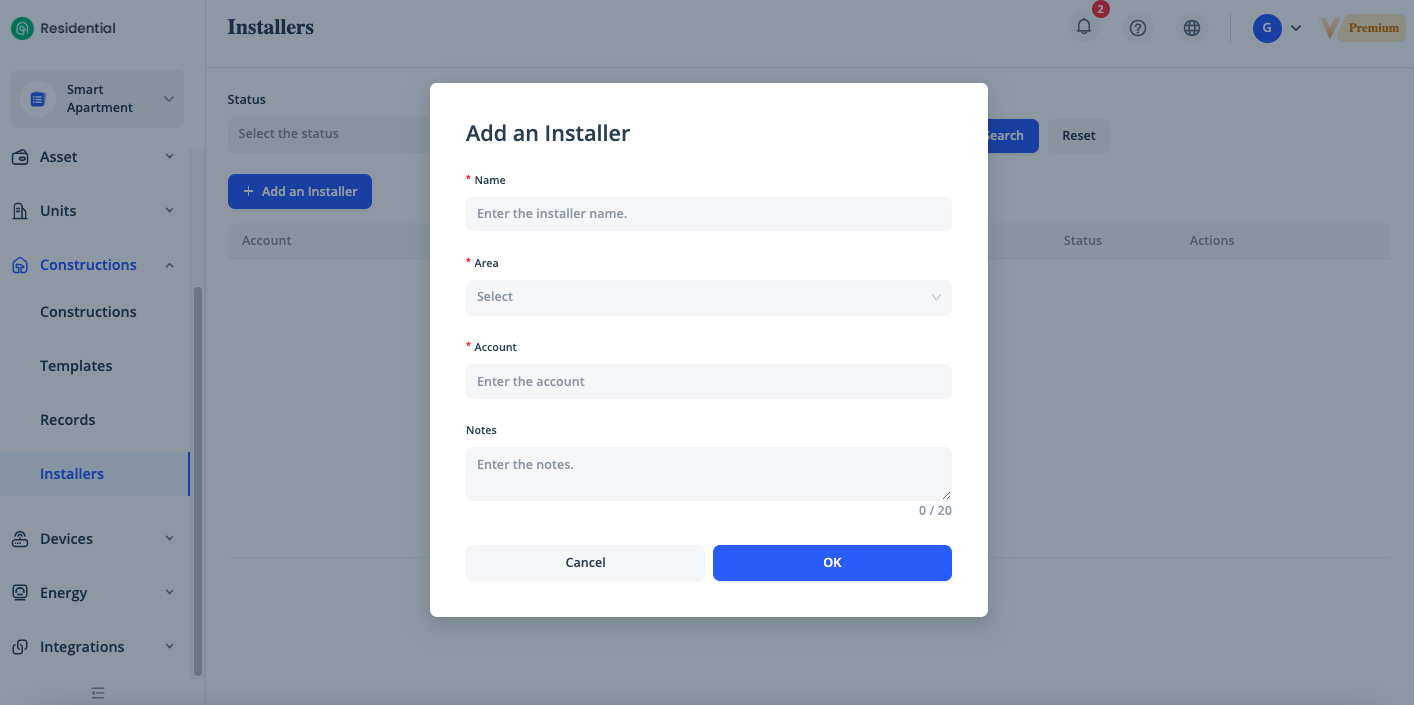
Create a installer account in [Constructions] - [Installers] - [Add an Installer].
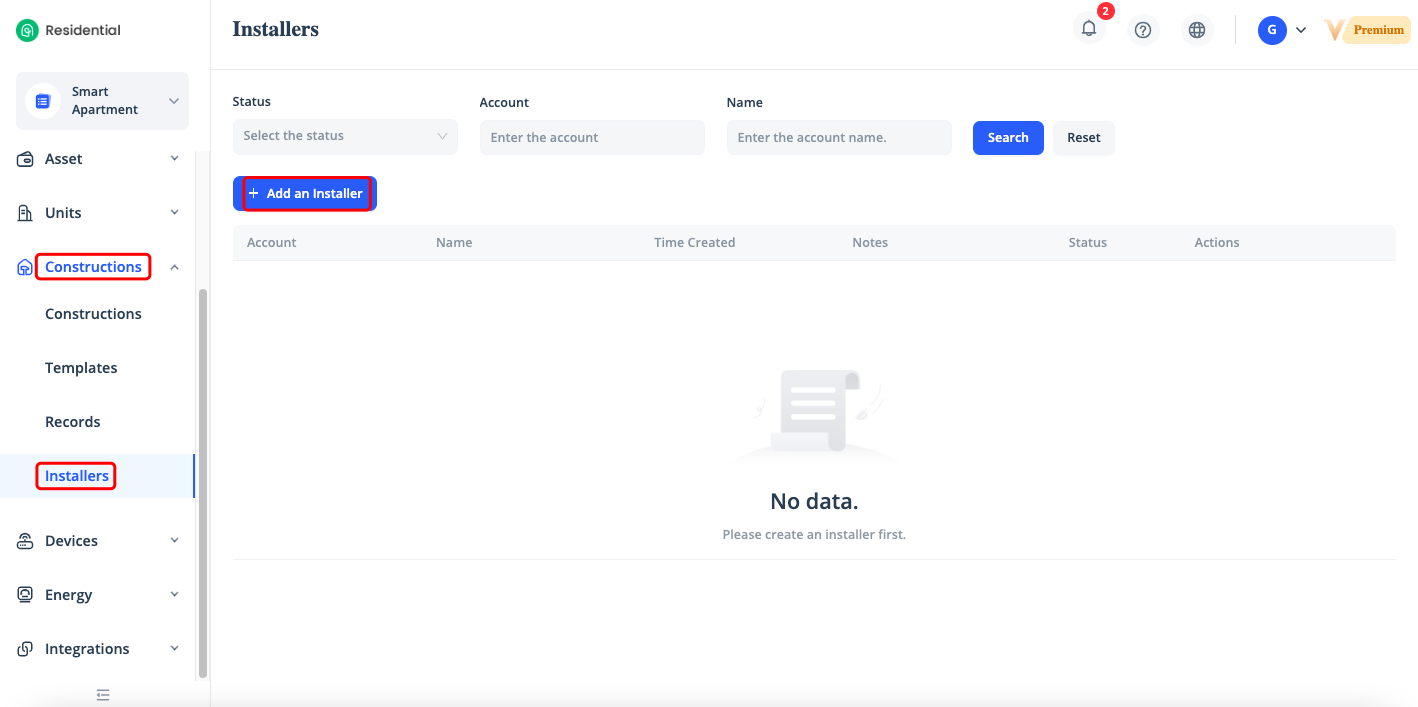
Name, Area, Email Address are required. After the adding is complete, you can log in Smart Construction app with this installer account.
Assign Free Installation Task
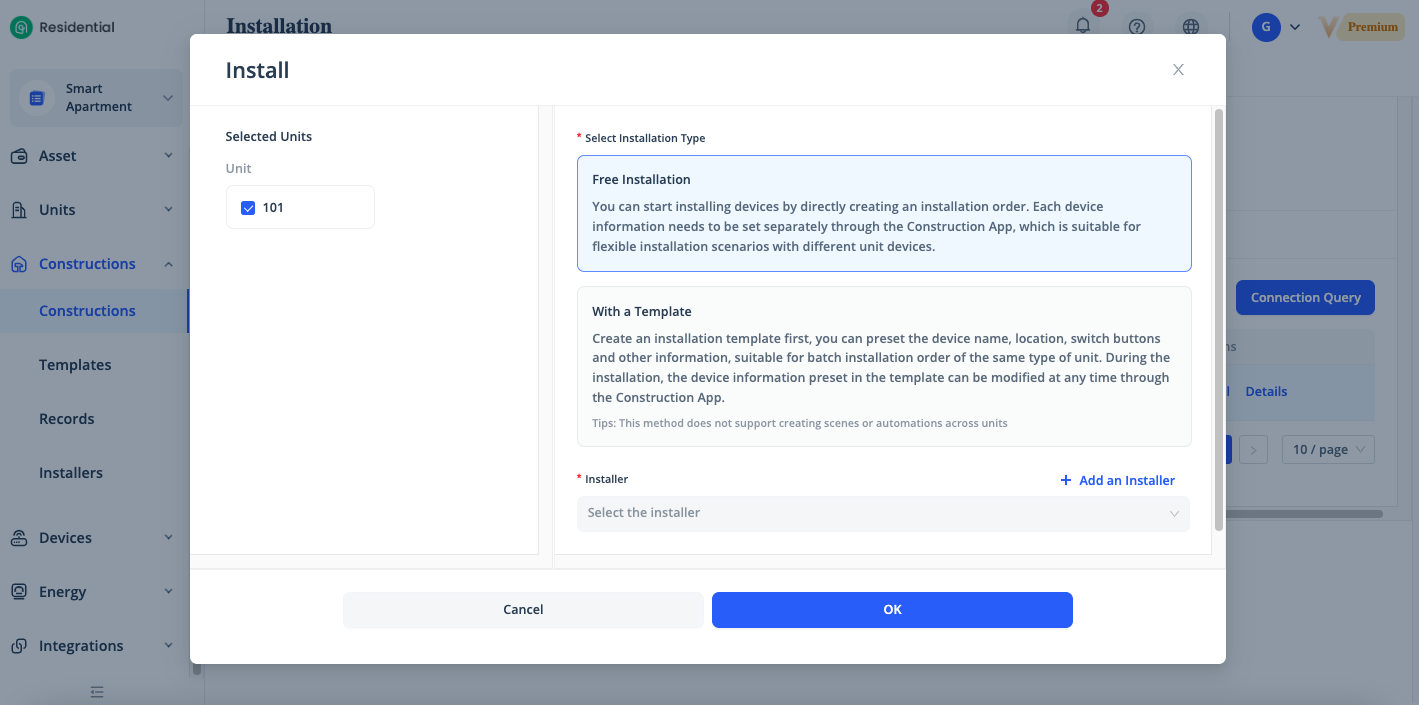
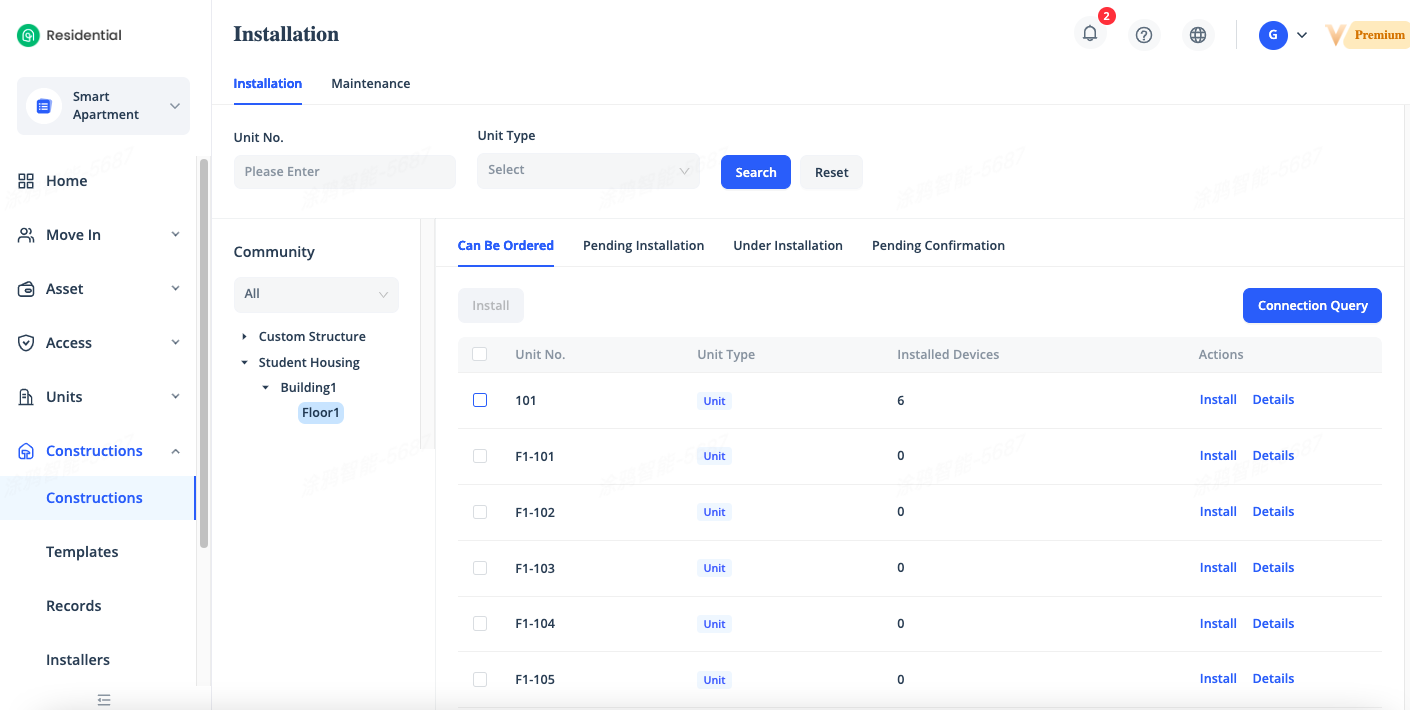
Assign an installation task to the unit in [Constructions] - [Constructions] - [Installation], tick the unit which you want to install the devices in it and click [Install].

Select the installer account which you added in [Installer], and select the Installation Type.
"Free Installation Type" means that you can add any devices in the Smart Construction App directly without template. "With a Template" means that you have to create an installation template in [Constructions] - [Templates] first, you can preset the device name, location, switch buttons and other information in advanced, it's suitable for batch installation order of the same type of unit but the installation needs to be done strictly according to the template.
We recommended to choose Free Installation Type. Click [OK] to assign the Free Installation task.
Assign Installation Task with Template
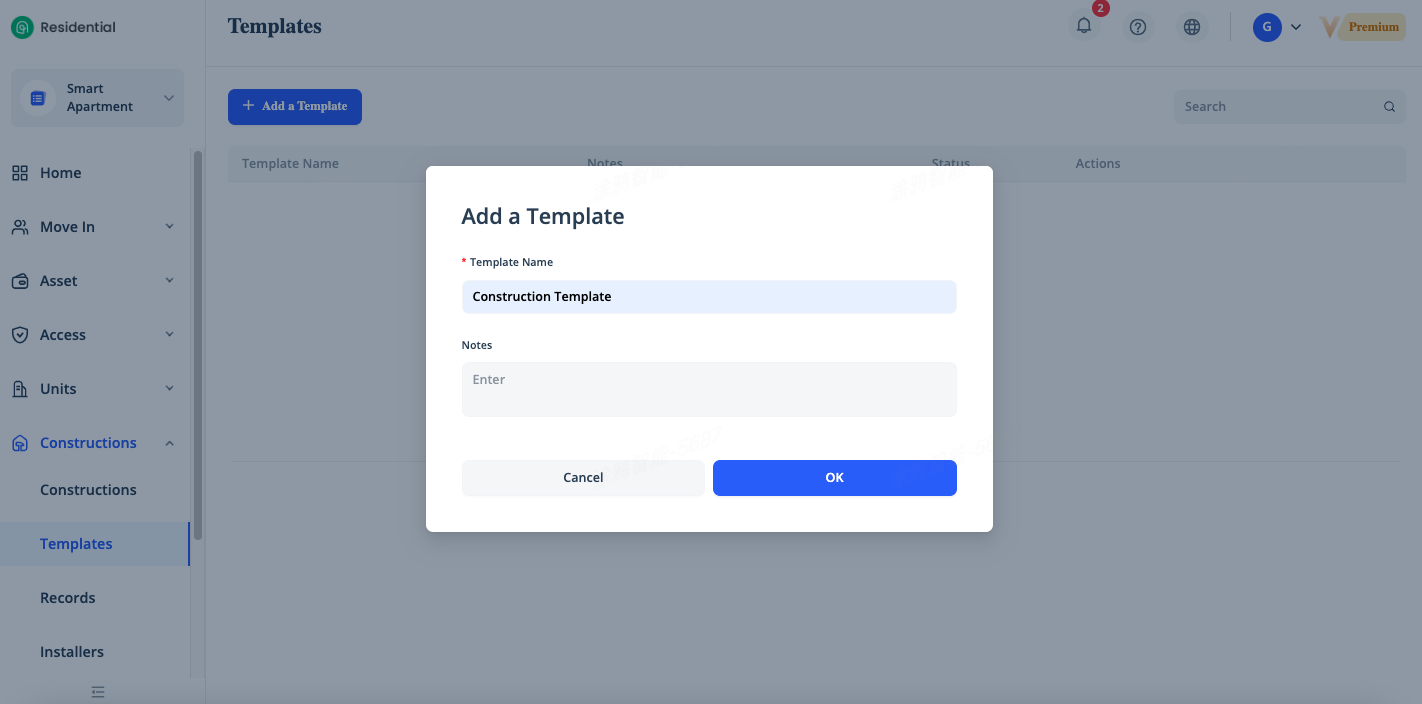
On the [Constructions] page, click [Templates] - [Add a Template], enter the template name and remarks and click [OK].
On the Template Details page, click the [+] icon in the top right corner of the Area Management to create an area. You can create multiple areas at one time.
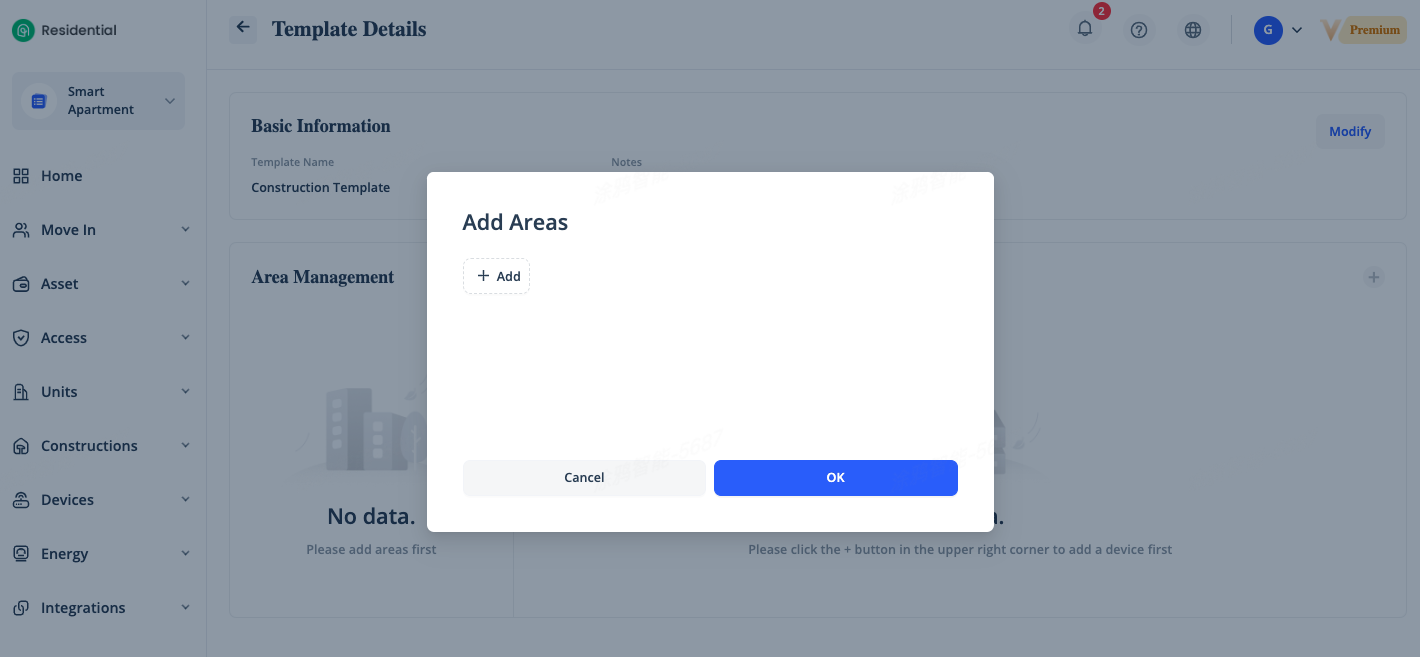
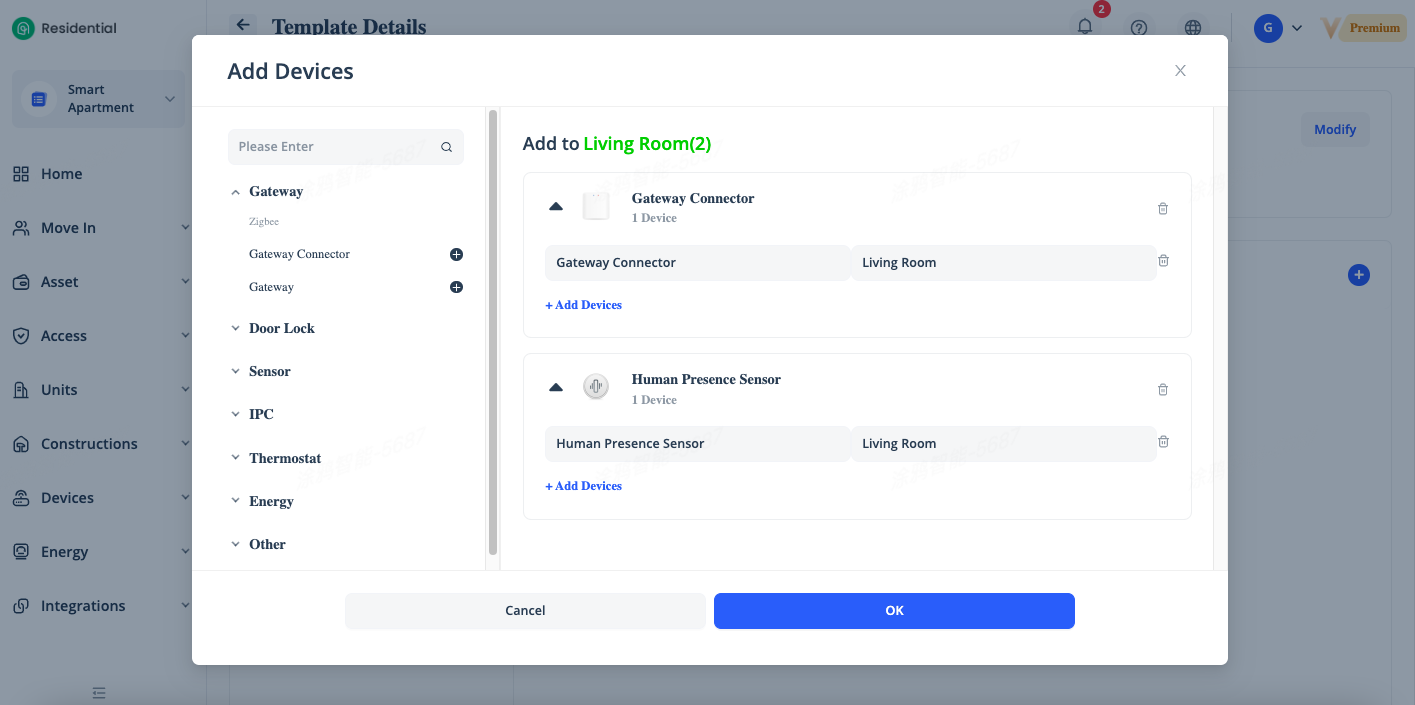
After areas are created, select an area where you want to add devices and click the [+] icon in the top right corner of the [Authorized Device] to add devices by device category. Enter the device name and installation location.
Then, click [OK]. Installation tasks cannot be assigned based on a template without devices.
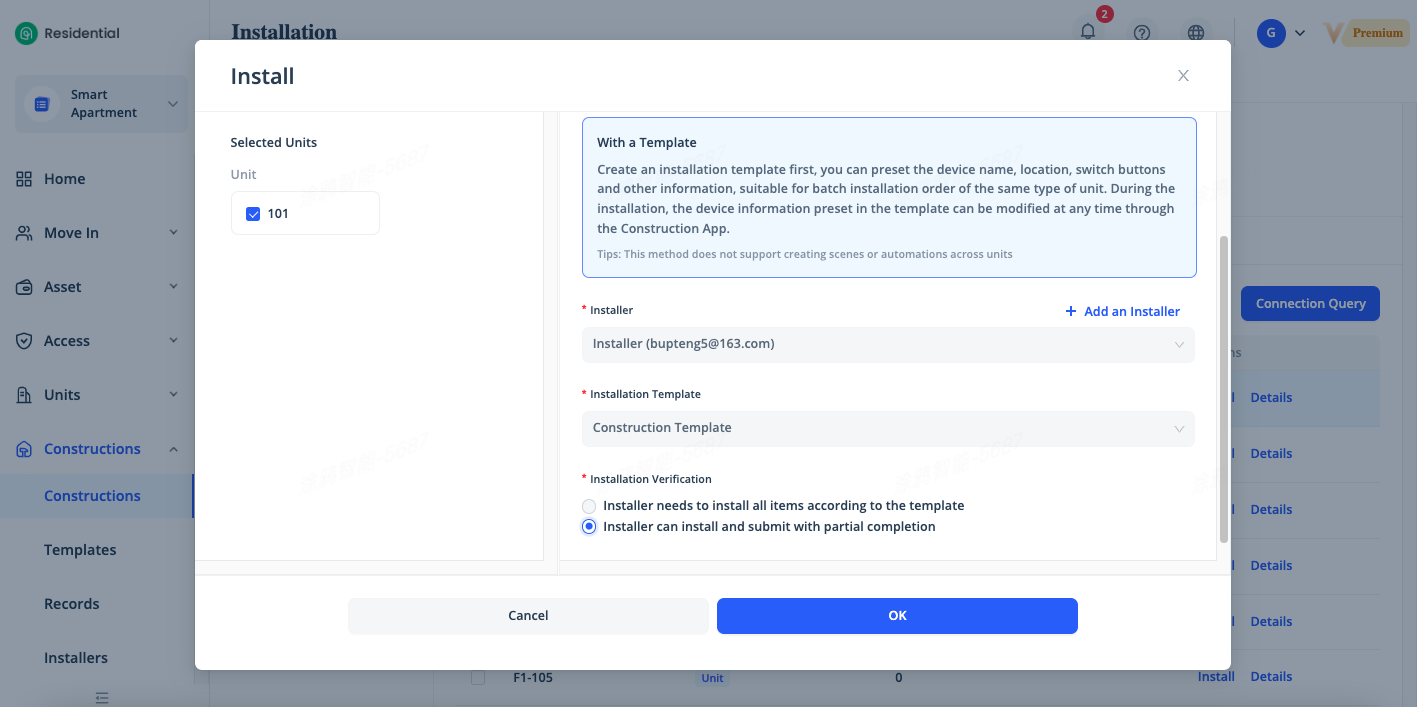
Assign an installation task to the unit in [Constructions] - [Constructions] - [Installation], tick the unit which you want to install the devices in it and click [Install].
Select With a Template of Installation Type, select the installer account which you added in [Installer], and select the template which you created in [Templates], select the Installation Verification, “Installer needs to install all items according to the template“ means that the installation needs to be done strictly according to the template, otherwise the installer can’t submit the task on their Construction App when the work is done. We recommended to choose “Installer can install and submit with partial completion” for most scenarios that the installation task doesn’t need to be done strictly according to the template. Click [OK] to assign the task.
Query Installation Status
Can Be Ordered: The Can Be Ordered tab displays the units and public areas to which you can assign installation tasks. You can click [Install] in the Actions column of a unit or public area to assign an installation task. You can click [Details] in the Actions column of a unit or public area to view the historical installation records.
Pending installation: The tab displays the units and public areas that have received installation tasks and are pending installation.
Under installation: The tab displays the units and public areas under installation. Installers have received the installation tasks for these units and public areas and started installation.
Pending confirmation: The tab displays the units and public areas that have been installed and need to be accepted by managers.
Query Installation Records
On the [Constructions] page, click [Records] - [Installation] to go to the Installation Records page, you can query the historical installation records, including the tickets of installation tasks that are not started, been in progress, and pending acceptance. In the upper part of the Installation Records page, you can view the total number of all installation tickets and the distribution of tickets in each state.
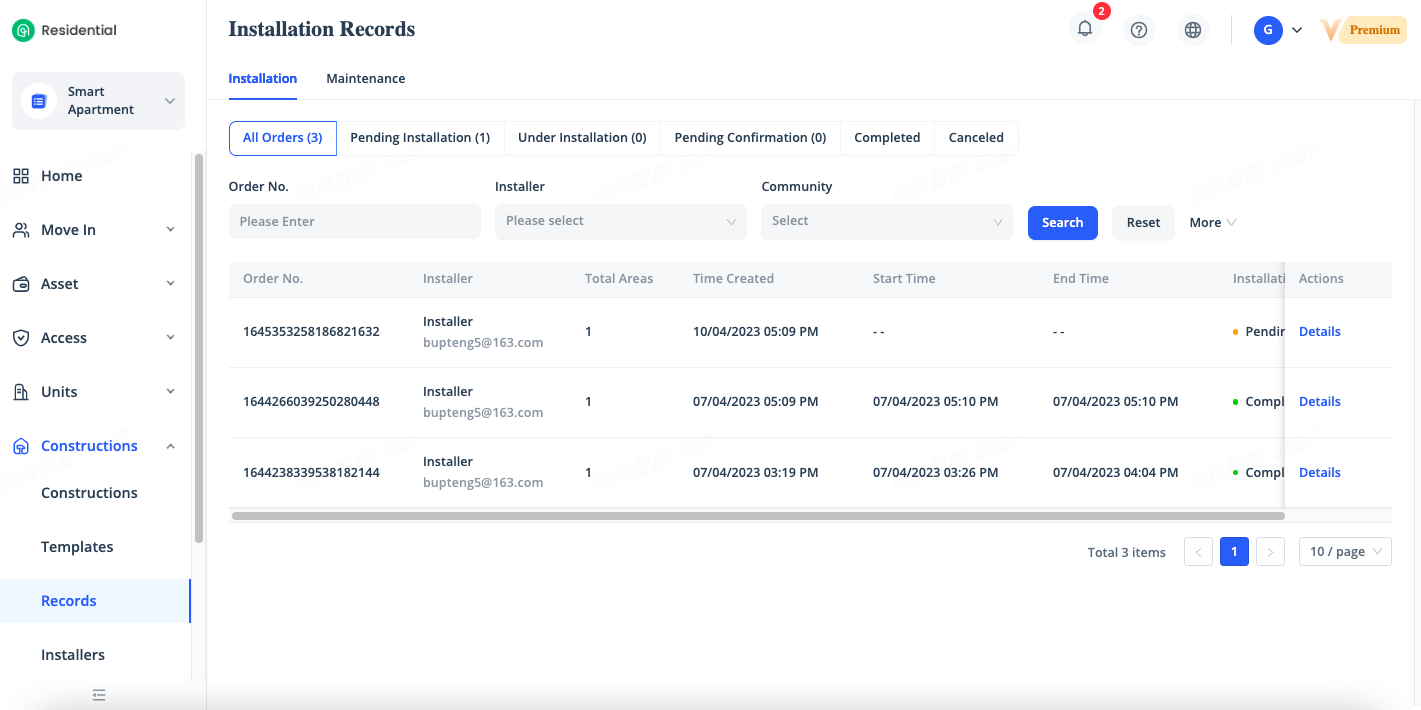
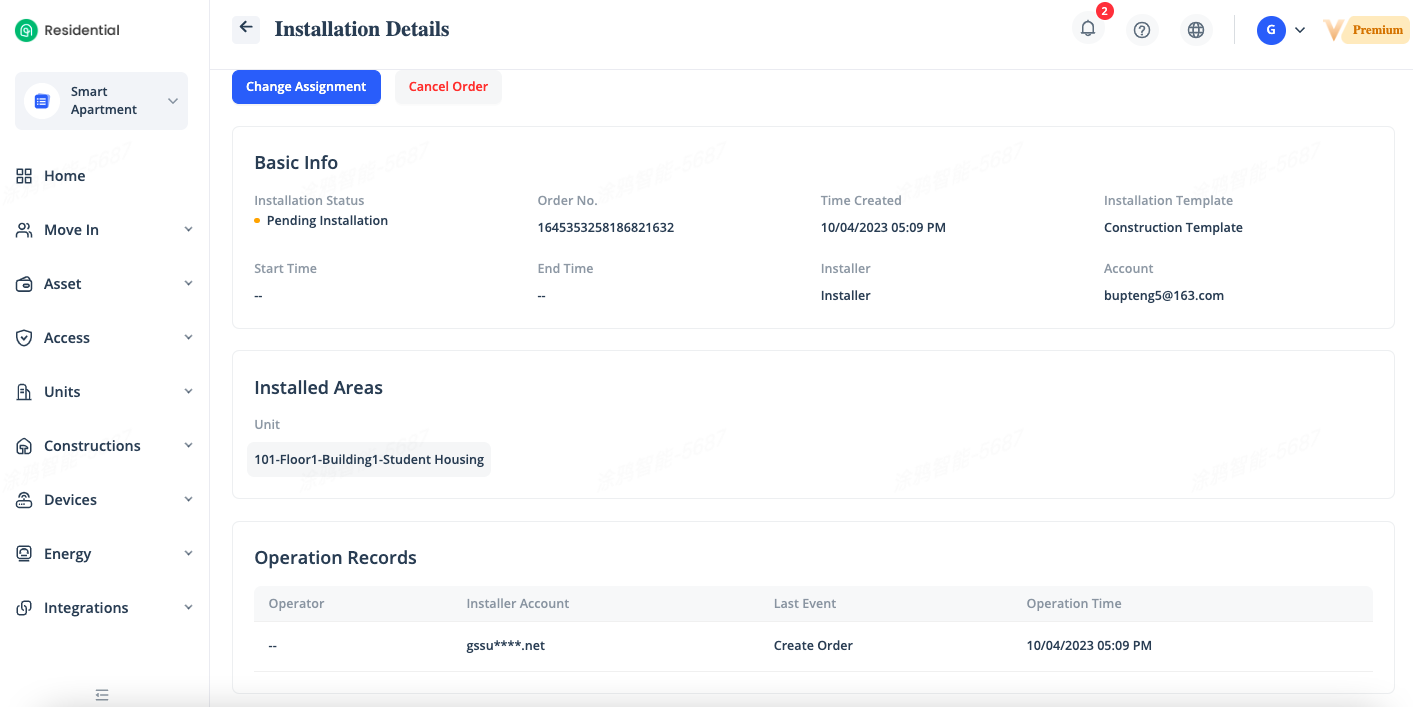
To view the details of an installation ticket, click [Details] in the Actions column of the ticket, you can view the detailed information of the ticket in the page that appears, including the installation start time, installation end time, installer, installation area, and operations records.
Assign a Maintenance Task
Maintenance task can be used to repair or replace faulty devices which already installed, and you also can extra devices for the maintenance task in the Smart Construction App.
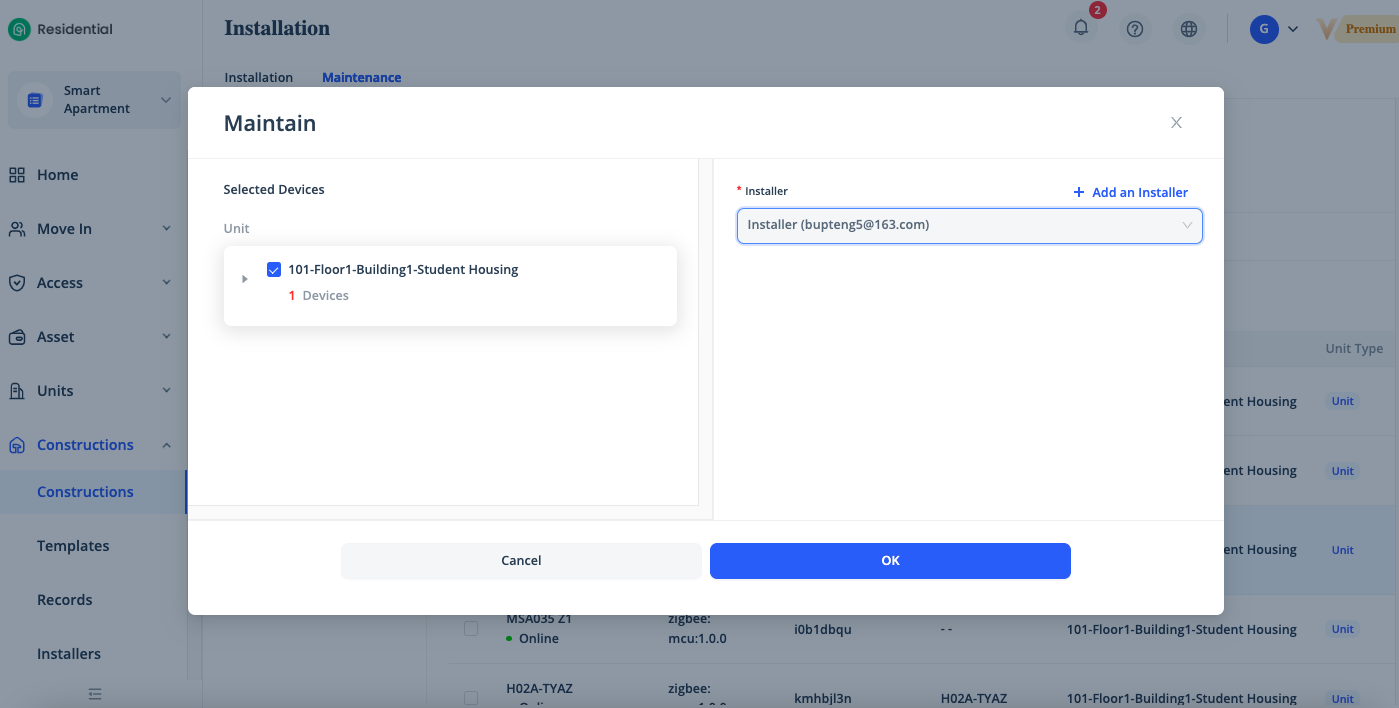
Click [Constructions] - [Constructions] - [Maintenance], tick the faulty devices which you want to repair, if you want to add extra devices through maintenance task, pls tick the gateway and click [Maintain] to assign the task.

Select an installation account under [Installer] and Click [OK] to assign the maintenance task. You can click [Details] for a device to view the historical maintenance records of the device.
Query Maintenance Records
On the [Constructions] page, click [Records] - [Maintenance] to go to the Maintenance Records page, you can query the historical maintenance records, including the tickets of maintenance tasks that are not started, been in progress, and pending acceptance. In the upper part of the Maintenance Records page, you can view the total number of all maintenance tickets and the distribution of tickets in each state.
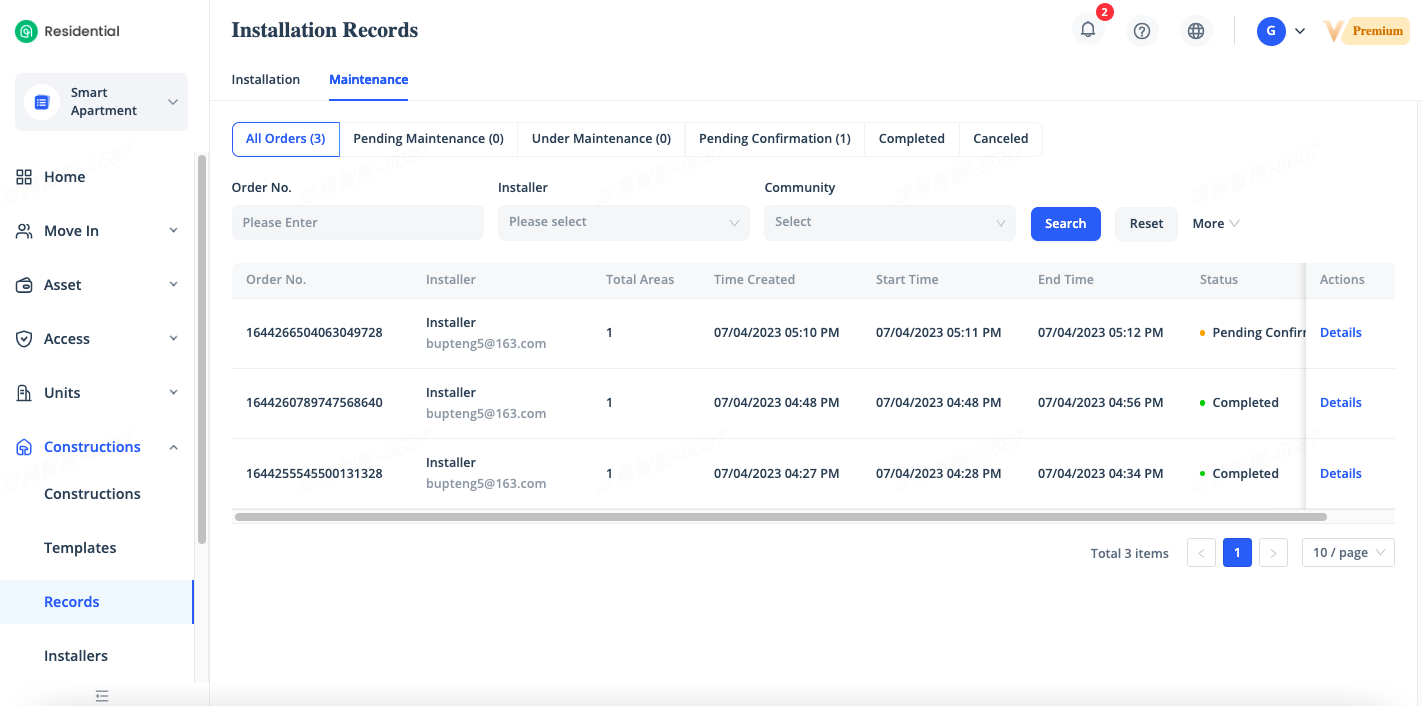
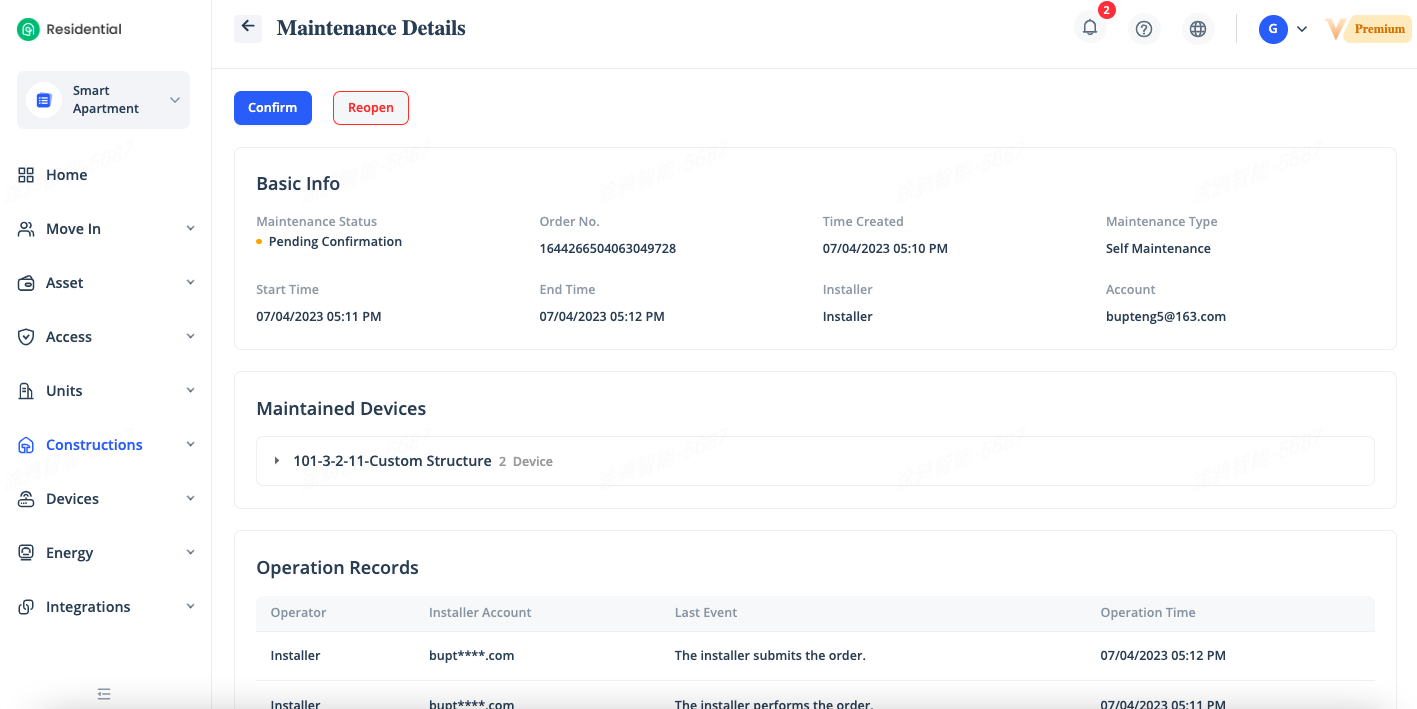
To view the details of an maintenance ticket, click [Details] in the Actions column of the ticket, you can view the detailed information of the ticket in the page that appears, including the maintenance start time, maintenance end time, maintainer, device maintained, and operations records.
Related Topics