
Schedule Setting And Automation Setting
Last Updated on:2021-09-26 09:01:13
Schedule Setting
Go to System Configuration > Schedule Setting. You can view and create schedules on this page.
Note:A created schedule can be edited, deleted, enabled, or disabled.
- Edit: Click Edit in the Operation column to modify the parameters of a schedule, including
- Schedule Name, Schedule, and Object Action.
- Delete: Click Delete in the Operation column to delete a schedule.
- Enable/Disable: Turn on or off this switch to enable or disable a schedule.
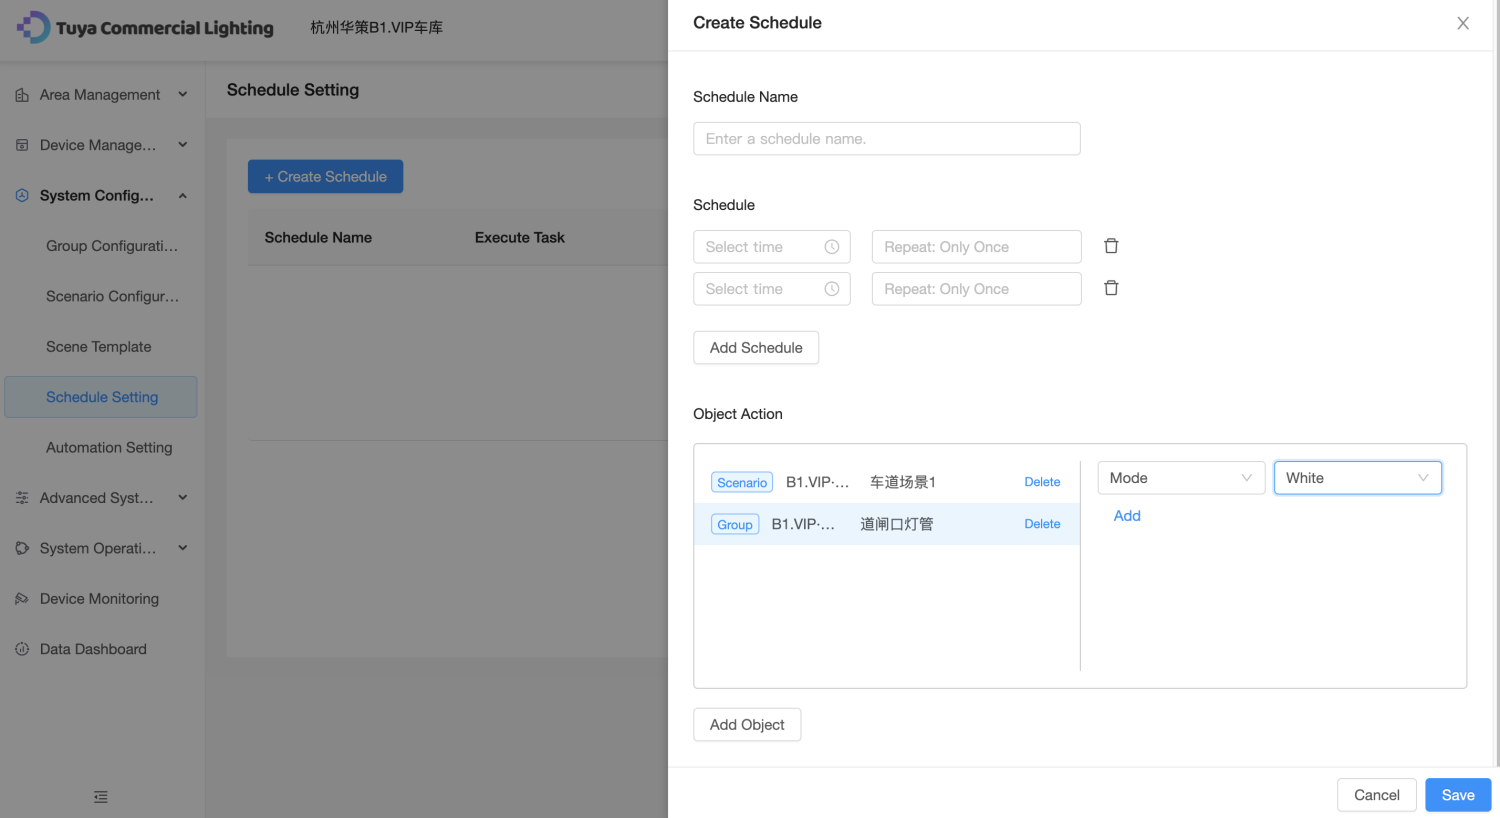
Create Schedule and perform the following
operations:
1. Set Schedule Name.
2. Select the trigger time and trigger cycle respectively, for example, 7:00 and Monday. You
can click Add Schedule to add schedules. If you do not specify the trigger cycle, the
schedule is executed only once by default.
3. Select an object. You can select a scenario, group, device, or an automation rule as the
object. When the object is a device or group, you must configure corresponding actions.
4. Click Save.

Automation Setting
- Note:The created automation rules can be edited, deleted, enabled, or disabled. Edit: Click Edit in the Operation column to modify the parameters of an automation rule,
- including the Automation Name, Condition Information, and Object Action.
- Delete: Click Delete in the Operation column to delete an automation rule.
- Enable/Disable: Turn on or turn off this switch to enable or disable an automation rule.
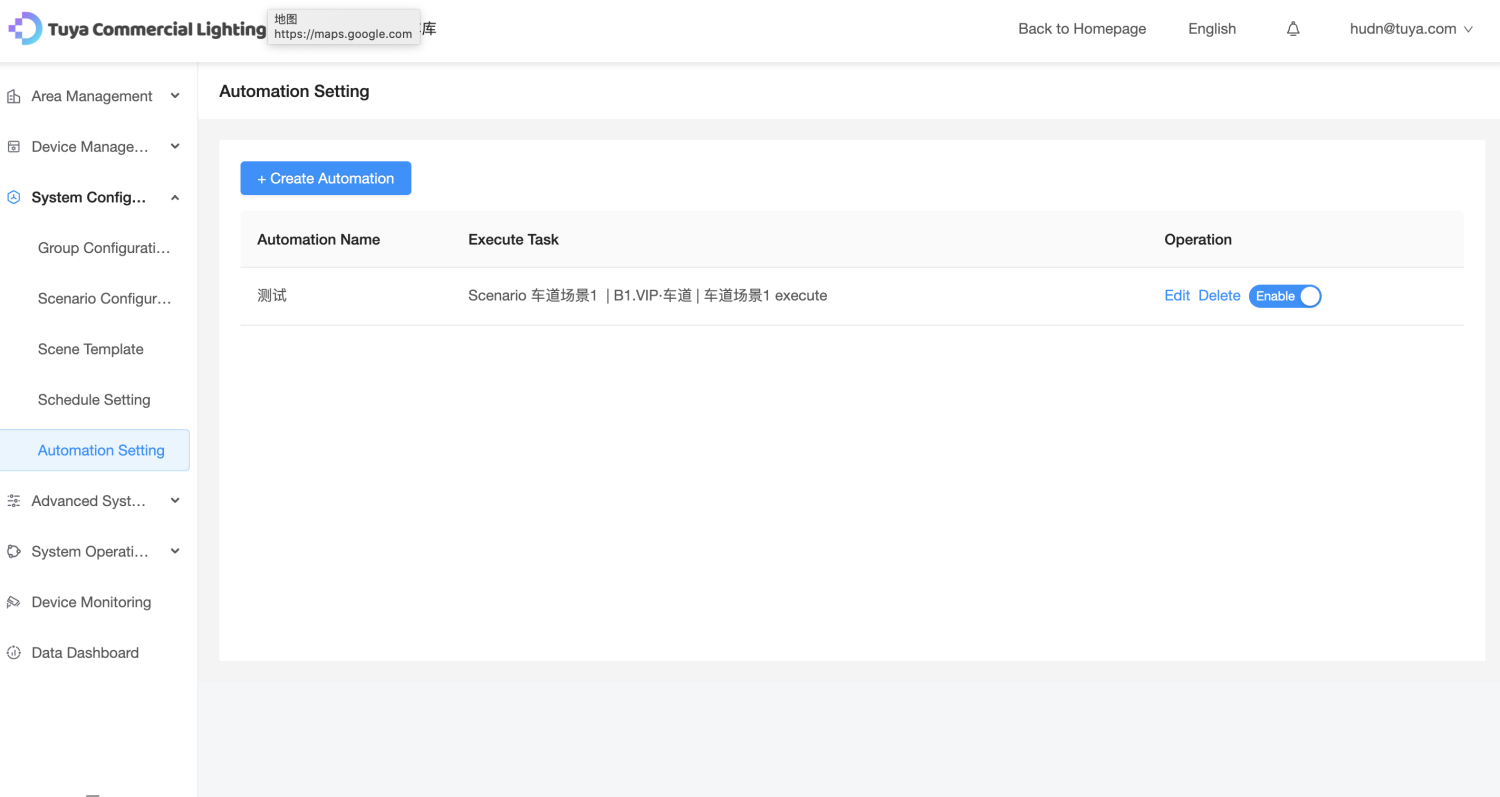
Create Automation and perform the following
operations:
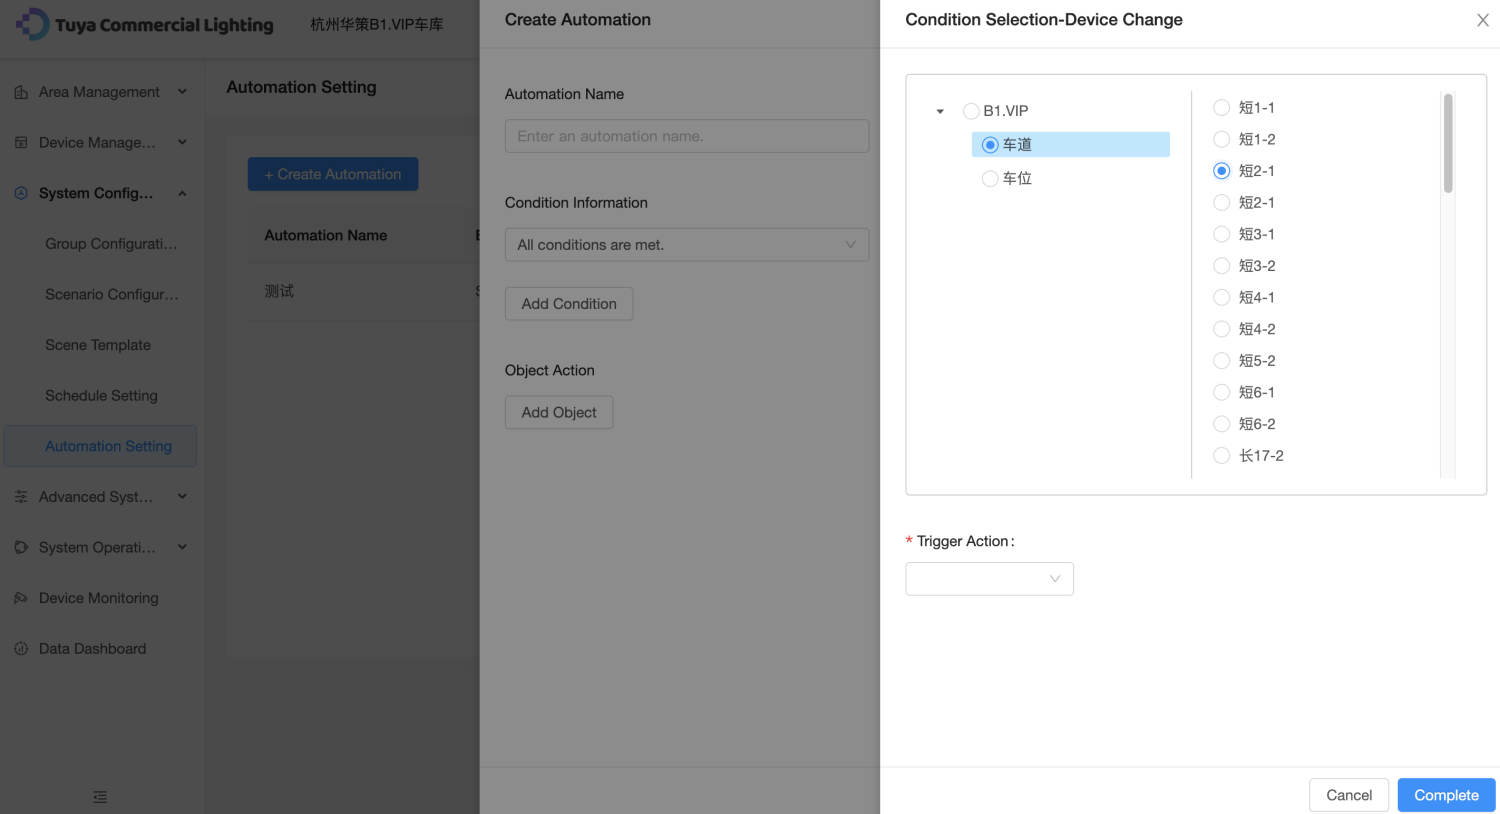
1. Set Automation Name.
2. Set Condition Information. You can select Device Change or Custom Event Trigger as a condition. If you select Device Change, select a floor and device in sequence and set the trigger action. You can select only one item each time, but you can add multiple conditions. If you select Custom Event Trigger, you can select one or more events created on the
Custom Event page each time.
3. Set the object action. You can select a scenario, group, or device as the object and configure corresponding actions.
4. Click Save.
Related Topics
Marketing Cooperation
Business Cooperation
Customer Service
Media Inquiry


