
How to create a commercial project quickly?
Last Updated on:2021-09-26 09:01:12
Step: (1) create new project (2)area management
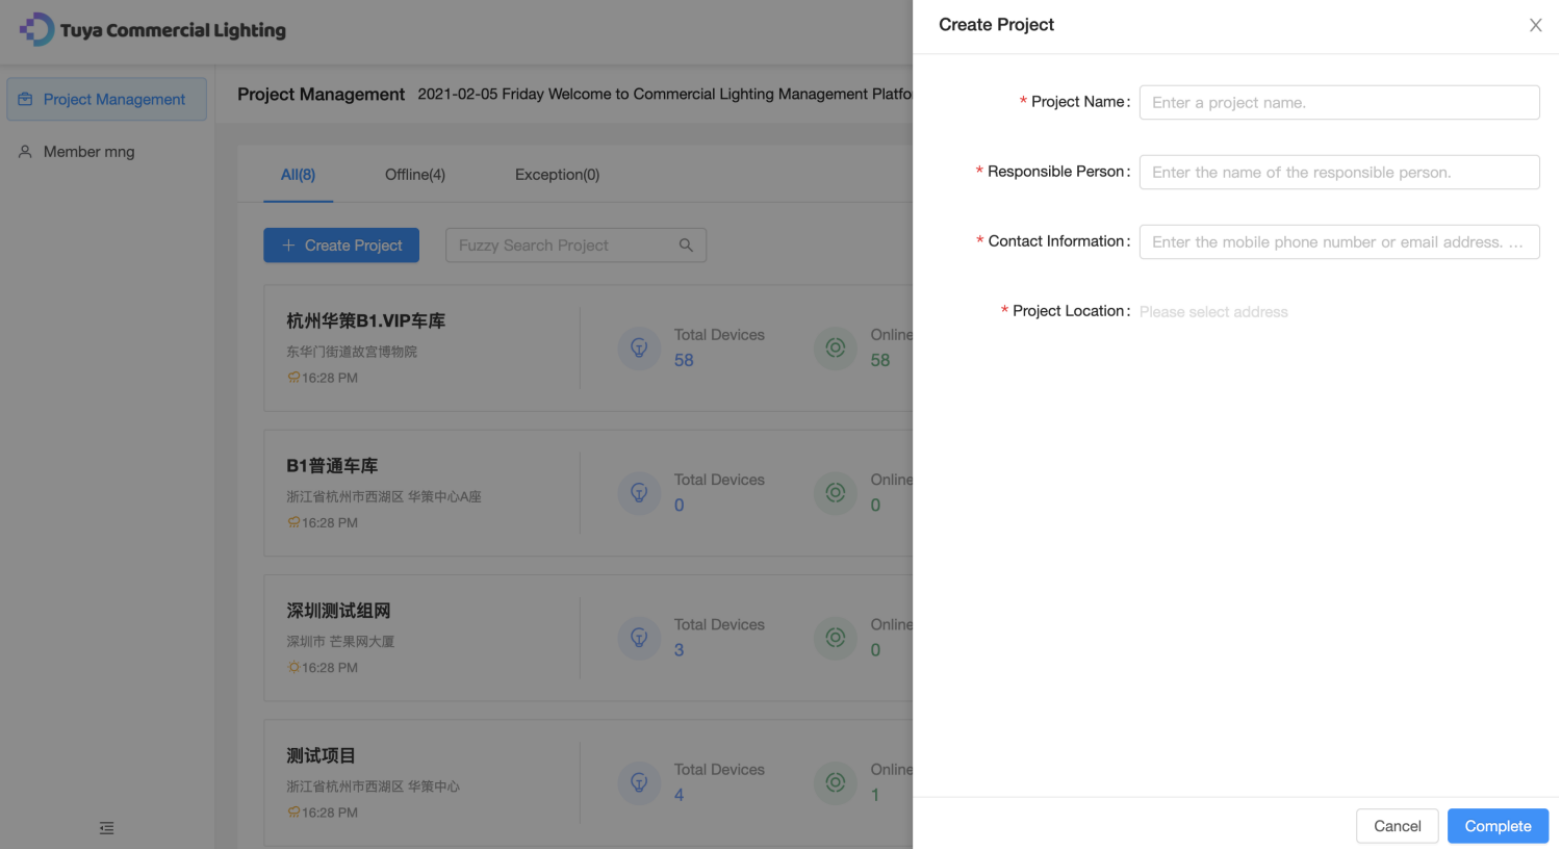
One:Create new project
click Create Project and set the following parameters:
1. Project Name
2. Contact Information
3. Responsible Person
4. 1. Project Location:You can set the project location based on your location.
After you specify the project information, click Complete. The created project is then displayed on the All tab.
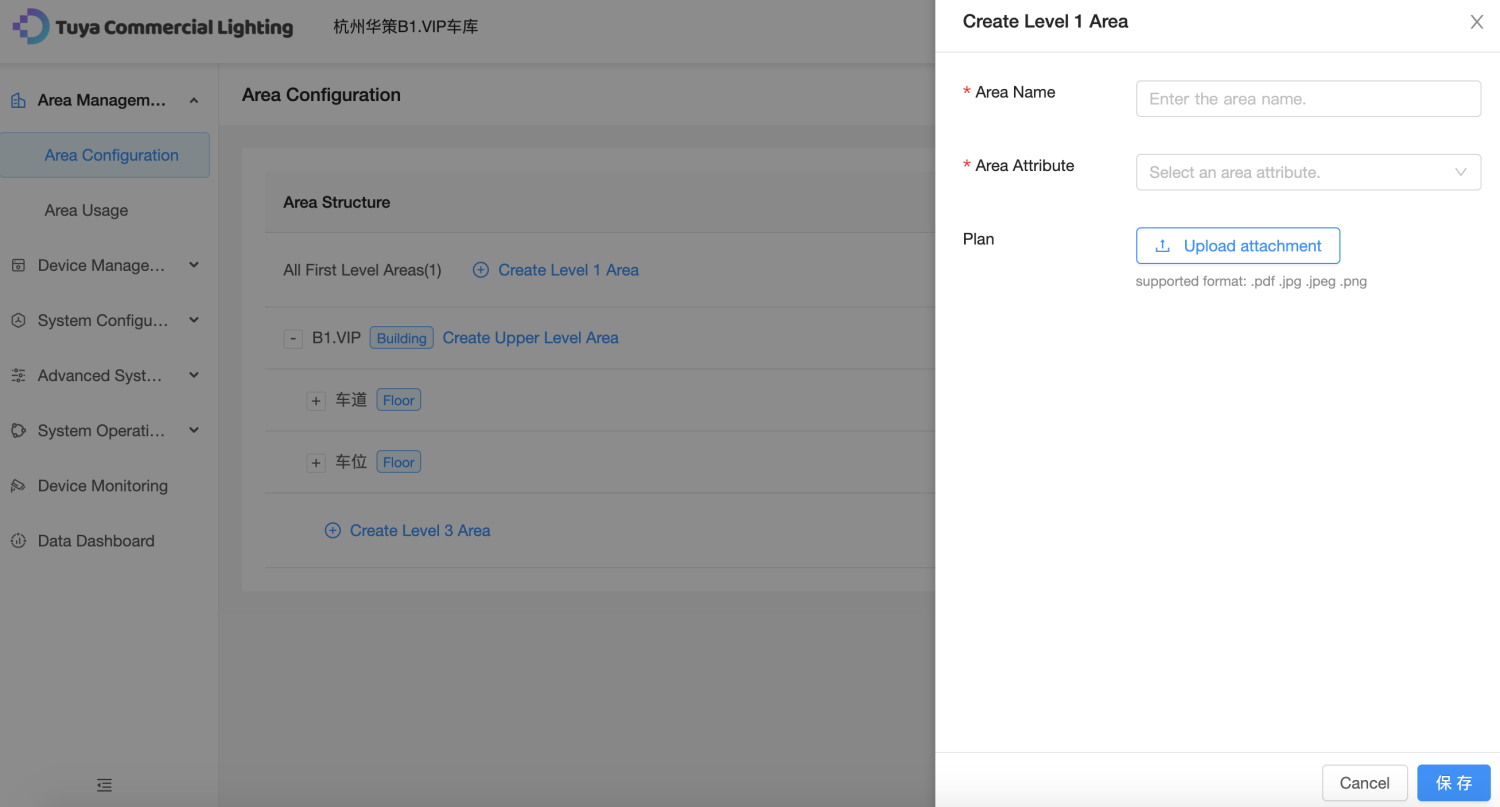
Two:Area Configuration
Go to Area Management > Area Configuration. In the Area Structure section, you can create areas at four levels based on the actual architectural situation.
Create Level 1 Area and set the following
parameters:
Area Name.
Area Attribute. Valid values: Park, Building, Floor, and Room.
(Optional) Plan.
Then click Save.
Note: Configurations related to the Area Usage function depend on the architectural drawing you upload. Therefore, obtain a complete architectural drawing and import it to the project before project implementation.
Marketing Cooperation
Business Cooperation
Customer Service
Media Inquiry


